Tag: Sedation

  • Triage, pt 1: primary survey

    Triage, pt 1: primary survey

    The art of triage takes time to master – particularly in emergency hospitals, where critical patients arrive in quick succession to the crash area.

    Patients need to be examined quickly and effectively to ensure the most critical issues are identified and stabilised. To do this, I break triage into two categories – primary survey and secondary survey.

    In part one I will discuss the primary survey process. The second part will go into the details of the secondary survey.

    ABCDE approach

    Primary survey refers to the initial stabilisation stage, where the aim is to preserve life, manage life-threatening injuries and re-establish tissue perfusion with oxygenated blood.

    The approach to all deteriorating or critical patients is the same: ABCDEAirway, Breathing, Circulation, Disability and External.

    ABC – Airway, Breathing, Circulation
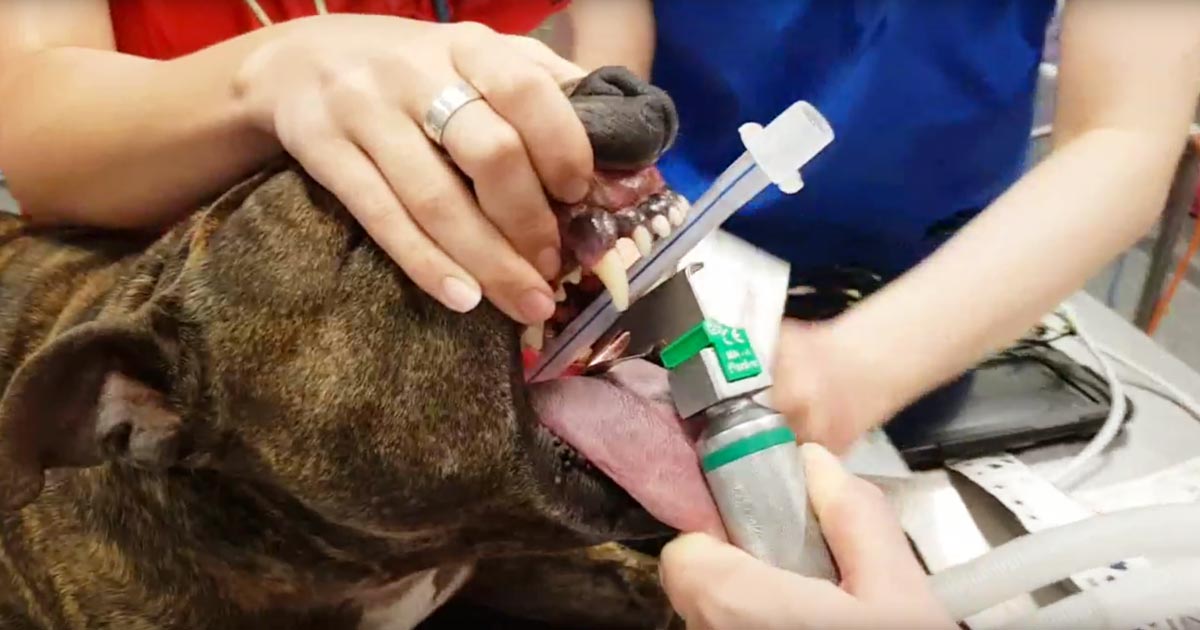
    Critically ill patients need to be examined quickly and effectively.
    Critically ill patients need to be examined quickly and effectively.

    Assess airway

    • Is it patent?
    • Does it require suctioning?
    • Does evidence exist of upper airway obstruction?
    • Intubate if you suspect the patient may need resuscitation.

    If you suspect cardiopulmonary arrest, begin basic life support immediately. This involves chest compressions, and intubation and ventilation in:

    • loss of consciousness
    • absence of spontaneous ventilation
    • absence of heart sounds on auscultation
    • absence of palpable pulses
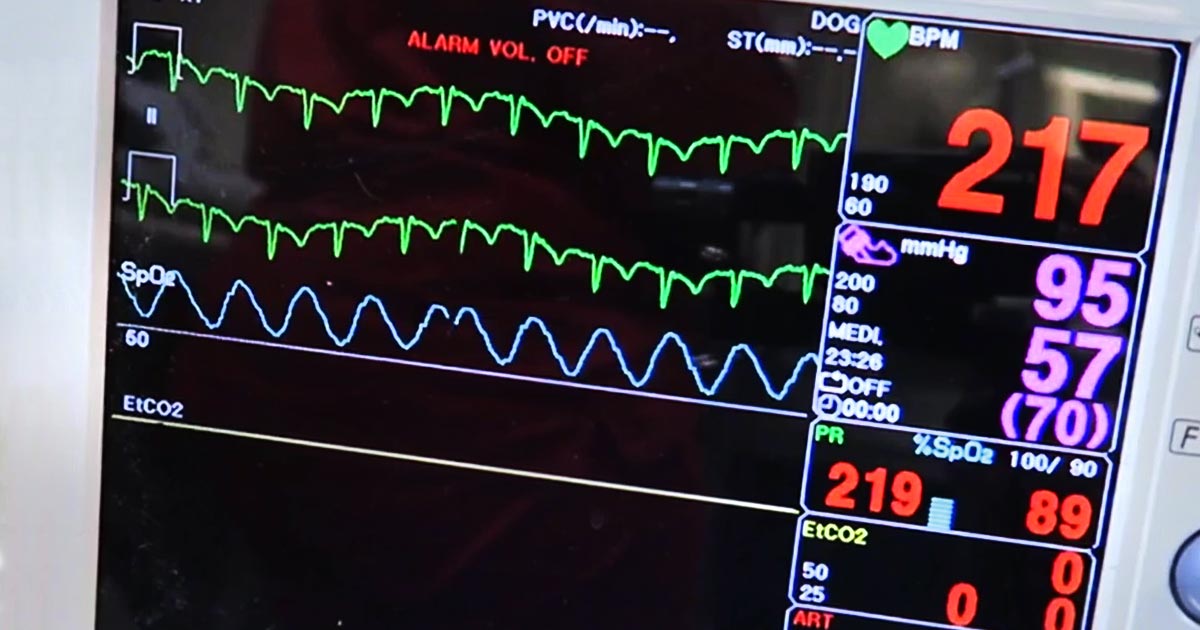
    Assess breathing

    • Is the patient hyperventilating or hypoventilating?
    • How is the respiratory effort? Is it sustainable?
    • What is its oxygen saturation, or does the patient looks like it needs oxygen? If yes, provide supplemental oxygen therapy.
    • Does the patient need to be ventilated? Ventilation is required if any of these criteria are satisfied:
      • hypoxaemia (partial pressure of oxygen lower than 60mmHg or blood oxygen saturation level lower than 90%) and unresponsive to oxygen supplementation
      • hypercapnia or hypoventilation (partial pressure of carbon dioxiden greater than 60mmHg)
      • unsustainable respiratory effort?
    • Consider sedation. Reducing stress can make a dramatic difference in stabilising dyspnoeic patients. Butorphanol or low-dose acepromazine (try to rule out cardiac disease first) can be used in these situations.

    Assess cardiovascular system

    • Mucous membrane colour, capillary refill time, heart rate and rhythm, pulse pressure, and temperature.
    • If a heart murmur or arrhythmia is present, I try to rule out cardiogenic shock before resuscitation therapy.

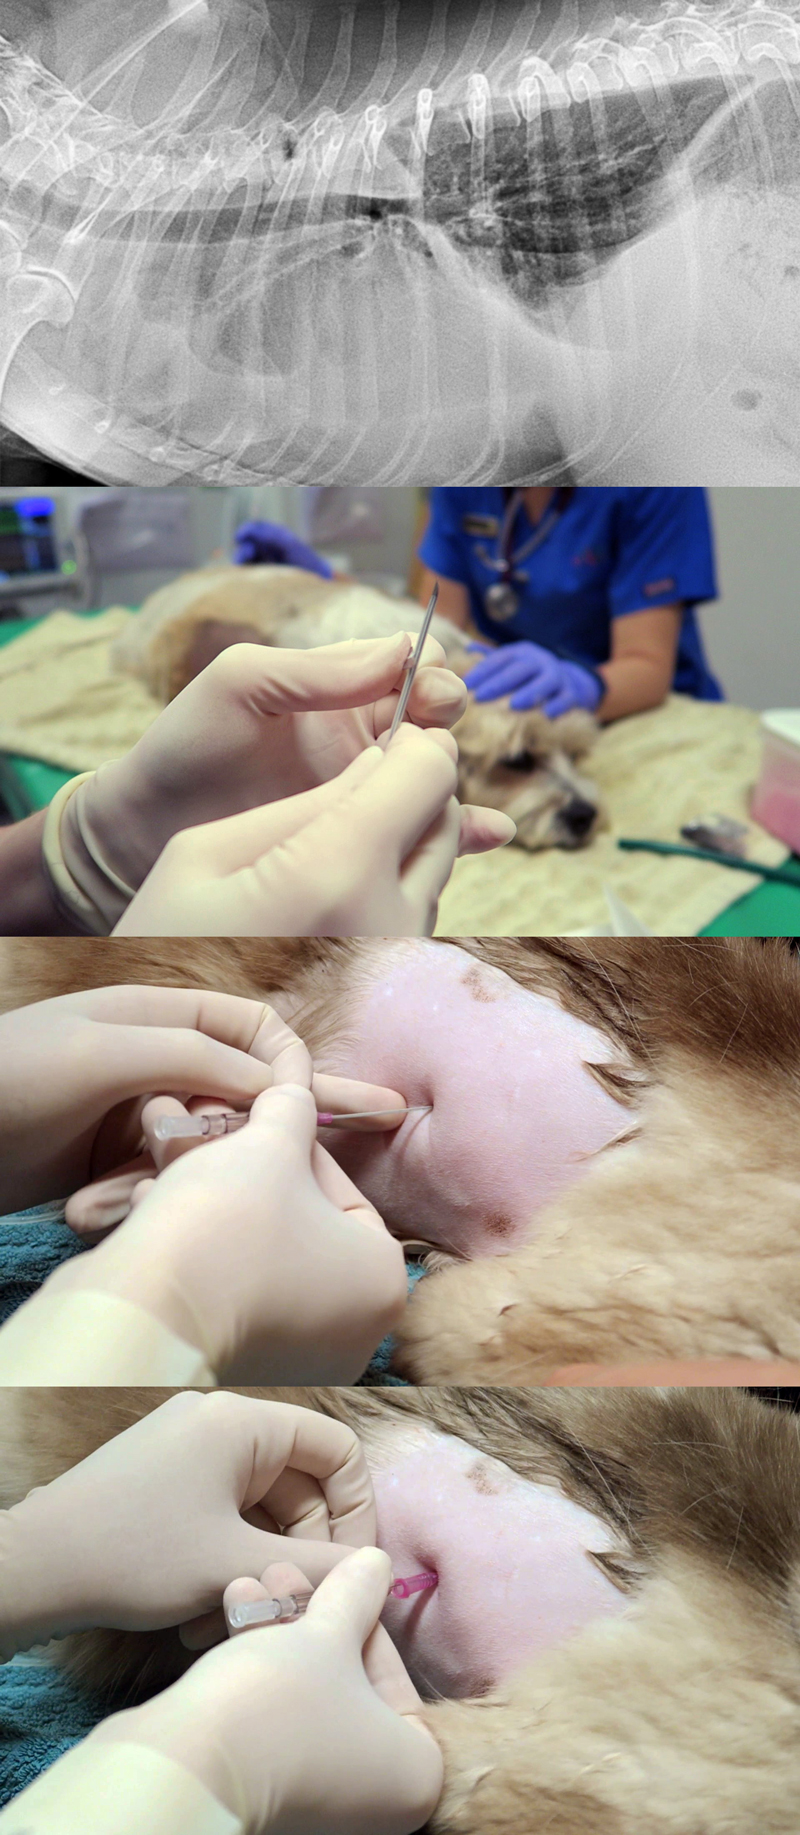
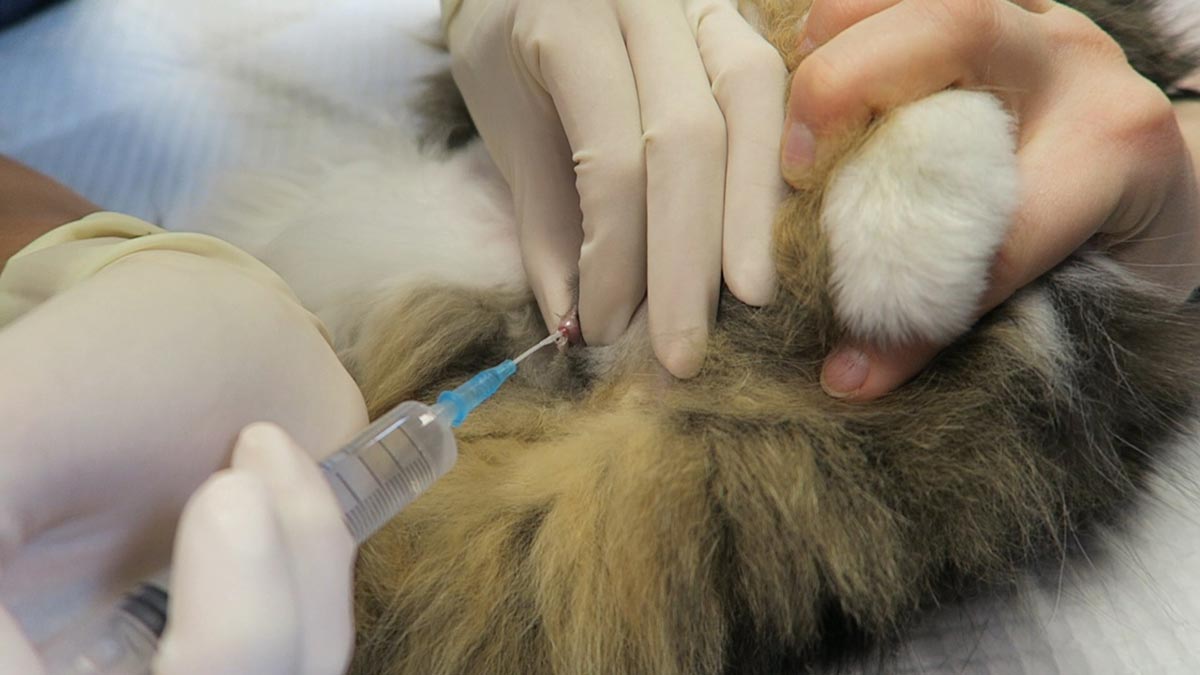
    At the same time, draw enough blood to run baseline blood work and begin IV fluid resuscitation if signs of shock are present. Fluid boluses should be considered if any of these exist:

    • pale mucous membranes
    • slow capillary refill time
    • tachycardia
    • poor pulse pressures
    • hypothermia

    I generally start with 10ml/kg Hartmann’s Solution over five minutes and reassess.

    D – Disability assessment

    Any abnormalities in:

    • Mentation? Seizures?
    • Level of consciousness?
    • Altered pain sensation?

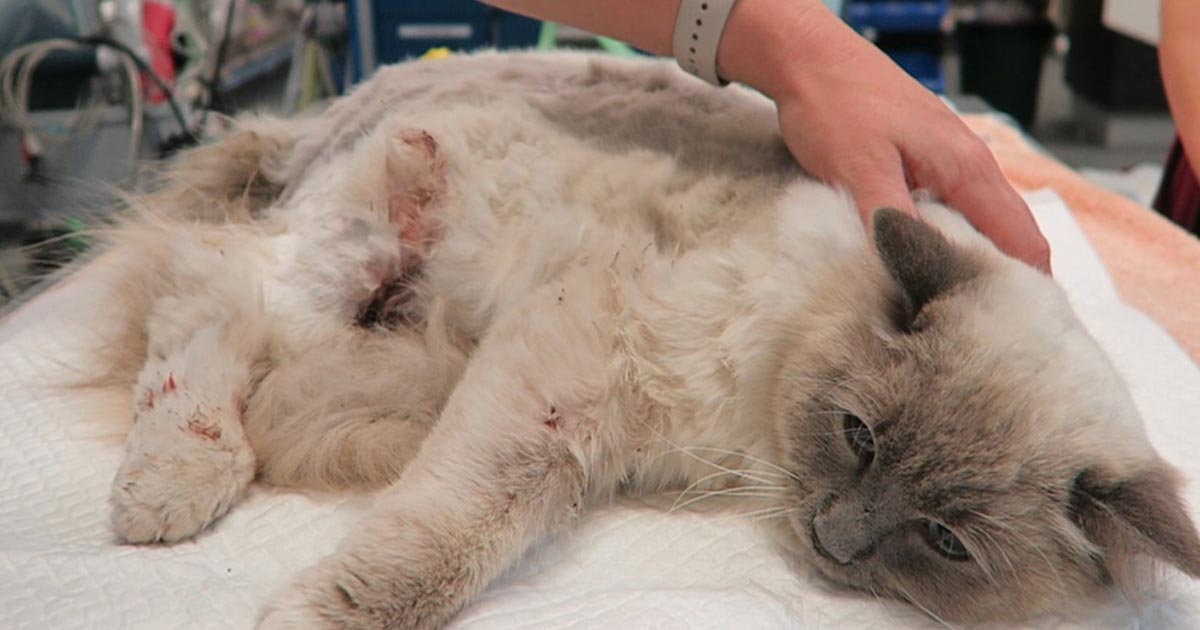
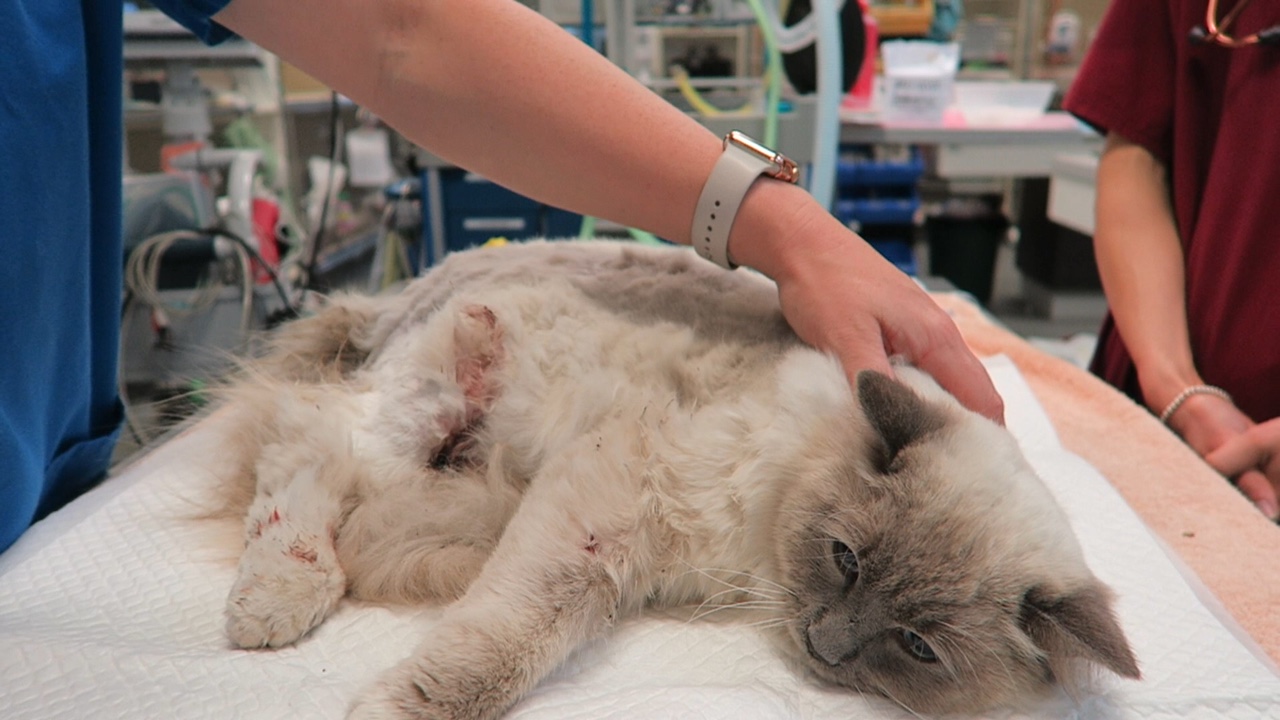
    E – External assessment

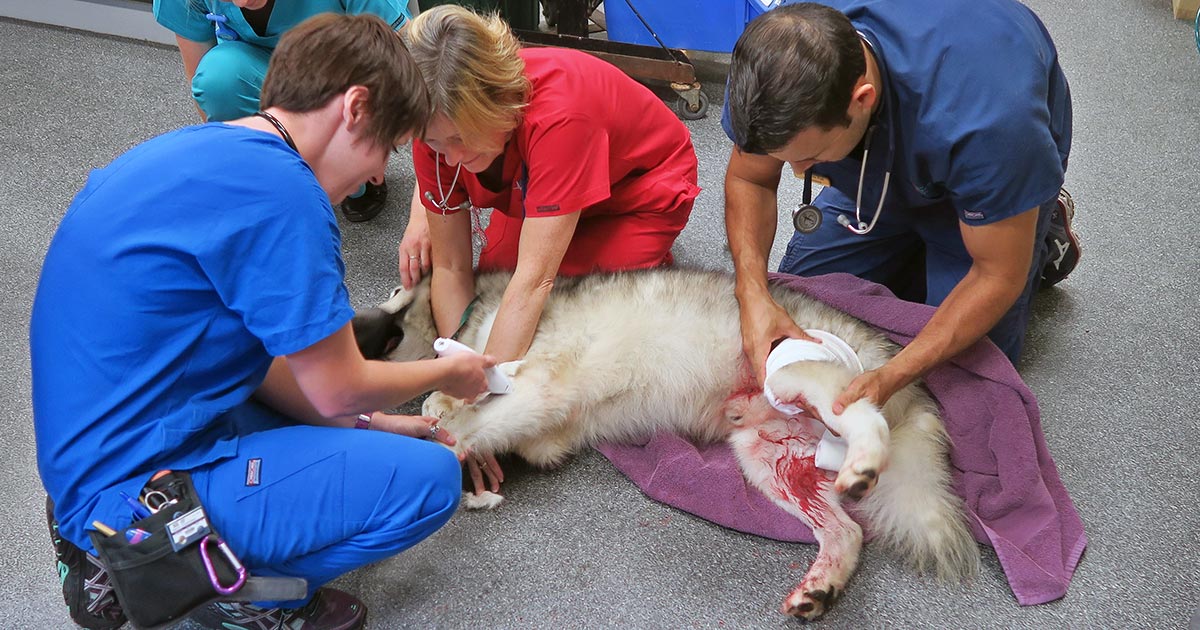
    • assessment for wounds or injuries
    • control any obvious bleeding, apply direct pressure – possibly tourniquets, but only for less than 30 minutes unless life-threatening bleeding
    • initial medications:
      • pain relief – generally opioids are safest with unstable patients
      • antiepileptics – diazepam
      • sedation for dyspnoeic patients – butorphanol or low-dose acepromazine IV

    Once you have finished your primary survey and performed the required intervention, you repeat your primary survey until the patient is appropriately stabilised.

  • Rat bait’s sneaky trick: bleeding into the dorsal tracheal membrane

    Rat bait’s sneaky trick: bleeding into the dorsal tracheal membrane

    Most of us are familiar with anticoagulant rodenticide toxicosis and the range of clinical signs it can present with, but there is one potentially fatal manifestation of coagulation pathology that is perhaps not as widely known…

    Dogs with severe clotting problems will occasionally bleed into the dorsal tracheal membrane. This causes collapse of the thoracic trachea and can lead to severe respiratory distress.

    Presenting signs

    These cases can present with none of the other signs of bleeding normally associated with coagulopathies, so rat bait poisoning may not come to mind as a differential diagnosis if you are not aware of this syndrome.

    The typical case will present as an otherwise healthy dog that develops acute respiratory problems. Early signs can be as mild as a persistent cough, but it can quickly escalate into a life-threatening respiratory crisis.

    Severe cases will have an obvious stridor on both inspiration and expiration, cyanotic mucous membranes, and patients may be very distressed.

    It will look very much like:

    • a dog that is choking from a tracheal foreign body
    • an old dog with tracheal collapse
    • the end stages of laryngeal paralysis – except the stridor will come from much lower in the respiratory tract than it does in laryngeal paralysis

    So, what do you do?

    On initial presentation you would approach it as any respiratory distress case: oxygen, oxygen, oxygen, calm and stress-free handling, and light sedation (butorphanol, for example).

    bleeding_dorsal-tracheal-membrane

    Once it is safe to do so, you should take chest rads to look for what you’ll probably suspect is a tracheal foreign body, and you’ll get an image like the one above (although it may not be this severe). Then you’ll remember this article, have an “aha!” moment and run a clotting profile (but if it’s as bad as this case, you’ll obviously first save the animal’s life by passing an ET tube).

    Once a clotting problem is confirmed you’ll need to stop the bleeding with standard therapy for anticoagulant rodenticide toxicity: plasma and vitamin K.

    Severe cases

    In a severe case you may need to keep the dog intubated for several hours, until the clotting times have normalised, before cautiously attempting to extubate.

    If the patient is unable to stay well oxygenated without an ET tube (mucous membrane colour, pulse oximetry, blood gas), consider placing a long oxygen catheter past the narrowing – either via a tracheostomy or a nasal O2 catheter.

    If these cases are quickly recognised for what they are, and an open airway can be maintained, the prognosis should be good. These are potentially very satisfying cases with great potential for you to be a total hero.

  • Thoracentesis, part 1: indications, equipment and protocol

    Thoracentesis, part 1: indications, equipment and protocol

    Thoracentesis is a relatively straightforward and life-saving technique for seriously dyspnoeic animals with pleural space disease, and is a valuable diagnostic tool.

    Here are my tips for getting the most out of your approach to performing a thoracentesis.

    Indications

    • Therapeutic – relieve respiratory distress caused by pleural effusions and pneumothorax.
    • Diagnostics – cytological examination of pleural effusions will refine your differentials list and dictate subsequent management.

    Equipment required

    In addition to general equipment for clipping and prepping of the surgical site, the following tools are required to perform thoracentesis:

    • oxygen and mask
    • 20ml to 60ml syringe
    • 16G to 21G butterfly needle
    • three-way tap
    • extension set
    • ethylenediaminetetraacetic acid tubes (for cell counts)
    • sterile collection tubes (for culture and cytology)
    • fluid collection bowl (non-sterile collection)
    • +/- lidocaine 1mg/kg to 2mg/kg for centesis site

    Protocol

    1. Patient comfort

    Thoracocentesiscombined
    An approach to performing a thoracentesis.

    a. Options include local anaesthetic infiltration of the intended centesis site, and/or IM or IV opioid pain relief at standard doses.

    b. Opioid pain relief, such as butorphanol, is great for sedation that facilitates the process.

    c. Depending on the case, I often use opioid pain relief without local. This is sufficient in the vast majority of cases.

    d. If severely dyspnoeic, anaesthesia and intubation can help facilitate the process. It will reduce patient stress, enable manual ventilation and administration of 100% oxygen, and allow for larger volumes of air/fluid to be removed.

    2. Patient positioning

    Generally, sternal is easiest – otherwise, lateral recumbency or standing (if the animal will tolerate it).

    3. Site

    a. Locate the seventh to ninth intercostal spaces.

    b. To remove air, clip the dorsal two-thirds of the chest.

    c. To remove fluid, clip the ventral two-thirds of the chest.

    d. Clip a larger area than you expect.

    e. Prepare the area for an aseptic procedure.

    4. Connect everything

    a. The syringe to the three-tap and extension set should be ready prior to connecting the butterfly catheter.

    b. Often, a rush occurs to connect everything after the catheter is in place.

    5. Needle insertion

    a. Insert the needle on the cranial edge of the rib to avoid the nerves and blood vessels that run along the back of the rib.

    b. Ultrasound guided is best for fluid; you can lube the inside of a sterile glove and put the probe inside the glove to keep the area sterile.

    c. An IV catheter can also be used. I partially fenestrate a 20g IV catheter with two extra holes – once the catheter is advanced into the chest minimal risk exists of trauma to the lungs, and larger volumes of fluid and air can be removed.

    6. After insertion

    a. Once through the skin, connect to the extension set and apply gentle negative pressure. This can help determine how far you need to advance the needle into the chest.

    b. Sometimes a small syringe, such as 10ml, is better for smaller volumes as it creates less negative pressure. Pulse the negative pressure.

    7. Collect samples

    Make sure you collect the required samples from the first collection, as this is often the best sample and means you don’t forget.

    Overall, if you feel it is necessary to perform an emergency thoracentesis then do not delay. Most animals will tolerate the procedure well and have immediate dramatic improvements in respiratory rate, effort and oxygen saturations – all great outcomes for any dyspnoeic patient.

    Next week, we will look at what to do with the collected sample.

  • Oxyhaemoglobin dissociation curve, pt 2: pulse oximetry’s limitations

    Oxyhaemoglobin dissociation curve, pt 2: pulse oximetry’s limitations

    Pulse oximetry is a useful, non-invasive method of measuring a patient’s oxygen saturation (SO2) and, under normal physiological circumstances, correlates well to the arterial oxygen saturation (SaO2).

    However, despite its ease of use and accessibility, it is not infallible. Circumstances exist that will undermine the accuracy of these readings – some with dire consequences if not recognised.

    Others causes are more technically associated, but also needs recognition.

    Unequal to task

    Pulse oximetry is incapable of assessing:

    • a patient’s haemoglobin levels
    • the haemoglobin’s functionality
    • the patient’s partial pressure of arterial carbon dioxide (PaCO2)

    The former is particularly apparent in anaemic patients, where peripheral capillary oxygen saturation (SpO2) readings could be greater than 95%, but animals still severely hypoxic. This is because the total numbers of haemoglobin is reduced; therefore, overall oxygen-carrying capacity is also decreased.

    Similarly, haemoglobin can be fully saturated with carboxyhaemoglobin or methaemoglobin strands, giving a misleadingly high SpO2 reading, yet patients are severely oxygen deprived.

    Finally, the ventilation status of the patient is not assessed by pulse oximetry. This is particularly important in animals with respiratory compromise, patients under heavy sedation and those under general anaesthetic or severe respiratory muscle paralysis from envenomation by a tick or snake. These patients can have near normal SpO2, but a dangerously high PaCO2.

    To overcome these problems, capnography or arterial blood gas analysis with cooximetry, and assessment of haemoglobin concentration is crucial.

    Accuracy issues

    The accuracy of pulse oximeter readings are also affected by several causes.

    Severe hypoxaemia (lower than 70% SpO2) is not accurately detected by pulse oximetry and requires partial pressure of arterial oxygen (PaO2) to confirm. Also, any cause of reduced peripheral perfusion can cause erroneously low readings, such as arrhythmias, hypotension, heart failure, hypothermia and severe vasoconstriction.

    Physical examination parameters that can indicate perfusion deficits are present include:

    • tachycardia
    • reduced pulse pressures
    • pale mucous membranes
    • prolonged capillary refill time
    • dull mentation/weakness
    • hypothermia

    It is not uncommon to stabilise a patient with hypovolaemic shock and find the SPO2 reading has normalised.

    Improving outcomes

    Although the accuracy of pulse oximetry readings are based on a large number of assumptions, it is still a valuable substitute for the measurement of PaO2 in clinically stable patients.

    Understanding the above concepts will allow you to derive a lot more information when used in the context of your patient’s oxyhaemoglobin dissociation curve and their clinical status.

    This will help improve patient outcomes, while early recognition of changes will allow prompt intervention and management of a patient’s disease.

  • Laryngeal paralysis

    Laryngeal paralysis

    This patient was brought to us for exercise intolerance, breathing difficulty and loud airway sounds.

    The patient has laryngeal paralysis. This is where the muscles controlling the arytenoids cartilages do not work and leads to failure of opening of the arytenoids during inspiration.

    Most commonly seen in middle-aged large breed dogs, it can occur acutely, but more often it is a chronic problem exacerbated by heat or stress. The cause is often unknown, but it can be caused by trauma or lesion to the cervical region or some kind of neuropathy, such as myasthenia gravis or tick paralysis. Diagnosis is based on visualisation of the arytenoid cartilages failing to abduct during inspiration under light anaesthesia.

    Treatment

    The management of the acute presentations include oxygen and sedation (butorphanol) to improve airway dynamics – with or without active cooling triggered by heat and with or without anti-inflammatories (dexamethasone) to reduce swelling secondary to airway turbulence.

    Patients in severe respiratory distress, anaesthesia and intubation may be required for a short period. Long-term management involves either surgery, such as laryngeal tieback, or conservative management strategies that involve weight loss, avoiding exercise and being kept in a cool environment.

  • Euthanasia (part 2): caring for the patient

    Euthanasia (part 2): caring for the patient

    Last month we discussed the importance of caring for clients during the process of euthanising their much-loved pet. This month, we focus on your patient.

    The goals of euthanasia are always to make it as painless, fearless and stress-free as possible for the patient.

    Pain relief

    Most patients presented for euthanasia are either suffering from chronic, terminal or traumatic disease.

    The first thing I like to do is ensure the patient’s pain is managed. This usually means providing opioid pain relief. Methadone is my opioid of choice. Butorphanol provides minimal pain relief, but is excellent for mild sedation.

    Next, if your patient is in shock, you need to try to alleviate some of it through IV fluid resuscitation. This is important as poor circulation will slow the process when you administer the euthanasia solution.

    Calm and stress-free

    One of the most important goals in the euthanasia process is to have the patient as calm and stress-free as possible.

    If the patient is stressed or anxious, some sedation may be required. Diazepam or acepromazine are good choices, depending on the condition of the patient, of course, and, together with the opioid you have administered already for pain relief, will help calm the patient. Try to avoid using medetomidine as a sedative in all but the most fractious of patients, as it causes peripheral vasoconstriction that will make IV catheter placement difficult.

    The aim of sedation is to relax your patient as much as possible without rendering them unresponsive to owners when it is time to say goodbye. This can be tricky as every patient responds differently to sedation, so you must make a point of warning owners the sedation may make their pets very sleepy.

    IV catheter

    Where possible, I avoid performing euthanasia without first placing an IV catheter. It makes the delivery of the euthanasia so much smoother. Including an extension to the administration line also allows you to stand a little away from the patient and their owners to give them a little privacy while you administer the euthanasia solution.

    Once your patient is sedated and an IV catheter placed, I set up comfortable bedding in the room where I will perform the euthanasia and bring the patient to the room. The amount of euthanasia solution I have with me always exceeds how much I think I will need; the last thing I want is to have to leave the owner and patient to get more euthanasia solution.

    Once I have administered the euthanasia solution, I check the heart and once that stops completely, I then tell the owners their pet’s heart has stopped, which they understand as their pet has passed.

    Performing euthanasias is the one of the hardest parts of our job, but also a privilege we hold as vets, so I hope my tips will help make the process easier for you, your client and, most importantly, your patient.

  • Temporary catheters in obstructed FLUTDs: buying time with a blocked cat

    Temporary catheters in obstructed FLUTDs: buying time with a blocked cat

    Obstructive feline lower urinary tract disease (FLUTD) is a common presentation in both general practice and emergency settings.

    Every clinician has his or her own approach to treating and managing a cat with obstructive FLUTD signs. Working in an emergency setting, once I have confirmed an obstructed bladder via palpation, I focus on trying to relieve the obstruction as quickly as possible.

    The first step is obtaining consent from the client to administer pain relief (an opioid IV or IM), place an IV catheter, collect blood for biochemistry, electrolyte and blood gas analysis, and temporarily relieve the obstruction.

    At our hospital, we achieve temporary relief of the obstruction generally within 15 minutes of patient arrival.

    Process

    blocked cat
    Obstructive feline lower urinary tract disease is a common presentation in general practice.

    We do this in three steps:

    1. Assess the tip of the penis, occasionally a crystal/mucus plug is all that is blocking the penis.
    2. If this is not the case, I pass a pre-lubricated 22g IV catheter tip (without the stylet) into the penis with a 10ml syringe, containing 0.9% NaCl, connected for hydropropulsion. In the vast majority of cases, this helps to dislodge the urethral blockage enough to enable some urine to pass (urination suggests active urination by the cat).
    3. Once urine is flowing, I pass a 12cm or 14cm rigid catheter, tape it to the tail and leave it in place to allow constant drainage.

    If the 22g IV catheter does not relieve the obstruction, I would use a rigid catheter and progressively advance it up the urethra while hydropropulsing with the saline the entire time. Once unblocked, then I will tape it to the tail as aforementioned.

    Quick Tip: Once you have the catheter in the tip of the penis, pull the prepuce straight out to straighten the penis and thus the penile urethra. Otherwise, the bend in the penile urethra may hinder the passage of the catheter.

    Benefits

    The benefits I see of placing a temporary urinary catheter include:

    • immediate relief to the patient and reduces their stress levels
    • provides a sample for urinalysis
    • allows you time to run through the diagnostic and treatment plan in more detail with clients
    • buys you time to stabilise the patient for their anaesthetic later to place a closed system indwelling urinary catheter and then bladder lavage

    Quite often, your patient would present unwell enough that you should have no issues (resistance to) passing this temporary urinary catheter, provided you have given pain relief on presentation.

    In fractious patients, I usually forgo the temporary catheter and focus on stabilising the patient. The aim is to have them stable as soon as possible for sedation or a general anaesthesia to place a longer indwelling urinary catheter.

  • Cat bite abscesses

    Cat bite abscesses

    Cat bite abscesses are one of the most common presentations in general practice.

    Even in an emergency setting, I see a number of these patients. Usually they are obvious, but, occasionally, they’re not so obvious and the patient comes in lethargic, inappetant and often “painful”.

    Overly dramatic?

    One thing I’ve learned in my time is a cat bite abscess should be considered for all cats that have pyrexia. For a pyrexic outdoor cat without an obvious cause, I include a whole body clip as part of my diagnostic process. This is because a cat bite can start as a cellulitis and bite wounds are very small.

    Whole body clipping may sound dramatic, but it has saved me many times and helped rule out cat bites as a major differential for cats with pyrexia.

    Standard approach

    Everybody treats cat bite abscesses in their own way, but here’s my approach:

    • Any warm, painful area or swelling should be clipped to look for bite wounds.
    • I always look for all four tooth marks – you can miss wounds and other developing abscesses by focusing only on the obvious bite wounds.
    • You must establish drainage, surgically explore and lavage. This means patients are always placed under heavy sedation or a full anaesthetic. Why do I always recommend this? I have found cat nails, hair and teeth in abscesses before; without removing those foreign bodies, the abscess won’t heal and antibiotics won’t be effective.
    • I almost always administer antibiotics, even if I have removed an abscess en bloc and no contamination exists.
    • Pain relief is always indicated, depending on the age and stability of the patient. An NSAID is my preference, but only after I have corrected my patient’s fluid deficits, otherwise I select a different type of analgesic.
    • Drains? Sometimes I place drains in very large abscesses, but mostly I prefer to close primarily after appropriate debridement.
  • Occupational hazards

    Occupational hazards

    Before I started vet school, I attended a workshop for aspiring vets where students shared anecdotes about the various occupational ailments they had experienced or witnessed over the years.

    Despite having to defer the start my veterinary degree due to a horse-related incident, I got through university largely unscathed by veterinary-related disease. I contracted a skin infection while on placement in Bolivia, but I don’t think that was anything zoonotic.

    However, some colleagues were not so lucky…

    Illnesses and injuries

    The various vet-student ailments that have affected friends include:

    • rotavirus caught while on a dairy EMS placement
    • an odd reaction to the BCG vaccine we received en masse in the first few weeks of vet school – after investigating a persistent cough, it transpired it was actually latent tuberculosis that would flare up periodically
    • a mumps epidemic – while not zoonotic, the disease spread like wildfire through those who attended “Vetski” one year (a number of other skiing-related injuries were suffered on the same trip, including two damaged knees)
    • the notorious cryptosporidiosis, which claimed at least one victim on every farm rotation group
    • ringworm – despite having been in close proximity to cattle heavily infected with ringworm, I have avoided it thus far (the same cannot be said for one friend, who had to claim she had thrush to convince the pharmacist to sell her the necessary antifungal cream)

    Appreciating dangers

    TB testing
    TB testing – one of the most dangerous veterinary tasks.

    Since qualifying, a good proportion of my work in practice has consisted of one of the most dangerous veterinary tasks – TB testing.

    While I remained relatively unharmed for the first few months, I did appreciate how easy it could be to get injured, with some dodgy crushes to contend with and, often, largely unhandled beasts.

    Having tested hundreds of cattle unscathed, my final test was quite eventful…

    During a previous test at this particular farm, the vet had considered sedating one of the cows because it was so wild – but this time I was prepared, with sedation at the ready in case it was needed and the crush chained so the cow couldn’t go flying out the front door.

    Crushed crush

    Although a great deal of jumping about took place, I managed to test the cow without needing to resort to xylazine. However, the bull, which could barely squeeze into the crush, decided to stick his head under the front door and bend it nearly in half as the farmer, his son and I watched in horror.

    Luckily, the bull seemed to think better of this plan and retreated before destroying the crush.

    After the farmer had bashed the door back into some resemblance of its original shape, one calf somehow jumped out of the side of the crush and ended in a neighbour’s field.

    First-hand experience

    Just as we thought we’d had enough entertainment for one day, one of the six-month-old sucklers managed to squash my hand between it and the crush.

    The world went green for a moment and I had to park myself on an upturned bucket.

    Having taken a bit of a breather, we got the next calf in and I tried to continue, but the world kept spinning and I didn’t want to take my glove off to look at the damage. Feeling highly embarrassed, I sat back down and telephoned the practice for backup while the farmer went off to fetch a cup of sugary tea.

    Not the only ones

    An x-ray thankfully found no breaks, but a lot of swelling and bruising.

    I joked with my doctor about occupational injuries, saying I didn’t suppose GPs would be likely to get into that kind of situation. However, he said he’d had a couple of knives pulled on him – one from someone demanding a prescription!

    So, maybe we’re not the only medical profession at such a high risk of injury, we’re just exposed to slightly different dangers.

  • Aggressive patients

    Aggressive patients

    I’ve discussed before the massive emotional shift that seems to occur in the transition from a student to a new graduate – namely due to the responsibility – but the transition to being an actual vet also means being on the front line when it comes to aggressive patients.

    As a student, you are often given the “nice” patients to practise blood sampling or catheterising – or even just examining. If a pooch utters a slight growl, the muzzle will be on, with a confident RVN holding for you at worst, but, in most cases, the vet would just take over to keep you out of harm’s way.

    As such, when I started out as a “real vet”, this meant I had very little experience in dealing with the more difficult patients.

    Exposure

    At vet school, we were shown how to make a bandage muzzle if all else failed and practised stuffing a cuddly toy cat into a cat bag, but, again, we were rarely involved with any real-life angry cats or dogs.

    Obviously, this was in the interests of our safety, and I’m not suggesting they put us in dangerous situations deliberately, but in the real vet world, we are now the ones who ultimately need to gain that blood sample, despite flailing paws and teeth.

    Safe handling of aggressive, or often just scared or nervous, patients who lash out from fear is something that can only be gained from experience – which, as a new grad, is fairly limited at this point. Drawing on ideas from your colleagues and nurses is probably the best way to learn – especially for behaviour-related things that aren’t necessarily taught very well at university.

    Near misses

    IMAGE: jonnysek / fotolia.
    Dealing with difficult patients on the front line is “quite a scary place to be”. IMAGE: jonnysek / fotolia.

    Nearly being bitten by a little dog with severe dental disease (who could blame it for not wanting me to touch its mouth), that then seemed immune to sedation and therefore needed a general anaesthetic to even examine its mouth, was my first taste of having to make a call based on my own safety, but also the need to make an accurate assessment.

    I’ve also had a few near misses with horses – in particular, one that really did not fancy a nerve block and decided to fling its front legs at mine and the other vet’s head height instead.

    Support each other

    Being a vet can be a dangerous job, since we work with unpredictable living creatures better equipped with natural defences than us, and often a lot bigger and heavier. We just need to help each other work as safely as possible around them. But, if you’re on your own with bared teeth, it’s still quite a scary place to be.

    Just another thing to add to the list of “things they don’t teach you at vet school”.