Tag: Pain Management

  • Pancreatitis, pt 1: diagnosis

    Pancreatitis, pt 1: diagnosis

    Pancreatitis is one of the most common exocrine conditions seen in small animal practice. It is caused by premature activation of enzymes (zymogens) within the pancreas leading to autodigestion, and can result in severe morbidity with the potential to lead to mortality.

    To this day, the diagnosis of pancreatitis remains a challenge – especially in feline patients – and relies on the use of a combination of history, signalment, clinical signs and diagnostic findings.

    Presenting signs

    In dogs, overweight middle aged to older (more than five years old) are at higher risk. Miniature schnauzers, Yorkshire terriers and silky terriers are some breeds identified as higher risk. Approximately 90% present with anorexia and vomiting, 50% with abdominal pain and 30% with diarrhoea.

    In cats, no common age range exists, although domestic shorthair and longhair cats are the most commonly affected. They present more commonly with anorexia and lethargy; 30% presenting with vomiting and 25% with abdominal pain.

    Diagnostic changes

    Pancreatitis-Image---Pancreatitis
    Cases can be confirmed with ultrasound.

    A summary of the commonly seen diagnostic changes are included below, many of which due to the nature of the disease are non-specific:

    • Hyperlipaemia and an inflammatory leukogram can be present, but are both non-specific.
    • Hyperlipasaemia and hyperamylasaemia are commonly seen, but the sensitivity and specificity of both are only about 50%.
    • Elevation in alkaline phosphatase and bilirubin can indicate pancreatic bile obstruction. Other changes may be present and can indicate wider organ system involvement – azotemia, for example.
    • Canine pancreatic specific lipase immunoreactivity (cPLI) has a high sensitivity, but poor specificity – approximately 50%. This means, if real pancreatitis is present, it will show positive; but a positive result will only actually be real pancreatitis 50% of the time. A negative result, however, can be interpreted as “highly unlikely for pancreatitis to be present”. A positive cPLI should be confirmed with ultrasound, which is the gold standard for canine pancreatitis.
    • Feline pancreatic lipase immunoreactivity (fPLI) has been reported to have a sensitivity of 67% and specificity at 91%. This means, 90% of the time, a positive indicates real pancreatitis – but these figures vary between studies. To make things even more difficult, cats with pancreatitis can have normal fPLI/spec fPL and normal ultrasonographic findings.
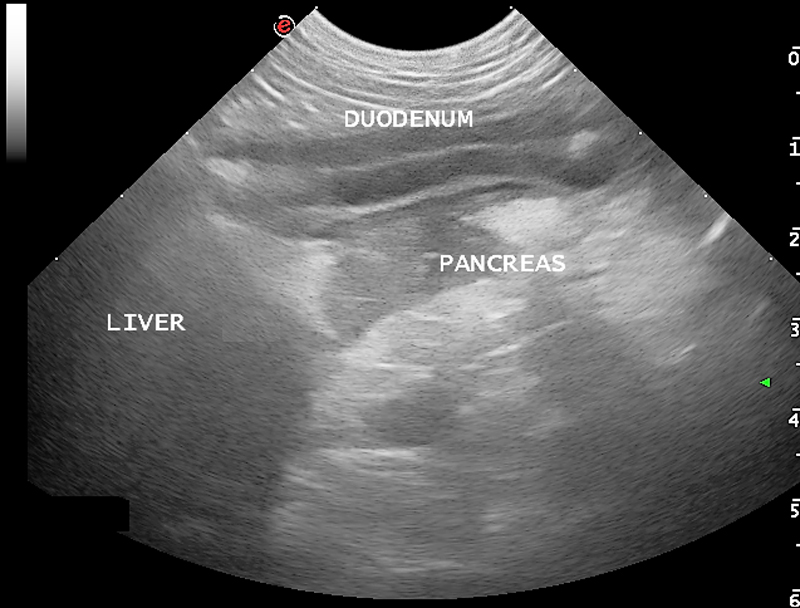
    • Common changes on ultrasound with acute pancreatitis include free abdominal fluid (generally a non-septic exudate) and hypoechoic pancreas surrounded by hyperechoic peripancreatic fat. As mentioned above, feline pancreatitis often has no visible changes.
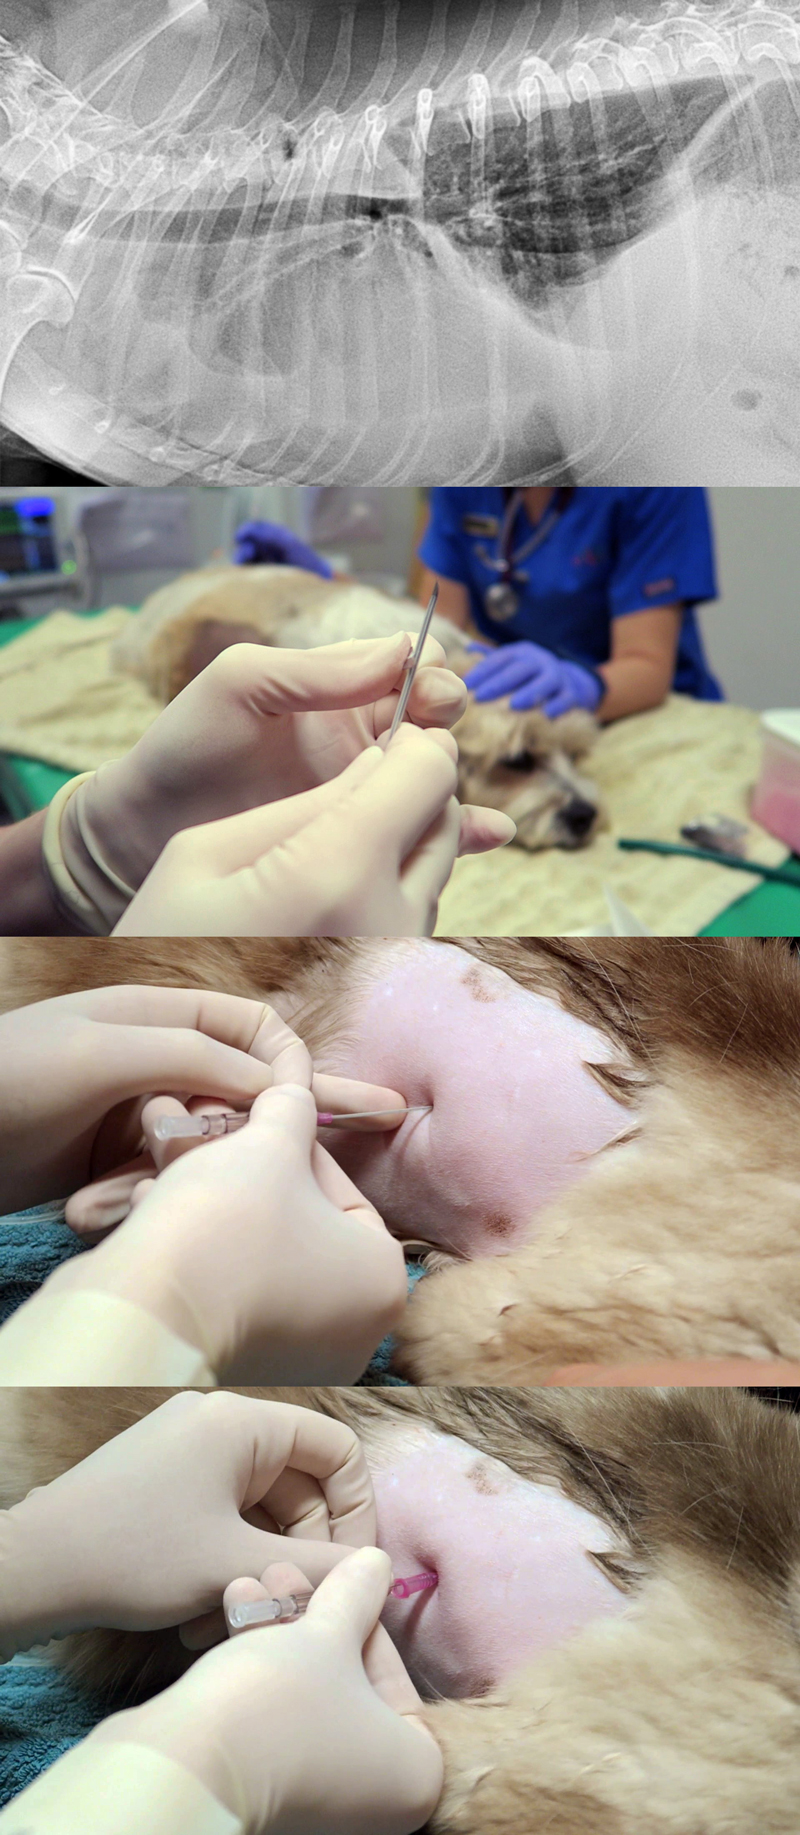
    • Radiography may show reduced serosal detail around the pancreatic regions – again, this is not specific or sensitive, but is helpful at ruling out other differentials, such as foreign bodies.

    Summary

    In summary, canine pancreatitis is less of a diagnostic challenge compared to its feline counterpart. There is no single test that can accurately confirm the presence of feline pancreatitis, apart from in biopsies via exploratory laparotomy – which are understandably invasive and costly.

    Next week, we will cover the fundaments of managing pancreatitis patients.

  • The dreaded client complaint

    The dreaded client complaint

    Regardless of how well you conduct yourself and how thorough you are in your work, it’s inevitable you’ll occasionally find yourself on the receiving end of a client complaint. This will always suck.

    When someone criticises you, it’s very natural to feel a strong negative emotional response. The emotional control centres of your brain interpret criticism as a direct threat to your safety, and will trigger the same response it would if you were under physical attack.

    But reactive and defensive behaviour will not help your cause – better to let your logical brain take over from your limbic system and institute a proactive plan in dealing with complaints.

    Five simple steps

    Here’s a proven five-step approach to dealing with client complaints:

    1. Listen

    Listen carefully to what the client has to say (preferably in person). Approach them with empathy and try to see it from their perspective.

    Avoid formulating a response in your head while they are still speaking, or focusing on the reasons why they are wrong and you are right. Try (and I mean really try) to understand why they are upset, then verbalise this to them: “I can see where you’re coming from – I understand why this looks bad and why you are upset.”

    2. Critically evaluate the merits of the complaint

    Sometimes people have an unreasonable point of view, but very often they don’t. They might have blown it completely out of proportion, or have a distorted understanding of a situation, but it’s rare someone complains where they don’t have some legitimate basis for the complaint – at least in their eyes.

    Remember: what seems trivial to you might be a big issue for your client.

    Stay open to the possibility you may have done something wrong or could, at least, have done something better. The reasons and excuses, however valid, shouldn’t matter, only how it was perceived by your client and how you can fix it.

    3. Fix it, if you can

    Do the extra test, get it in for a recheck, do something that is over and above the expected level of care; this is an opportunity to make the unhappy client into a lifelong fan.

    4. Make an apology

    If you can’t fix it, apologise. Sincerely.

    Explain what went wrong and what you have done to prevent similar problems from occurring again.

    5. Try to make up for it

    If it is within your decision-making power; don’t be scared to offer some sort of financial compensation.

    It doesn’t need to be an admission of guilt: “We’ve looked carefully into the decisions made with this case, and I can’t see that any mistakes were made. However, we strive to keep our clients happy, and you clearly feel you didn’t receive value with us, so I’d like to offer you x, y or z.”

    This doesn’t always need to be money back (but it can be); offer a discount on a subsequent visit, follow up x-rays free of charge, or offer to donate money to their favourite charity in their name. If a relatively small amount of money early on during negotiations can make the problem go away, it might save you a lot more time and money down the line.

    Turning bad into good

    This approach of firstly allowing for some critical self-evaluation, and then simply focusing on being fair and reasonable can save a lot of pain an effort, and can potentially turn these unpleasant situations into valuable opportunities for learning and growth.

  • Thoracentesis, part 1: indications, equipment and protocol

    Thoracentesis, part 1: indications, equipment and protocol

    Thoracentesis is a relatively straightforward and life-saving technique for seriously dyspnoeic animals with pleural space disease, and is a valuable diagnostic tool.

    Here are my tips for getting the most out of your approach to performing a thoracentesis.

    Indications

    • Therapeutic – relieve respiratory distress caused by pleural effusions and pneumothorax.
    • Diagnostics – cytological examination of pleural effusions will refine your differentials list and dictate subsequent management.

    Equipment required

    In addition to general equipment for clipping and prepping of the surgical site, the following tools are required to perform thoracentesis:

    • oxygen and mask
    • 20ml to 60ml syringe
    • 16G to 21G butterfly needle
    • three-way tap
    • extension set
    • ethylenediaminetetraacetic acid tubes (for cell counts)
    • sterile collection tubes (for culture and cytology)
    • fluid collection bowl (non-sterile collection)
    • +/- lidocaine 1mg/kg to 2mg/kg for centesis site

    Protocol

    1. Patient comfort

    Thoracocentesiscombined
    An approach to performing a thoracentesis.

    a. Options include local anaesthetic infiltration of the intended centesis site, and/or IM or IV opioid pain relief at standard doses.

    b. Opioid pain relief, such as butorphanol, is great for sedation that facilitates the process.

    c. Depending on the case, I often use opioid pain relief without local. This is sufficient in the vast majority of cases.

    d. If severely dyspnoeic, anaesthesia and intubation can help facilitate the process. It will reduce patient stress, enable manual ventilation and administration of 100% oxygen, and allow for larger volumes of air/fluid to be removed.

    2. Patient positioning

    Generally, sternal is easiest – otherwise, lateral recumbency or standing (if the animal will tolerate it).

    3. Site

    a. Locate the seventh to ninth intercostal spaces.

    b. To remove air, clip the dorsal two-thirds of the chest.

    c. To remove fluid, clip the ventral two-thirds of the chest.

    d. Clip a larger area than you expect.

    e. Prepare the area for an aseptic procedure.

    4. Connect everything

    a. The syringe to the three-tap and extension set should be ready prior to connecting the butterfly catheter.

    b. Often, a rush occurs to connect everything after the catheter is in place.

    5. Needle insertion

    a. Insert the needle on the cranial edge of the rib to avoid the nerves and blood vessels that run along the back of the rib.

    b. Ultrasound guided is best for fluid; you can lube the inside of a sterile glove and put the probe inside the glove to keep the area sterile.

    c. An IV catheter can also be used. I partially fenestrate a 20g IV catheter with two extra holes – once the catheter is advanced into the chest minimal risk exists of trauma to the lungs, and larger volumes of fluid and air can be removed.

    6. After insertion

    a. Once through the skin, connect to the extension set and apply gentle negative pressure. This can help determine how far you need to advance the needle into the chest.

    b. Sometimes a small syringe, such as 10ml, is better for smaller volumes as it creates less negative pressure. Pulse the negative pressure.

    7. Collect samples

    Make sure you collect the required samples from the first collection, as this is often the best sample and means you don’t forget.

    Overall, if you feel it is necessary to perform an emergency thoracentesis then do not delay. Most animals will tolerate the procedure well and have immediate dramatic improvements in respiratory rate, effort and oxygen saturations – all great outcomes for any dyspnoeic patient.

    Next week, we will look at what to do with the collected sample.

  • Feline aortic thromboembolism

    Feline aortic thromboembolism

    If a cat comes in unable to walk, consider the three Ps:

    • pain
    • paralysis
    • pulselessness
    gerardo_paws
    Figure 1. Colour change in the paws of a cat.

    Feline aortic thromboembolism (FATE) should be on top of your differentials.

    Figure 1 demonstrates the colour change in the paws of an affected cat outlining blood flow: the pink pad is the unaffected cat’s front paw, while the pale pad is on the affected hind limb that will be cold to the touch.

    Cardiological problems

    Often FATE is a secondary condition in cats with heart disease.

    The heart forms clots in the distal aorta that occlude flow to the femoral arteries. With the femoral arteries being the main arteries providing blood flow to the hind limbs, symptoms become apparent.

    Symptoms can include:

    • sudden hind limb paralysis
    • cold hind limbs
    • vocalising
    • pain
  • Nutritional healing power

    Nutritional healing power

    Nutrition is a key factor in a patients recovery; in fact, numerous studies show getting patients to eat as soon as possible or providing nutritional support early has several benefits:

    • Patients start to eat on their own earlier.
    • They are less nauseous once they start.
    • Reduced mortality.
    • Improved wound healing.

    All of these contribute to overall improved outcomes for the patient.

    Encouraging patients

    At Animal Emergency Service we treat the sickest of the sick so we work hard towards encouraging patients – just like the kitten pictured above – to eat as soon as possible. So, after they have recovered from their anaesthesia we make sure there are no contraindications, we address their nausea and pain, then offer food.

    It is best for the patient and feeding to use as much of the gastrointestinal tract as possible, meaning it’s better if they eat on their own, otherwise the next best thing is an oesophageal tube, followed by a tube into the stomach, such as a nasogastric tube.

    Focused approach

    So, in combination with the management of pain, nausea and the underlying illness, we first encourage them to eat on their own. We begin with offering an assortment of different foods, warmed up to increase aromas, or ask owners to try to feed their pet.

    If they are critically ill we will take a more focused approach with feeding tubes, as they are unlikely to eat on their own by themselves for several days.

    We feel a proactive approach to early nutrition helps get our patients home to their families earlier.

  • Is puppy yoga flexibly ethical?

    Is puppy yoga flexibly ethical?

    Is puppy yoga the new cat café?

    Is it a new passing trend or here to stay?

    Either way, as a student with a passion for both fitness and animals, I was initially intrigued. But I can’t help but have concerns for whether this practice is beneficial for all members of the class.

    Five freedoms

    Usually applied to the context of captive animals, the five freedoms can really be utilised to evaluate the welfare of any animal outside of its natural habitat (which, technically, every dog is).

    These being freedom from pain and disease, stress, discomfort and hunger, as well as freedom to express normal behaviour.

    My main concerns when it comes to puppy yoga would be stress, hunger and disease.

    If classes run back to back, younger animals that require more frequent feeds may miss out on vital mealtimes, and there’s always the worry some puppies included in these classes are too young to be removed from their mothers. Ideally, no puppy should be removed from the dam or weaned before eight weeks of age. In larger breeds, puppies can appear older than they really are, and some breeders or yoga studios may be motivated by profits to use pups that are slightly shy of this age limit.

    The danger here is that puppies don’t typically receive vaccinations until they’re eight weeks old, and if puppies from different litters are introduced when their mother-derived immunity is lowering, diseases can be transmitted very quickly. Most vets wouldn’t advise mixing a puppy with other dogs until at least two weeks after its second vaccines (at around 12 weeks old) to allow adequate immunity to develop.

    In regard to stress, anything new or novel can be stressful to a puppy (or any animal for that matter). Loud noises, strange smells and lots of new people all at once can also be very overwhelming and scary to puppies that are yet to be properly socialised.

    Socialisation

    The socialisation window for puppies is from when they are roughly one to three months old. During this time, the animal’s perceptions of the outside world and its stimuli are being shaped by its experiences, and once that window closes, it can be more difficult for biases towards certain stimuli to be changed.

    Since the majority of puppies used in yoga sessions are between two to four months old, on paper, the practice sounds like an excellent opportunity for animal lovers to exercise and unwind surrounded by adorable puppies, with the added benefit of those puppies being socialised to grow up more well-rounded and well-behaved pets.

    Unfortunately, however, socialisation is not an exact science, and while it is incredibly beneficial to introduce puppies to lots of different things during their socialisation window, it does not mean flooding them with lots of stimulus all at once.

    This is the really tricky part, because what counts as “overwhelming” to one puppy may be completely manageable to the next. Some animals may find a room full of new people and smells incredibly exciting, while others need to be introduced to new people one at a time, with plenty of opportunity to withdraw from the experience if needed.

    It can also be impossible to predict what type of puppy you have until you place it in that situation. While a lot of behavioural aspects in our pets can be traced back to environment and genetics, every animal is unique, and just because a litter comes from docile, friendly and outgoing parents, doesn’t mean the offspring will share the same traits.

    Ensuring every puppy’s experience of a yoga session will be adequate from a welfare perspective would take a very knowledgeable and conscientious screening process that some businesses may not know how to or be able to provide.

    Yoga “pants”

    I feel that puppy yoga is probably far from a black and white picture, with the level of puppy welfare and attention to their needs varying from practice to practice. For this reason, I think it’s definitely a good idea to do your research before booking a session – whether you’re a vet or not – to make sure you’re happy with where the puppies come from, if the establishment is aware of vaccine records (and so forth), and if the puppies are given adequate opportunity to rest and retreat from engaging with the customers if they wish.

    In the same way that in the veterinary profession we are now seeing the outcomes of puppies raised during the pandemic lockdowns, we may soon see the influence of puppy yoga in the next generation of pets.

    At the end of the day, it’s up to the individual consumer to decide if the practice is for them, or if ethical puppy yoga is a bit of a stretch…


  • Blood gas analysis, pt 6: compensatory response

    Blood gas analysis, pt 6: compensatory response

    Simple acid-base disorders are compensated by predictable compensatory changes. The primary disorder shifts the pH, while the compensatory mechanisms aim to normalise the pH and bring it back to neutral.

    This is achieved by attempting to normalise the bicarbonate (HCO3-) to partial pressure of CO2 (PCO2) ratio in a paralleled manner.

    For example, an increase in HCO3– (metabolic alkalosis) is compensated by an increase in PCO2 (respiratory acidosis). Similarly, a respiratory alkalosis (decrease in PCO2) is compensated by a metabolic acidosis (decrease in HCO3-).

    Ruling out secondary process

    However, before jumping to the conclusion an opposing change is the result of compensation, we must rule out the presence of a secondary process. This can only be determined by calculation (Table 1).

    Table 1. Calculating compensatory change
    Component Expected compensation
    Metabolic acidosis
    ↓HCO3 (↓BE)
    per 1mEq/L ↓ in HCO3 = ↓ PCO2 of 0.7mmHg
    Metabolic alkalosis
    ↑HCO3 (↑BE)
    per 1mEq/L ↑ in HCO3 = ↑ PCO2 of 0.7mmHg
    Respiratory acidosis (acute)
    ↑PCO2
    per 1mmHg ↑ PCO2 = ↑ 0.15mEq/L HCO3
    Respiratory acidosis (chronic)
    ↑PCO2
    per 1mmHg ↑ PCO2 = ↑ 0.35mEq/L HCO3
    Respiratory alkalosis (acute)
    ↓PCO2
    per 1mmHg ↓ PCO2 = ↓ 0.25mEq/L HCO3
    Respiratory alkalosis (chronic)
    ↓PCO2
    per 1mmHg ↓ PCO2 = ↓ 0.55mEq/L HCO3

    By comparing the reported to what the calculated compensatory change should be, you can determine whether the patient’s reported value is due to compensation or a separate disorder – for example, multiple primary acid-base disorders (a mixed acid-base disorder).

    An example of a mixed disturbance could be a hyperventilating (respiratory alkalosis) dog with renal failure (metabolic acidosis).

    The level of decrease in PCO2 change is in excess of the calculated compensation for the metabolic acidosis, therefore confirming a mixed acid-base disturbance. In fact, the most common causes of hyperventilation – pain, fear and excitement – often complicate blood gas analysis.

    Another example of a mixed disorder could be a patient with traumatic haemothorax experiencing both lactic acidosis (hypoperfusion) and hypoventilation (respiratory acidosis) due to pleural space disease.

    Waiting game

    Another thing to keep in mind is compensation takes time – respiratory processes take approximately 8 to 12 hours, while metabolic processes take one to three days.

    The lungs are able to alter PCO2 levels relatively quickly by adjusting the rate of ventilation. The kidneys, on the other hand, take a longer time to adjust the pH, as the change in rate of absorption and excretion of HCO3– takes much longer in comparison.

    Regardless of the rate, physiologic compensation for a primary acid-base disturbance is almost never able to return pH to neutral.

    Summary

    A simple acid-base disorder should be suspected when the patient’s reported values are similar to the calculated compensation value, and a mixed acid-base disorder when the values fall outside the calculated range.

    Another hint that a mixed acid-base disturbance is present is if the pH falls within the normal reference range, but the HCO3– or the PCO2 are not; or if the HCO3– and PCO2 are in opposite directions as opposed to being parallel.

    Remember, the body can never overcompensate nor return the pH to neutral.

  • Blood gas analysis, pt 4: respiratory acidosis and alkalosis

    Blood gas analysis, pt 4: respiratory acidosis and alkalosis

    Assessing the respiratory component is simple. A quick glance at the partial pressure of carbon dioxide (PCO2) level can tell you whether a respiratory acidosis or alkalosis is present.

    If the PCO2 level is elevated (respiratory acidosis) then either a primary respiratory acidosis is present, or it is the result of a compensatory response to a metabolic alkalosis.

    Similarly, if the PCO2 level is low (respiratory alkalosis) then it could either be a primary respiratory alkalosis, or compensation to metabolic acidosis has occurred.

    The respiratory component should always be assessed before the metabolic component, due to the ability to respond to pH shifts almost immediately. This, therefore, is a more accurate reflection of the patient’s clinical disease.

    Respiratory acidosis – increased CO2

    Respiratory acidosis occurs anytime the patient is hypoventilating and not eliminating CO2 appropriately.

    As hypoventilation can be associated with hypoxia, these patients are often critical and require immediate interventions.

    Causes of respiratory acidosis include:

    • drugs (depress respiratory centre, relax thoracic muscles)
    • neuromuscular disease (for example, tick paralysis, botulism and snake envenomation)
    • upper airway obstruction
    • pleural disease (for example, pneumothorax, pleural effusion and diaphragmatic hernia)
    • gas exchange disorders (for example, pulmonary thromboembolism, pneumonia and pulmonary oedema)

    Respiratory alkalosis – loss of CO2

    Respiratory alkalosis occurs when a patient is hyperventilating – excessive loss of CO2 causes the pH to increase.

    The health effect of this is usually minimal, since, in most cases, the effect is secondary and correction of the underlying cause usually resolves this problem. The exception is when respiratory alkalosis is a primary disorder. This is usually quite rare, but can occur with brain stem trauma where the respiratory centre is affected.

    Causes of respiratory alkalosis are:

    • hyperventilation (for example, fear, pain, stress, anxiety and hyperthermia)
    • neurological (for example, head trauma/neoplasia involving the respiratory centre)

    Anticipating changes

    Correctly identifying the primary disorder is essential for anticipating the changes the patient is likely to experience. This will help identify the underlying disease, and is essential for patient monitoring and disease management.

    In the next blog, we will discuss assessment of the metabolic component.

  • Euthanasia (part 2): caring for the patient

    Euthanasia (part 2): caring for the patient

    Last month we discussed the importance of caring for clients during the process of euthanising their much-loved pet. This month, we focus on your patient.

    The goals of euthanasia are always to make it as painless, fearless and stress-free as possible for the patient.

    Pain relief

    Most patients presented for euthanasia are either suffering from chronic, terminal or traumatic disease.

    The first thing I like to do is ensure the patient’s pain is managed. This usually means providing opioid pain relief. Methadone is my opioid of choice. Butorphanol provides minimal pain relief, but is excellent for mild sedation.

    Next, if your patient is in shock, you need to try to alleviate some of it through IV fluid resuscitation. This is important as poor circulation will slow the process when you administer the euthanasia solution.

    Calm and stress-free

    One of the most important goals in the euthanasia process is to have the patient as calm and stress-free as possible.

    If the patient is stressed or anxious, some sedation may be required. Diazepam or acepromazine are good choices, depending on the condition of the patient, of course, and, together with the opioid you have administered already for pain relief, will help calm the patient. Try to avoid using medetomidine as a sedative in all but the most fractious of patients, as it causes peripheral vasoconstriction that will make IV catheter placement difficult.

    The aim of sedation is to relax your patient as much as possible without rendering them unresponsive to owners when it is time to say goodbye. This can be tricky as every patient responds differently to sedation, so you must make a point of warning owners the sedation may make their pets very sleepy.

    IV catheter

    Where possible, I avoid performing euthanasia without first placing an IV catheter. It makes the delivery of the euthanasia so much smoother. Including an extension to the administration line also allows you to stand a little away from the patient and their owners to give them a little privacy while you administer the euthanasia solution.

    Once your patient is sedated and an IV catheter placed, I set up comfortable bedding in the room where I will perform the euthanasia and bring the patient to the room. The amount of euthanasia solution I have with me always exceeds how much I think I will need; the last thing I want is to have to leave the owner and patient to get more euthanasia solution.

    Once I have administered the euthanasia solution, I check the heart and once that stops completely, I then tell the owners their pet’s heart has stopped, which they understand as their pet has passed.

    Performing euthanasias is the one of the hardest parts of our job, but also a privilege we hold as vets, so I hope my tips will help make the process easier for you, your client and, most importantly, your patient.

  • Euthanasia (part 1): caring for the client

    Euthanasia (part 1): caring for the client

    Euthanasia is a big part of our work as veterinarians. Working in an emergency setting, it is something I have to face on every shift.

    It doesn’t get any easier no matter how many times I have to do it, but I have fine-tuned my approach over the years so each euthanasia process runs as smoothly as possible, with minimal additional stress to both patient and client.

    This month, I will talk about taking care of your client.

    Communication is key

    dog and owner
    Euthanasia is a big part of our work as veterinarians.

    The most important aspect of taking care of your client in this difficult time is to make sure you really focus on communicating clearly, effectively and, most importantly, with sincere empathy.

    First, I listen to their concerns, and why they have made the difficult decision to euthanise their pet.

    Quality of life decisions can be a very grey area, and sometimes what you think may be manageable as a veterinarian can be a huge quality of life concern for a pet owner.

    A prime example is osteoarthritis in older dogs. You may assess them as being clinically well except for some difficulty walking, but the client sees their pet every day and notices the struggles they go through.

    Euthanasia is a difficult conclusion for them to come to and, in most instances, I will defer to the client when it comes to assessing the quality of life of their pet.

    Quality assessment

    One way I help clients assess their pet’s quality of life is by asking them about a few aspects of it, including:

    • Can your pet do the things that make them happy?
    • Do they spend more days sad, depressed and ill compared to the number of days they are bright, happy and eating?
    • Is your pet in pain? Is this pain manageable?

    Confirmation

    Once a client has expressed they want to euthanise their pet, I always try to confirm three things:

    1. That they have actually decided to euthanise their pet. I frame the question like: “So, my understanding from our conversation is that you have made the decision to euthanise Fluffy today?” Sometimes, when you ask this question, the client reveals they have not actually come to that decision yet, which means you will need to backtrack a little and guide them through the decision process again.
    2. Whether they would like to be present for the euthanasia.
    3. How they would like us to handle the after care.

    I also always try to manage all documentation and finances before the euthanasia so the clients will be in a position to leave immediately after the procedure, meaning they can begin to grieve rather than have to do paperwork. The only exception to this is when the patient is in a critical condition, meaning euthanasia cannot wait.

    Explaining the process

    Try not to perform the euthanasia in your consult room or in the main treatment areas – if you have a private room for euthanasias, that is the most ideal. This is important especially if the client comes back in the future with another pet or a new pet. They often find it difficult to walk into your consult room and be reminded of the euthanasia of their beloved pet.

    I like to give clients some time to spend alone with their pet to say their goodbyes in private. When I come back into the room, I start by explaining the process of the euthanasia, covering the following things every single time:

    • Euthanasia is an overdose of an anaesthetic agent
    • dog collarThe process is quick – 10 to 20 seconds
    • It is completely painless
    • The pet doesn’t close their eyes afterwards
    • The pet can have a couple deep breaths and muscle tremors
    • The pet can release their bowels and bladder (especially important to warn of this if the clients want to hold their pet)
    • Lastly, if their pet came into the hospital in shock and obtunded, where I have fluid resuscitated them, meaning they are now more bright and alert, I warn the clients that despite their pet looking better, the underlying disease remains the same.

    Once the euthanasia is performed, I again ask if the client wants to spend a little more time in private with their pet. Finally, when the client leaves, they typically will say “thank you”.

    Whatever you do, do not say something like “my pleasure” or “you’re welcome” like you would for a vaccination consult – this is a natural response, but would be a terrible faux pas. I simply say “I’m very sorry for your loss. Take care for now and let us know if we can help in any way”.

    Next month, I will talk about taking care of your patient throughout the euthanasia process.