Tag: Degree

  • Blood gas analysis, pt 7: evaluating oxygenation and ventilation

    Blood gas analysis, pt 7: evaluating oxygenation and ventilation

    In patients with respiratory compromise, it is important to look at the respiratory components of the blood gas to determine both oxygenation ability and adequacy of ventilation.

    To assess oxygenation, the partial pressure of arterial oxygen (PaO2) to fraction of inspired oxygen (FiO2) ratio, and alveolar-arterial gradient (A-a gradient) can be used. Conversely, the partial pressure of carbon dioxide (PCO2) is what dictates the adequacy of ventilation.

    Before going further, it should be noted only arterial samples can be used to evaluate oxygenation. Peripheral venous blood samples are rarely useful for oxygenation assessments, as the values are highly influenced by local factors and the degree of occlusion of the vessel from which the sample was collected from.

    Ventilation, conversely, can be assessed from either venous or arterial samples. The PCO2 values from the arterial samples are usually about 5mmHg to 10mmHg lower than the corresponding venous sample.

    Abnormalities

    Oxygenation and ventilation are not interchangeable terms. Adequate ventilation does not necessarily equate to adequate oxygenation, and vice versa.

    Oxygenation is determined by efficiency of oxygen absorption into the blood stream, after passing through the lungs, then delivered to the tissue. It is dependent on both ventilation (V) and perfusion (Q).

    For proper oxygenation to occur, matching ventilation and perfusion must occur at the level of the alveoli. When a V/Q mismatch occurs, blood is not properly oxygenated after passing through the lungs, referred to as venous admixture.

    Three forms of V/Q abnormalities exist:

    • Low V/Q can be caused by:
      • pneumonia
      • asthma
      • pulmonary oedema
      • inflammation
      • pulmonary thromboembolism
      • pulmonary neoplasia
    • Absent V/Q means blood has been diverted from parts of the lungs that are inadequately ventilated, such as those caused by atelectasis and alveolar collapse secondary to severe pleural effusion.
    • Diffusion impairment is caused by an increased distance between the gas exchange surfaces and pulmonary arterioles (rare in small animals). Pulmonary fibrosis and chronic obstructive pulmonary disease are among some of these causes where it can be severe enough to cause V/Q mismatch and, therefore, decreased PaO2.

    PaO2 to FiO2 ratio

    One way to determine the adequacy of oxygenation is by looking at the PaO2 to FiO2 ratio.

    FiO2 represents the percentage of the oxygen the patient is breathing. Room air is 21% oxygen, so the FiO2 is 0.21. PaO2 is normally about five times that of FiO2; therefore, the normal PaO2 of a patient with no pulmonary disease breathing room air should be about 100mmHg (5 × 21%).

    A normal PaO2 to FiO2 ratio is between 300 and 500. A number lower than 200 implies significant pulmonary disease or, possibly, acute respiratory distress syndrome. This ratio is particularly important in assessing patients requiring supplemental oxygen. An example is a congestive heart failure patient on bilateral nasal oxygen line (approximately FiO2 of 40%), with a PaO2 value of 80mmHg. The PaO2 appears to be adequate until the ratio is calculated (80/0.4 = 200). The change in FiO2 ratio is often more important than the PaO2 as a lone value.

    A-a gradient

    Once hypoxia has been established, the A-a gradient will help determine whether it is caused by ventilation failure or an underlying pulmonary disease. “A” stands for alveoli and “a” stands for arterial concentration of oxygen.

    A = [FiO2 × (Pb-PH20)] – (PaCO2/0.8) – Pb is the barometric pressure (760mmHg at sea level), and PH20 is saturated water vapour pressure, which is 50. The 0.8 is the respiratory quotient and affixed number.

    The simplified formula assumes the patients are breathing room air (FiO2 of 0.21) and at sea level, and the formula can be simplified to: A = 150 – (PaCO2/0.8)

    A normal A-a gradient should be less than 15. Abnormally high values indicate pulmonary parenchymal disease or an underlying heart disease, while a normal A-a gradient indicates the cause of hypoxia is likely secondary to ventilation failure.

    The ‘120 rule’

    Ventilation is particularly important to assess in animals with respiratory compromise, as it represents the entire mechanics of breathing.

    PCO2 is not only representative of the efficiency of ventilation, but also cellular metabolism and perfusion. Low PCO2, or hyperventilation, is rarely of any significance as aforementioned in the respiratory alkalosis section. High PCO2, however, is indicative of the lungs’ reduced ability to adequately shift air and can be caused by neurologic diseases, spinal cord injury, upper airway disease, trauma to the thoracic wall or muscles, and drugs that can cause respiratory depression.

    Ventilation must be assessed in light of oxygenation, as both are often affected by each other. An example of this would be a hypoxic animal (low PaO2) with a compensatory hyperventilation (low PCO2). The “120 rule” will help determine whether lung function is adequate.

    If the value you get, by adding the PaO2 and PaCO2, is greater or equal to 120, lung function is adequate. If the value is lower than or equal to 120, lung function is abnormal. This can only be calculated from patients breathing room air and at sea level.

    Ventilation adequacy

    Aside from looking at values on a blood gas, it is equally important to monitor the patient to determine whether the ventilation effort is sustainable.

    Animals with a significantly increased respiratory effort – despite normal blood gas values – are at risk of respiratory exhaustion and indicative of mechanical ventilation intervention.

    From these respiratory components of the blood gas value, clinicians should be able to determine the adequacy of ventilation, whether hypoxia is present and, if it is, whether the underlying cause is a result of ventilation failure or a possible underlying pulmonary or heart disease.

    Once oxygen supplementation has been implanted, the PaO2 to FiO2 ratio will help clinicians decide whether the response is adequate or mechanical ventilation is required.

    As with all laboratory measurements, it is extremely important to assess the patient itself. Non-sustainable respiratory efforts, in the face of normal blood gas parameters, is still an indication for mechanical ventilation.

  • Using caudal vena cava to guide fluids

    Using caudal vena cava to guide fluids

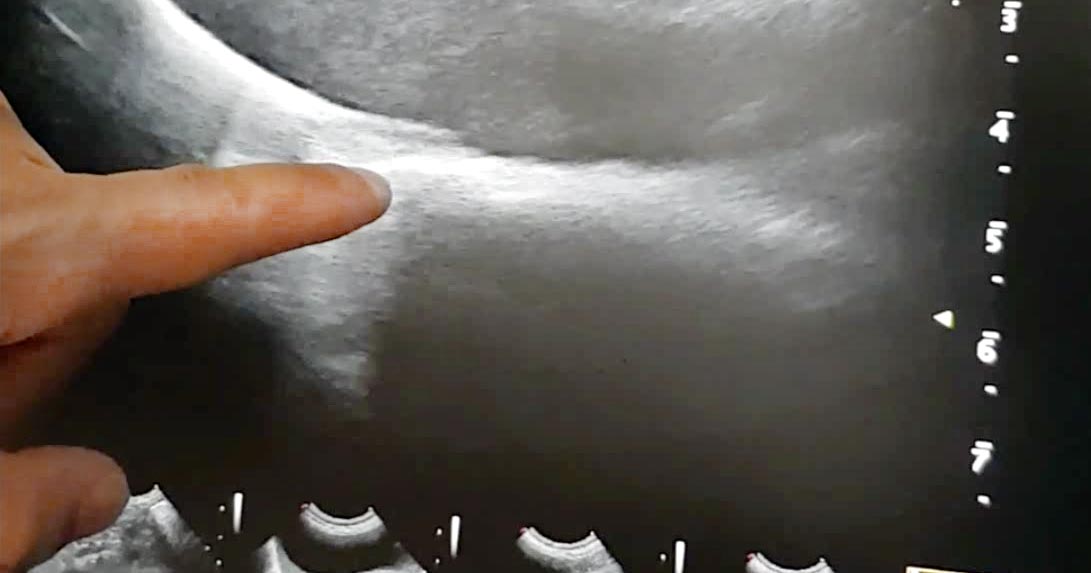
    Assessment of the caudal vena cava, via the diaphragmatic hepatic view, is useful for assessing the volume status of a patient.

    This is particularly helpful for hypotensive patients, to check whether they require more volume or vasopressor agents, or other management. With regards to “more volume”, this could be crystalloids, colloids or blood products, depending on the patient.

    How to find it

    • Place the probe under the xiphoid process.
    • Increase the depth, adjust the focal point, then reduce the frequency to be able to visualise the diaphragm completely.
    • Find the gall bladder, fan laterally to the right (slightly).
    • The caudal vena cava is seen deep to the gall bladder as two parallel lines through the diaphragm wall.
    • Assessment of volume status – or, more so, fluid responsiveness – is based on interpretation of the degree of collapse during inspiration.

    Interpretation

    • If it does not collapse during inspiration (“fat”), this can mean the vena cava is adequately loaded or volume overloaded. These patients would most likely benefit from vasopressor agents (or other managements – for example, pericardiocentesis), rather than further volume.
    • If it collapses more than 60% (“flat”), the patient requires more volume.
    • If it collapses between 20% to 60% (“bounce”), further volume loading can be trialled.
  • Focus on GDV, part 3: surgery tips

    Focus on GDV, part 3: surgery tips

    Following on closely from the first two parts of our February focus on gastric dilatation-volvulus (GDV) – which covered IV fluid resuscitation, pain relief and gastric decompression – we turn to surgery.

    Here, I offer a few tips to help ensure the procedure runs as smoothly as possible.

    Abdominal incision

    Make the abdominal incision large – from the xipoid to the pubis. You cannot perform a proper exploratory laparotomy without proper visualisation. Additionally, when it comes time to re-rotate the spleen, you will need all the space you can get. Removal the falciform fat to help improve exposure.

    Derotation

    derotation
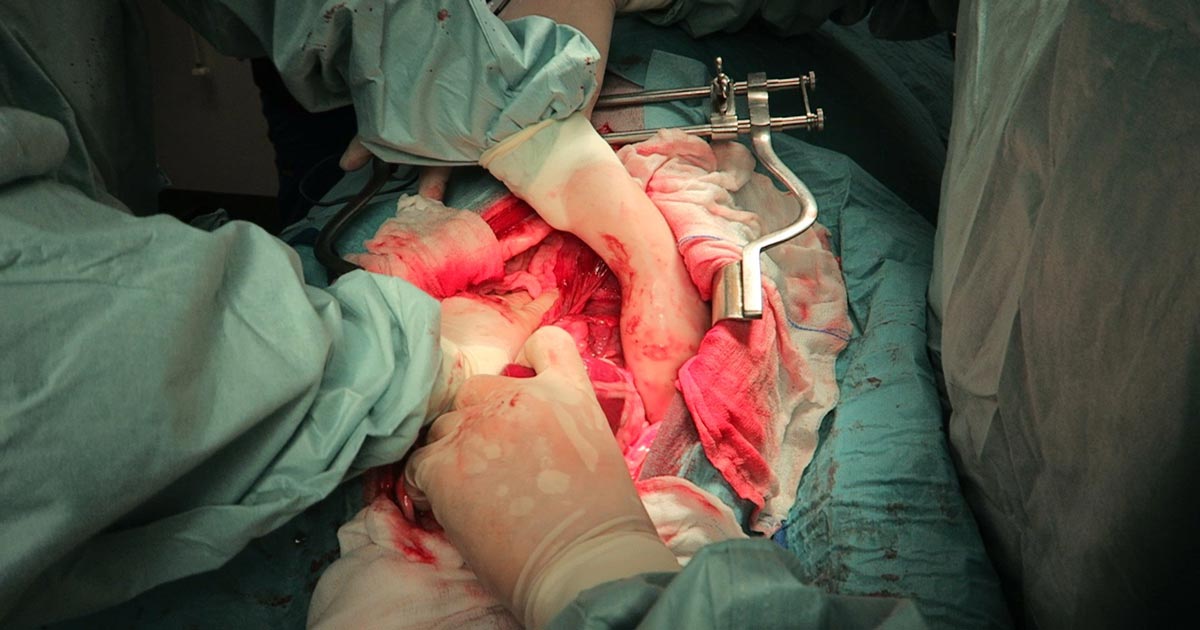
    Figure 1. Derotation of the stomach. Standing on the right side of the patient, one hand pulls as the other pushes.

    The degree of rotation is variable from 90° to 360°, so not all GDV surgeries will be the same. If the omentum is draped over the stomach, this is pathognomonic for GDV.

    When derotating, stand on the right side of the patient as all descriptions are based with the surgeon on that side.

    During volvulus, the pylorus rotates ventrally then to across to the left side of the body.

    Method

    With one hand (usually your right) reach down the left abdominal wall and firmly grab the stomach down where the spleen normally resides, then pull towards you (Figure 1). At the same time, use your other hand to apply downward pressure (or pressure in the dorsal direction) on the right side of the stomach. This simultaneous pulling on the left side of the stomach and push on the right side of the stomach is generally successful.

    At this stage, it is important to check things have gone back to their normal places. Ensure the:

    • pylorus is to the right and you are able to track it through to the duodenum and pancreas
    • fundus is to the left
    • omentum is hanging off the caudal aspect of the stomach
    • spleen is also derotated

    Passing a stomach tube can sometimes help you identify the oesophagus – you can feel it running along the inside of the gastric cardia and fundus.

    Further decompression

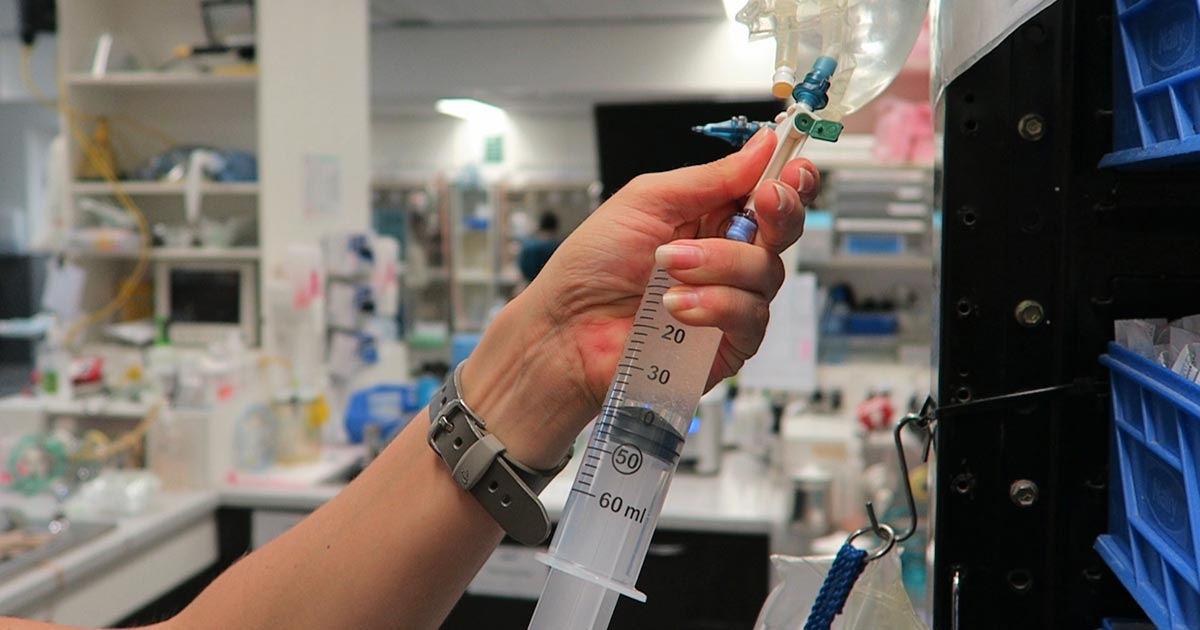
    If the stomach is still distended and hard to manipulate, reducing the size of the stomach can make derotation significantly easier. Pass the stomach tube again or aspirate more gas from the stomach using a 18G needle, extension set, 50ml syringe and three-way tap.

    Assessment of the stomach

    incision
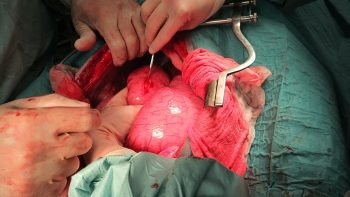
    Figure 2. Incision into the pyloric region of the stomach.
    Figure 3. Completed incision gastropexy.
    Figure 3. Completed incisional gastropexy.

    Gastric necrosis is most likely to occur along the greater curvature of the body and fundus. Lifting up the stomach and looking at the dorsal aspect of these areas is important. Allow 5 to 10 minutes after derotation before resecting the affected areas to see if it regains colour and pulsations.

    Pexy

    I personally perform incisional gastropexy – I find them easier and very effective. I find an area on the pyloric region of the stomach where minimal tension exists, when brought to the lateral body wall (Figures 2 and 3).

    Ensure you do not accidentally incise into the diaphragm; the muscle fibres of the diaphragm radiate out and insert at the costal arch. Identify the transverse abdominal muscles and pexy the stomach to here.

    I also ensure muscularis to abdominal muscle contact to increase the strength of the pexy once it is healed.

    Spleen

    The spleen is almost always engorged in GDV cases, but this does not necessarily mean it needs to be removed.

    Always assess the splenic blood supply as it is not uncommon for splenic vessels to tear or thrombose during the volvulus.

    If there is any concern that the splenic arterial flow is compromised, I would perform a splenectomy.

    Stomach still dilated after pexy?

    What if the stomach appears to be still dilated? Generally, once the stomach is derotated, normal anatomy has been achieved and the pexy is performed, the remaining food and gas will pass with time. You can try to empty more via a stomach tube or aspiration with a large needle, but this is not generally required. I would not perform a gastrotomy to remove contents.

    Next week, we will cover common postoperative complications.

    >>> Read Focus on GDV, part 4: the recovery

  • Focus on GDV, part 1: resuscitation

    Focus on GDV, part 1: resuscitation

    Last month we covered a bit of pathophysiology, presenting pathophysiology, presenting clinical signs and the radiographic diagnosis of gastric dilatation-volvulus (GDV).

    Now we cover the three things you need to do as soon as a suspected case is presented:

    1. IV fluid resuscitation
    2. decompression of the stomach
    3. pain relief

    Depending on the number of staff you have, all of these can be performed simultaneously. If not, follow the above order as shock is the most imminent problem.

    Catheter placement

    Fluid resuscitation is relatively straightforward. Most GDV patients will be in some degree of shock, varying from mild to severe. Regardless of the actual degree, all patients will require IV fluids.

    The placement of IV catheters is particularly important; their numbers and diameter will influence the rate of response to treatment. Large-bore catheters allow faster flow of fluids compared to smaller ones, while multiple catheters allow concurrent delivery of two bags of fluids as opposed to one – particularly important in large dogs. Therefore, always try to place the largest catheter possible (for example, 18G or larger for large-breed dogs) into the cephalic veins.

    Once the catheters have been placed, collect 2ml to 3ml of blood for baseline measurements. These can be collected directly from the catheters and should include:

    • PCV/total protein
    • blood gas analysis
    • lactate
    • activated clotting time
    • electrolytes
    • later, full haematological and biochemical analysis

    Once the baseline bloods have been collected, fluid resuscitation should start immediately.

    How much, how fast?

    fluid
    Fluid resuscitation is relatively straightforward, says vet Gerardo Poli.

    How much fluid should you deliver, and how fast? My “go to” fluid is crystalloids and I generally start with a 20ml/kg bolus of an alkalinising crystalloid.

    I perform bolus therapy, so 10ml/kg to 20ml/kg fluid doses rather than shock rates 90ml/kg/hr, as I feel it allows me to better titrate my fluid therapy to effect. It also helps minimise excessive fluid administration and the problems with haemodilution – such as anaemia, hypoproteinaemia and prolonged coagulation times.

    As fluids are being delivered, I administer pain relief and start gastric decompression (covered next week).

    The decision to administer more fluids depends on whether I have achieved some end point resuscitation variables, such as:

    • a reduction in heart rate
    • a reduction in capillary refill time
    • an improvement of mucus membrane colour
    • improvement in pulse pressures

    Improvement in mentation is not often reliable as the sedative effect of analgesia, which I generally give during fluid resuscitation, often confounds this effect.

    Shock therapy

    If evidence of shock still exists, despite the initial fluid boluses and gastric decompression, I will consider more fluids. This can include hypertonic saline or colloids.

    In my experience, a repeat of a smaller dose of crystalloid fluid bolus is often adequate (10ml/kg). The transition on to hypertonic saline (7% solution) or colloids is influenced by the results of the aforementioned baseline diagnostics.

    A reduction in PCV/total protein suggests blood loss. In this case, I will consider either hypertonic saline (3ml/kg to 5ml/kg of 7% solution), a dose of colloids or even blood products, such as whole blood or packed red blood cells.

    If significant prolongation in activated clotting time occurs, likely from consumption, then I may incorporate fresh frozen plasma into my fluid therapy. This is in anticipation of possible surgery, where prolonged coagulation times can not only be troublesome, but life-threatening.

    Lactate

    A quick note on lactate – I don’t use the baseline reading as a prognostic indicator or an indicator of gastric necrosis. This is supported by recent findings claiming it is not the level of lactate that is predictive, but the degree of improvement in response to fluid resuscitation and gastric decompression.

    I have seen unreadable lactate levels – greater than 15mmol/L – in patients who returned to reasonably normal levels within an hour of stabilising. These patients also went on to survive surgery.

    Pain relief

    After starting IV fluid resuscitation, I generally administer pain relief while the team is preparing for gastric decompression. To keep things simple, I stick to an easily accessible pure opioid agonist at 0.2mg/kg IV. I avoid subcutaneous or even intramuscular administration as the patient is often in shock; the peripheral blood is shunted centrally to the heart and the brain and absorption can be variable.

    I find this offers a reliable and great degree of pain relief that helps reduce anxiety levels and, consequently, reduces oxygen demand. It has minimal cardiovascular effects and the mild sedative effect also helps with the process of decompression.

    >>> Read Focus on GDV, part 2: Releasing the pressure (gastric decompression)

  • All hands on deck: GDV diagnosis

    All hands on deck: GDV diagnosis

    Gastric dilatation-volvulus (GDV) is a true veterinary emergency and while it can be daunting to be presented with a sick dog with suspected GDV, the most important thing to remember is this patient will likely succumb to this condition without your intervention.

    First, a little pathophysiology: GDV is a broad term that can refer to gastric dilation on its own, gastric dilation with volvulus, and even chronic gastric volvulus. These conditions usually present in large or giant breeds and we still know little about the underlying causes.

    GDV
    Gastric dilatation-volvulus (click to zoom).

    Once dilation and volvulus occurs, perfusion to the stomach and other abdominal organs is compromised. Along with general shock – which can be fatal in its own right – decreased stomach wall perfusion can result in stomach wall necrosis, rupture and peritonitis.

    Clinical signs

    Quite often, a GDV case starts with a telephone call from a panicking owner. He or she usually reports an acute onset of retching, regurgitation or vomiting in their large or giant breed dog after feeding.

    Other common signs include:

    • hypersalivation
    • agitation
    • palpable abdominal distension

    When presented, many of these cases will be obvious and the animal already in some degree of shock. You need to institute fluid resuscitation and gastric decompression immediately to restore perfusion as soon as possible.

    Confirmation

    To confirm the patient truly has GDV, as some patients may present with simple gastric dilation from over-engorgement, you need to perform an abdominal radiograph.

    Always keep an eye out for the large, deep-chested dog that presents with vomiting or retching, but doesn’t appear bloated. Don’t be fooled into ruling out GDV in these patients based on physical examination alone – often, no visible or palpable gastric distension exists as the ribs cover the stomach. That is where the abdominal radiographs play an especially important role.

    It is common practice at our hospital to perform abdominal radiographs as soon as possible, so as to not miss a hidden or subtle GDV in these large breed dogs.

    Which view is best?

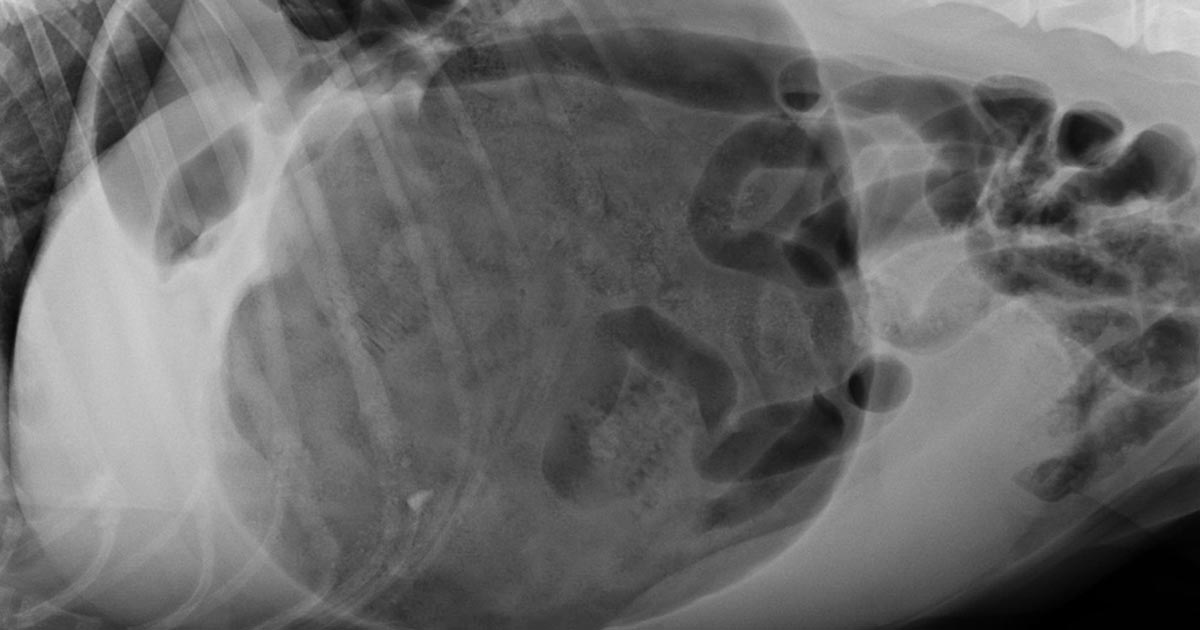
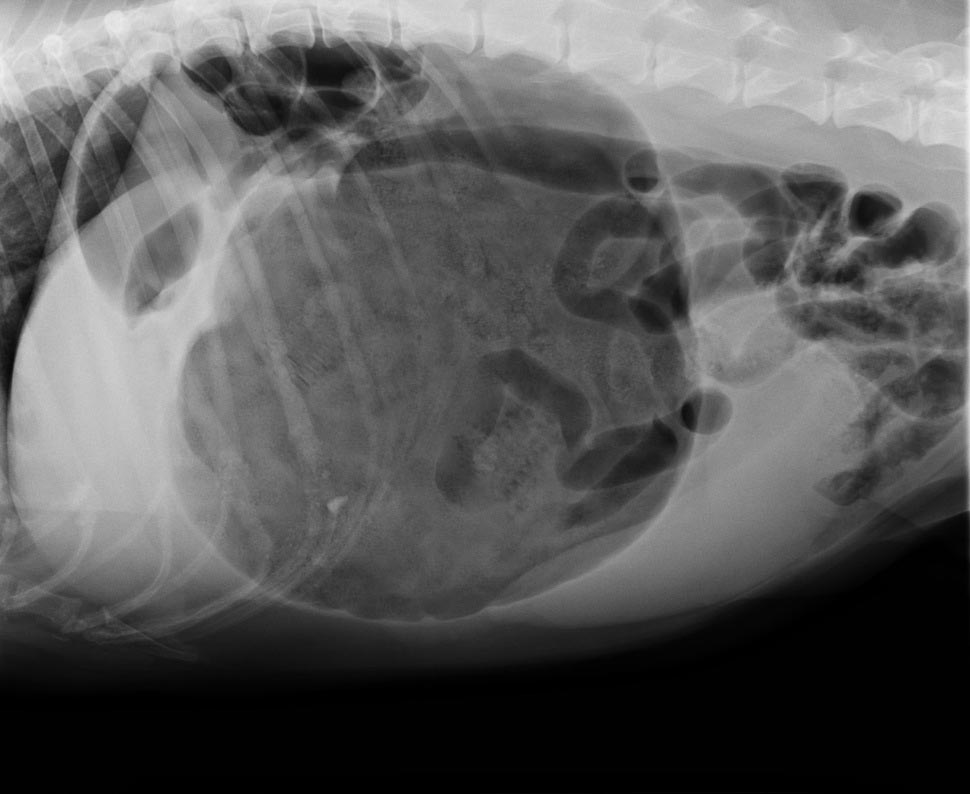
    The classic approach is to lie the patient in right-lateral recumbency, in this view, you would see the classic “Smurf’s hat”, “boxing glove”, “Popeye’s arm”, “double bubble”, etc. This is compartmentalisation of the stomach, indicating not only gastric dilatation, but volvulus as well.

    You should also look for evidence of pneumoperitoneum, as it may suggest gastric wall rupture.

    At this stage, it is also important to collect blood for biochemistry, haematology, electrolytes and, if available to you, blood gas analysis. ECG readings should also be taken to determine if the patient has any life-threatening arrhythmias, such as ventricular tachycardia.

    Next month, we will talk about stabilising and treating these patients.

  • Occupational hazards

    Occupational hazards

    Before I started vet school, I attended a workshop for aspiring vets where students shared anecdotes about the various occupational ailments they had experienced or witnessed over the years.

    Despite having to defer the start my veterinary degree due to a horse-related incident, I got through university largely unscathed by veterinary-related disease. I contracted a skin infection while on placement in Bolivia, but I don’t think that was anything zoonotic.

    However, some colleagues were not so lucky…

    Illnesses and injuries

    The various vet-student ailments that have affected friends include:

    • rotavirus caught while on a dairy EMS placement
    • an odd reaction to the BCG vaccine we received en masse in the first few weeks of vet school – after investigating a persistent cough, it transpired it was actually latent tuberculosis that would flare up periodically
    • a mumps epidemic – while not zoonotic, the disease spread like wildfire through those who attended “Vetski” one year (a number of other skiing-related injuries were suffered on the same trip, including two damaged knees)
    • the notorious cryptosporidiosis, which claimed at least one victim on every farm rotation group
    • ringworm – despite having been in close proximity to cattle heavily infected with ringworm, I have avoided it thus far (the same cannot be said for one friend, who had to claim she had thrush to convince the pharmacist to sell her the necessary antifungal cream)

    Appreciating dangers

    TB testing
    TB testing – one of the most dangerous veterinary tasks.

    Since qualifying, a good proportion of my work in practice has consisted of one of the most dangerous veterinary tasks – TB testing.

    While I remained relatively unharmed for the first few months, I did appreciate how easy it could be to get injured, with some dodgy crushes to contend with and, often, largely unhandled beasts.

    Having tested hundreds of cattle unscathed, my final test was quite eventful…

    During a previous test at this particular farm, the vet had considered sedating one of the cows because it was so wild – but this time I was prepared, with sedation at the ready in case it was needed and the crush chained so the cow couldn’t go flying out the front door.

    Crushed crush

    Although a great deal of jumping about took place, I managed to test the cow without needing to resort to xylazine. However, the bull, which could barely squeeze into the crush, decided to stick his head under the front door and bend it nearly in half as the farmer, his son and I watched in horror.

    Luckily, the bull seemed to think better of this plan and retreated before destroying the crush.

    After the farmer had bashed the door back into some resemblance of its original shape, one calf somehow jumped out of the side of the crush and ended in a neighbour’s field.

    First-hand experience

    Just as we thought we’d had enough entertainment for one day, one of the six-month-old sucklers managed to squash my hand between it and the crush.

    The world went green for a moment and I had to park myself on an upturned bucket.

    Having taken a bit of a breather, we got the next calf in and I tried to continue, but the world kept spinning and I didn’t want to take my glove off to look at the damage. Feeling highly embarrassed, I sat back down and telephoned the practice for backup while the farmer went off to fetch a cup of sugary tea.

    Not the only ones

    An x-ray thankfully found no breaks, but a lot of swelling and bruising.

    I joked with my doctor about occupational injuries, saying I didn’t suppose GPs would be likely to get into that kind of situation. However, he said he’d had a couple of knives pulled on him – one from someone demanding a prescription!

    So, maybe we’re not the only medical profession at such a high risk of injury, we’re just exposed to slightly different dangers.

  • SNAP cortisol test

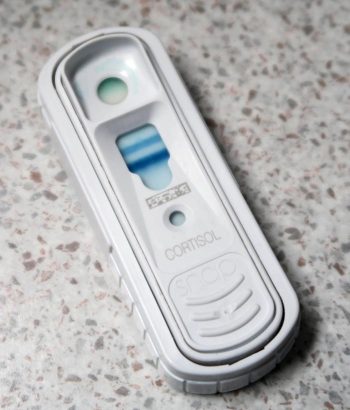
    SNAP cortisol test

    While hyperadrenocorticism is not an uncommon incidental finding in patients presenting to our emergency clinic, hypoadrenocorticism is a lot less common. Or, possibly, more frequently underdiagnosed.

    Textbook clinical presentations combined with haematology and biochemicial changes can make diagnosis straightforward, but not all patients will present with all the classic signs.

    SNAP cortisol test
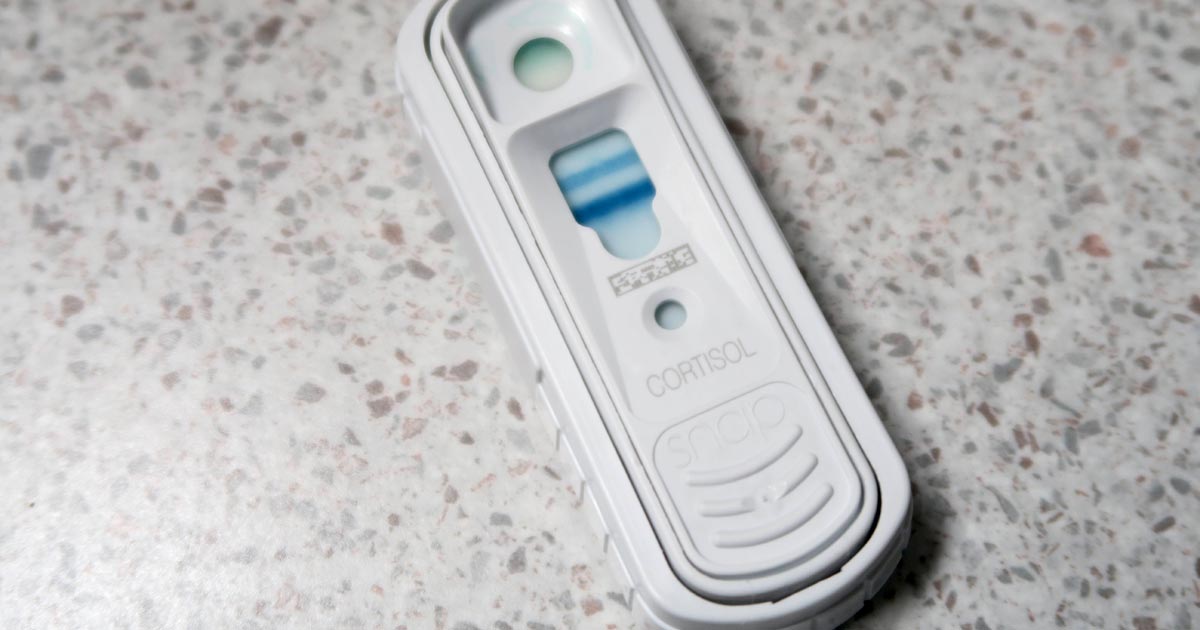
    The SNAP cortisol test is a quantitative ELISA test that measures the level of serum cortisol in dogs.

    To complicate things further, hypoadrenocorticism is the great mimicker of diseases; it is often impossible to arrive at a definitive diagnosis without knowing the cortisol levels.

    The SNAP cortisol test allows clinicians to determine cortisol levels in-house – a blessing to those of us who work out-of-hours – but is not without its limitations.

    Suspicious signs

    Patients with hypoadrenocorticism often present with vague and non-specific clinical signs, but certain clinicopathological changes help raise the suspicion:

    • a decrease in sodium-to-potassium ratio (below 1:27)
    • azotaemia
    • an inappropriately low urinary specific gravity, despite evidence of dehydration or hypovolaemia
    • a leukogram unfitting to the degree of illness of the patient (a “reverse stress leukogram”- neutropenia, lymphocytosis, eosinophilia)
    • anaemia
    • hypoglycaemia
    • hypercalcaemia

    Although most Addisonian patients will not present with all these signs – especially those in the early stages of disease or those with atypical Addisonian disease (glucocorticoid insufficiency only) – any patients showing any of these haematology and biochemicial changes should have hypoadrenocorticism ruled out as part of the diagnostic plan.

    Imperfect ELISA

    The SNAP cortisol test has been advertised as an in-house assay to aid the diagnosis, treatment and management of both hyperadrenocorticism and hypoadrenocorticism, although the quality of the result is not perfect. This quantitative ELISA test measures the level of serum cortisol in dogs.

    In one study1, the SNAP cortisol test appears to have a good correlation with an external laboratory chemiluminescent assay test; however, in 12.8% of cases (5 of 39 patients), the SNAP test result could have led to a different clinical decision regarding the management of the patient.

    Since long-term Cushing’s management relies on reliable, repeatable cortisol level detection, this high level of discrepancy is unacceptable, especially when more accurate alternatives are available at external laboratories.

    Still useful

    Despite this, it is still very useful helping to assess for the presence or absence of hypoadrenocorticism, especially in an emergency setting.

    I use the SNAP cortisol to measure the resting cortisol level. If it is below 2ug/dL or in inconclusive range (between 2ug/L and 6ug/L), but the clinical picture suggests hypoadrenocorticism, I would perform an adrenocorticotropic hormone (ACTH) stimulation test and send samples to an external laboratory. If it is well above the inconclusive range, I would not perform an ACTH stimulation test.

    In summary, I think the SNAP cortisol test can be useful in helping assess for hypoadrenocorticism, but would still recommend performing an ACTH stimulation test and running the samples externally.

    However, use it with caution for hyperadrenocorticism diagnosis and its long-term management – especially when more accurate and economical alternatives are available.

  • Don’t fear tuition fees

    Don’t fear tuition fees

    With the upcoming general election, the question of changing tuition fees has cropped up again.

    People obsess over the fact rising tuition fees are putting poorer families off from sending their children to university. But I think they’ve got it wrong – tuition fees aren’t the problem.

    debt
    Struggling with debt? Poor or middle-of-the-road people struggle because they don’t have enough “maintenance”, not because they have to pay tuition. IMAGE: pathdoc / Fotolia.

    Tuition fees are only paid back once you earn enough to manage it. Therefore, they don’t affect the student in the present, while he or she is studying. Out of interest, I recently logged into my student loan repayment account and was presented with a pretty scary number.

    Irrelevant

    Having calculated what I’ll pay back on my starting salary, I found, to begin with, the debt will actually continue to increase because I would be paying off less than the interest that accumulates every year. That just seems ludicrous – how will I ever pay it off? The answer is I won’t. The loan is written off after 30 years; so, assuming I won’t come into a massive sum of money or win the lottery, the total owed is irrelevant.

    I’m not really sure of the economics of how on earth the loan companies or government can find this sustainable, but I’m just discussing how it affects the students here.

    The point is, we should ignore that big scary number of total debt and just think of it as a graduate tax. You go to university to get a good education, which should give you the knowledge and skills to get a better career or progress more quickly within that career. For that, you accept a (very small) proportion of your pay packet every month disappears into the ether of student loan repayment – and, since you don’t pay it back until you reach the threshold for repayment, it is not unaffordable.

    Surviving during semesters

    What is unaffordable is trying to survive at university with nothing in your bank account. Poor or middle-of-the-road people struggle because they don’t have enough “maintenance”, not because they have to pay tuition. The issue is having enough money to live off now.

    It’s all very well suggesting students get part-time jobs to help them pay their way through university, but that can be detrimental to the end result as it takes away time from studying and, in some degrees – such as veterinary – it becomes near impossible due to contact time and, later, rotations and clinics.

    Some people do manage it, and fair play to them, but it’s certainly tough.

    Stuck in the middle

    college fund
    IMAGE: rutchapong / Fotolia.

    It’s not just the poor who struggle. In fact, the poor are better off because of means testing. It’s often the people in the middle who are stuck – those whose fates have been decided by some higher power that has ruled they’ll receive less government funding because their parents’ income means they should be able to support their children.

    Wrong!

    That’s okay for the rich, but for those in the middle, the family often cannot afford to stump up the difference.

    What about mature students? It’s ridiculous they are still means-tested even though they could well have been living independently for years without the financial support of their parents and may not even have anything to do with them anymore.

    Measured maintenance

    Maintenance should not be one size fits all either. Vocational degrees, such as veterinary, require many more materials than arts degrees, for example. Over the five years of my veterinary degree, I bought:

    • protective clothing (boiler suits, lab coats, wellies, waterproofs, scrubs, gloves and hospital shoes)
    • equipment (a thermometer, stethoscope and dissection kit)
    • books amounting to an estimated £700 (not including my laptop)

    On top of that, there’s the petrol and accommodation costs of EMS placements and rotations, not to mention the fact having to do EMS in holiday time takes away the opportunity to get a summer job.

    Veterinary is an expensive degree, with many applicants not quite realising how much so until they’re in too deep. So, surely maintenance grants and loans should reflect that?

    The political parties are isolating young people and students for various reasons, and part of me believes it’s because they don’t understand what we want or need. We need to stop obsessing over tuition fees and ask the students themselves why they are struggling.

  • The 7 stages of revision

    The 7 stages of revision

    Finals are imminent, so my colleagues and I are going through the annual rite of passage more commonly know as “revision hell”.

    Let’s break down the various stages… I think I’m at around number 5.

    1. Denial

    A couple of days into your revision, you’re thinking of the long weeks between now and the exam – you’ve got ages, it’ll be fine.

    You’ve done two hours of “reading” today – most of which was probably spent trying to find the right set of notes, ordering your highlighters into an appropriate rainbow effect and googling funny cat videos.

    You deserve a break – after all, in a few weeks you’ll be snowed under and won’t have the luxury of time to do other things and enjoy life outside the imprisonment of your degree.

    revision

    2. Panic (stage 1)

    This is probably somewhere around a couple of weeks into “proper revision”.

    You’ve still got a few weeks left, but, be honest, you probably haven’t been massively productive so far. You’ve looked at a calendar, maybe drawn up a timetable, looked at the list of topics to cover… and absolutely crapped yourself.

    3. Bargaining

    Shortly after panicking, you try to work out how you’re realistically going to tackle this.

    “If I cram 10 lectures worth of notes into half an hour, I should be able to cover the course in time,” you reason.

    Maybe at this point, you’re already deciding which topics to bin and, instead, go for a “strategic approach”, which involves trying to work out questions likely to be asked. However, in the time you spend looking up past papers, asking people a year older what they were asked and trying to calculate what hasn’t come up in a while, you probably could have just read about those diseases and conditions you are sacrificing.

    You also waste a lot of time looking up the elusive course information documents you definitely should have found a long time ago, but were not really listening when advised to do so in your final year induction lecture.

    You desperately work out which parts of the exam you have to pass, where you could make up marks, and the worst possible mark or grade you could get and still pass.

    This doesn’t really change your outlook at all.

    4. Past caring

    You feel like you haven’t seen daylight for days or worn anything but “comfy clothes” for a while, while the diet/fitness regime has gone down the toilet.

    You’ve been locked in this hell forever and still feel like you have forever left (probably about two weeks). You’ve lost all motivation and just want it to end now.

    3b9daa795f7e5f7259dc9986093d3fdd

    5. Panic (stage 2)

    Anytime from a week to a few days before, panic sets in again.

    Okay, you really have to get your act together. It’s now or never – you’ve got five years worth of stuff to learn in four days… sounds reasonable?

    But you don’t have time for a full-scale breakdown. This panic stage tends to be more productive and actually kicks your lazy butt into action. Get the caffeine on board and get on with it.

    6. Hysteria

    The combination of exhaustion and your brain feeling like total mush results in a drunk-like hysteria. Something that probably isn’t that funny makes you cry with laughter; a diaphragm deep bellow, as if you’d forgotten how to laugh or be happy.

    You realise you’ve probably gone a bit mad, but don’t even care – the end is in sight.

    7. Acceptance

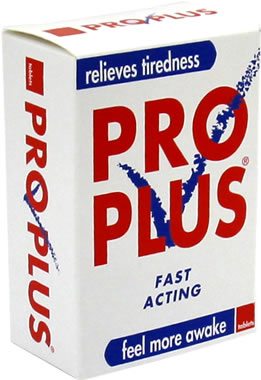
    pro-plus-tablets-24xWhether it’s the night before the exam as you close the books and try to get a good night’s sleep, or as you walk into the exam room buzzing from the seven Red Bulls you downed in the past four hours off the back of yet another pre-exam all-nighter, you will finally reach a point of acceptance. There’s nothing more you can do now except stay awake long enough to finish the paper your degree depends on.

    It’s all very well when people who’ve likely never sat a veterinary exam offer you extremely unhelpful and unrealistic advice – such as “drink green tea instead of coffee”, “get lots of sleep” and “take regular breaks” (jeez, if I took a break every 15 minutes, it would take 20 years to get this degree) – but you’ve got this far using whatever “unhealthy” method works for you, so believe in yourself. It’s the last push now and you’ll never have to sit an exam again (maybe).

    Anyway, I’d better get back to my cocktail of Pro Plus, chocolate and Earl Grey.

    Good luck!

  • It’s good to talk…

    It’s good to talk…

    The issue of poor mental health in the veterinary profession as a whole is becoming more recognised, and has sparked the launch of initiatives such as Mind Matters and Vetlife’s helpline service. But what about vet students specifically?

    riding team
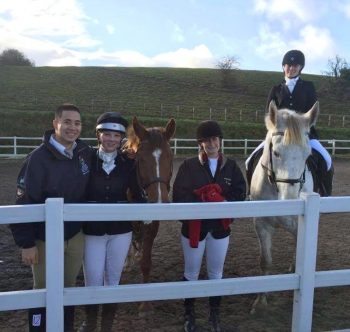
    Despite not being selected for the sports teams she tried out for initially, Jordan (mounted) got on to the riding team during her second year at Glasgow.

    When I was applying for vet school, I remember numerous people told me the hardest part is getting in… well, they lied. Having now spent five years at Glasgow, I can’t even comprehend why they would spread that awfully inaccurate myth.

    My first inkling this oft-repeated phrase was totally unfounded came during one of our first lectures where my entire second year of A-level physics was summed up in an hour – and the pace only continued to pick up from there.

    Difficult beginnings

    Along with the personal struggles of moving away to university (in my case, 300 miles from home), not being selected for the sports teams I tried out for and the social pressures (feeling I had to take part in things despite feeling exhausted and wanting to sleep), it was hard.

    I also had a sense of emptiness – having worked my entire life towards getting into vet school, once I got there, it was like: “Now what?”

    I began to wonder whether veterinary was really the right career for me and, in the first term, seriously considered leaving.

    No alternative

    One of the main things that kept me there was the simple fact I didn’t know what I would do instead. I took my car back with me after Christmas, which helped with logistical issues, and started an evening creative writing class that gave me the opportunity to get away from vet school and vet students every so often.

    By the summer of first year, I still wasn’t convinced I would stay. I hinged my fate on exam results, deciding I wouldn’t have the motivation to resit them because my heart wasn’t in it.

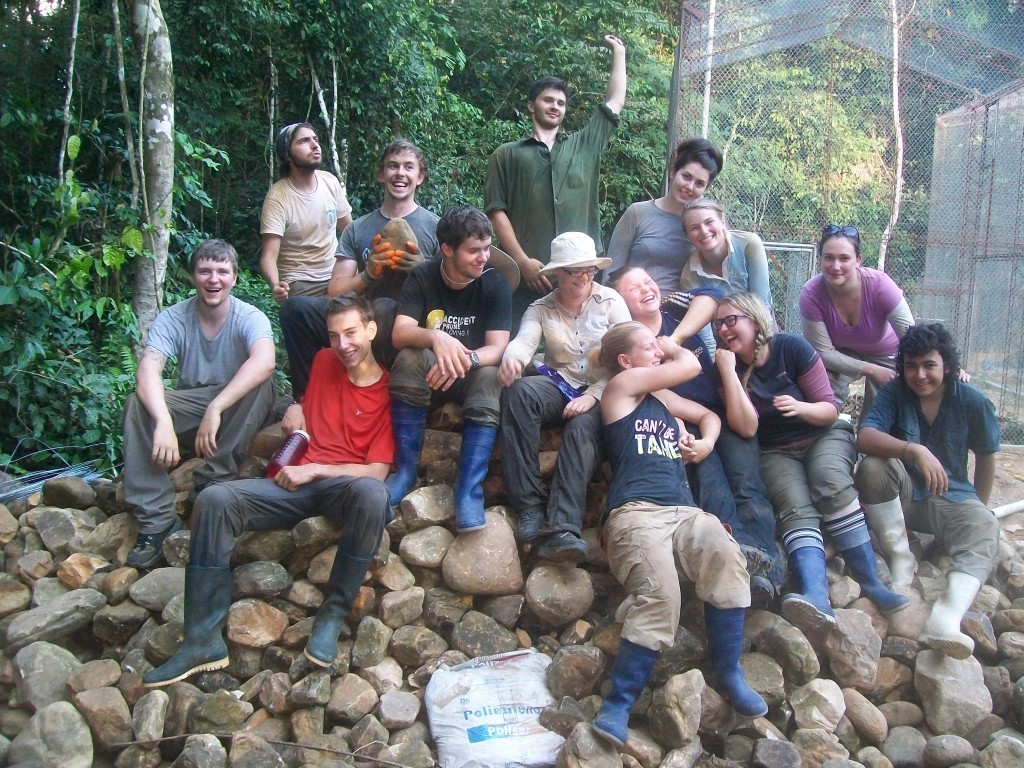
    Jordan and the team of volunteers at Inti Wara Yassi.
    Jordan and the team of volunteers with Bolivian NGO, Comunidad Inti Wara Yassi.

    However, I passed, and bundled myself on to a plane to South America to undertake some EMS in the Amazon rainforest. My time in Bolivia was incredible and rekindled a long-forgotten passion.

    After that, my vet school experience shifted massively. I suddenly loved being a vet student – I got on the riding team, became more involved with the social side of vet school and continued my love of writing through getting involved with the Association of Veterinary Students.

    I was the definition of the “work hard, play hard” vet student, but it was all about balance – the negatives of being a vet student were being outweighed by the positives.

    Serious doubts

    I still wasn’t particularly enthused by the course and merrily carried on because I was coping. Besides, a veterinary degree didn’t have to culminate in a veterinary career.

    Every exam period was a rite of passage to get to the next year. Before Christmas, one year, we had nine exams in eight days – I think I averaged two hours’ sleep a night that week, but we got on with it. Everyone moaned together and everyone came out the other side, one way or another.

    Nobody is immune – even at later stages in the course, those students who were high achievers and never seemed phased by anything started having doubts – serious “I’ve been to discuss where my degree stands if I drop out now” doubts.

    By fourth year, I’d reached a level of acceptance that, since I’d got this far, I may as well carry on.

    A sense of equilibrium

    I started final year rotations absolutely terrified, but took comfort in the shell-shocked looks reflected in my classmates’ faces on the first morning of medicine rounds in the small animal hospital. We were all in the same boat.

    Yet, finally, I found my stride; I have absolutely loved final year. For the first time in five years, I didn’t regret my life choices and found myself thinking “this is exactly what I want to do”. I was fascinated by medicine and felt a real sense of achievement of actually doing things for myself, such as taking consults and performing surgery.

    Again, some of my peers hit their “walls” during final year, but we got them over it.

    Another nugget of advice “they” tell you is final year will fly by. That one, I’m afraid, is not a lie – I can hardly believe I’m sat here with 12 months of rotations behind me, already facing finals and job applications.

    All in the same boat

    Jordan
    Jordan eventually “found her stride” during final year rotations.

    Everyone has a wobble at some point and thinks “why am I doing this to myself?” The important thing is to remember other people are probably feeling the same way.

    Mine was very early on, when everyone else seemed to be loving life, and I felt so alone. I felt like I would let my family and friends down if I dropped out, so felt too ashamed to say anything. However, when I eventually voiced my feelings, it transpired a lot of people were thinking the same.

    A lot of support is out there now, which can be accessed in different ways. Each university will have a formalised counselling service and many vet schools now have a peer support system in place – this has been a huge success at Glasgow.

    Meanwhile, Vetlife offers confidential telephone support to vets and vet students alike if you need an impartial, anonymous ear.

    Feelin’ good

    Glasgow recently held “Feel Good February”, a month of events and activities to raise awareness of these services and promote good mental well-being around the vet campus, part of which involved defining the problem at Glasgow specifically.

    The Glasgow University Veterinary Medical Association revealed the results of a survey, which showed:

    • 62% of current vet students felt stress had a negative impact on their everyday life
    • 89% felt it was normal to feel stressed during a veterinary degree

    This normalisation of stress can lead to students feeling they should be able to deal with it, but that the inability to cope will not translate well to life as a vet. It’s a very tough course for a number of reasons, including the workload that was described by our professor, Ian Ramsey, as “savage” in an STV interview.

    However, this perception students should be stressed leads to an inability to speak out, for fear of seeming weak and “not cut out” for veterinary.

    So worth it

    I cannot imagine where I would be now if I hadn’t carried on with my veterinary degree. I’m so grateful friends and family supported me through everything and I made it to the point of starting a veterinary career knowing wholeheartedly this is what I want to do.

    If you’re thinking of dropping out, please talk to someone – I can guarantee they’ve felt the same at some point. And if you’re having a particularly tough rotation or coming up to exams, power through and help each other – it’ll be worth it in the end!