Tag: anaesthesia

  • Blood transfusions, pt 1: clinical signs

    Blood transfusions, pt 1: clinical signs

    I get asked frequently when is the right time to transfuse an anaemic patient?

    The difficulty lies in the fact not all anaemic patients require blood transfusions. Just because a patient has pale mucous membranes does not mean the patient needs a transfusion.

    The term commonly brought up during the discussion is “transfusion triggers present”.

    What constitutes a “transfusion trigger”?

    A couple of different definitions exist: classically, it is the PCV or haemoglobin level at which a transfusion is indicated in an individual animal – essentially, if it gets below a certain number, transfusion is required – but it is not always that simple. Just because the PCV is 15%, it doesn’t always mean a transfusion is required.

    When the PCV drops low enough, clinical signs of reduced oxygen delivery to the tissues start to develop, these include:

    • decreased exercise tolerance
    • weakness
    • dull mentation
    • tachycardia
    • tachypnoea
    • elevated lactate levels when shock has been addressed

    Rapid or slow?

    These clinical signs are influenced by the speed at which the anaemia has developed.

    If the anaemia has occurred rapidly due to internal bleeding from trauma or a ruptured organ, these clinical signs can present in a matter of minutes, depending on how big the bleed is. This means a transfusion might be indicated when the PCV is still 25%, especially if further rapid blood loss is likely.

    If the anaemia developed over days to weeks (slow red cell destruction or anaemia of chronic disease, for example) transfusion triggers might not be present until the PCV drops below 15%, as the body has had time to compensate.

    Summary

    So, in summary, the decision-making process involves asking the questions:

    • What is the PCV?
    • How fast has the anaemia developed?
    • Are there clinical signs of reduced oxygen delivery?
    • Is further loss likely?

    When you combine the core aspects of each of the questions above, “transfusions triggers” change from absolute numbers to this:

    • PCV under 15% with clinical signs of reduced oxygen delivery.
    • Rapid PCV drop to under 20% in dogs and 15% in cats.
    • PCV under 25% and surgery or anaesthesia is required, and/or rapid ongoing blood loss is occurring.

    Blood products you should use and why will be covered in a future post.

    Note: Haemoglobin levels should also be assessed in conjunction with the PCV.
  • Thoracentesis, part 1: indications, equipment and protocol

    Thoracentesis, part 1: indications, equipment and protocol

    Thoracentesis is a relatively straightforward and life-saving technique for seriously dyspnoeic animals with pleural space disease, and is a valuable diagnostic tool.

    Here are my tips for getting the most out of your approach to performing a thoracentesis.

    Indications

    • Therapeutic – relieve respiratory distress caused by pleural effusions and pneumothorax.
    • Diagnostics – cytological examination of pleural effusions will refine your differentials list and dictate subsequent management.

    Equipment required

    In addition to general equipment for clipping and prepping of the surgical site, the following tools are required to perform thoracentesis:

    • oxygen and mask
    • 20ml to 60ml syringe
    • 16G to 21G butterfly needle
    • three-way tap
    • extension set
    • ethylenediaminetetraacetic acid tubes (for cell counts)
    • sterile collection tubes (for culture and cytology)
    • fluid collection bowl (non-sterile collection)
    • +/- lidocaine 1mg/kg to 2mg/kg for centesis site

    Protocol

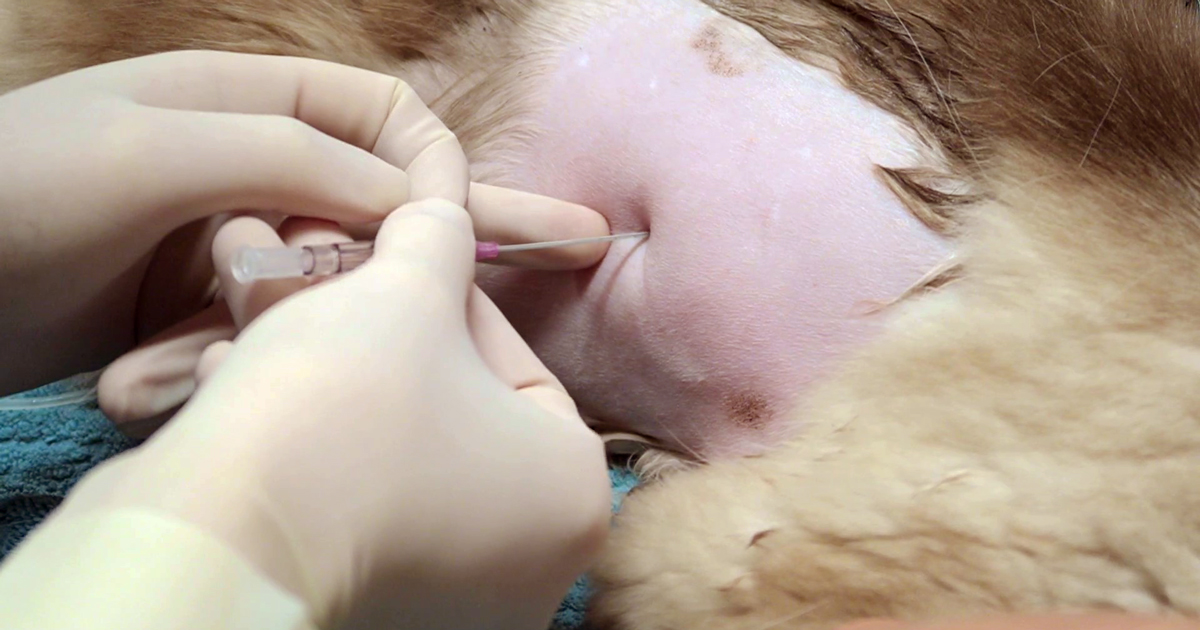
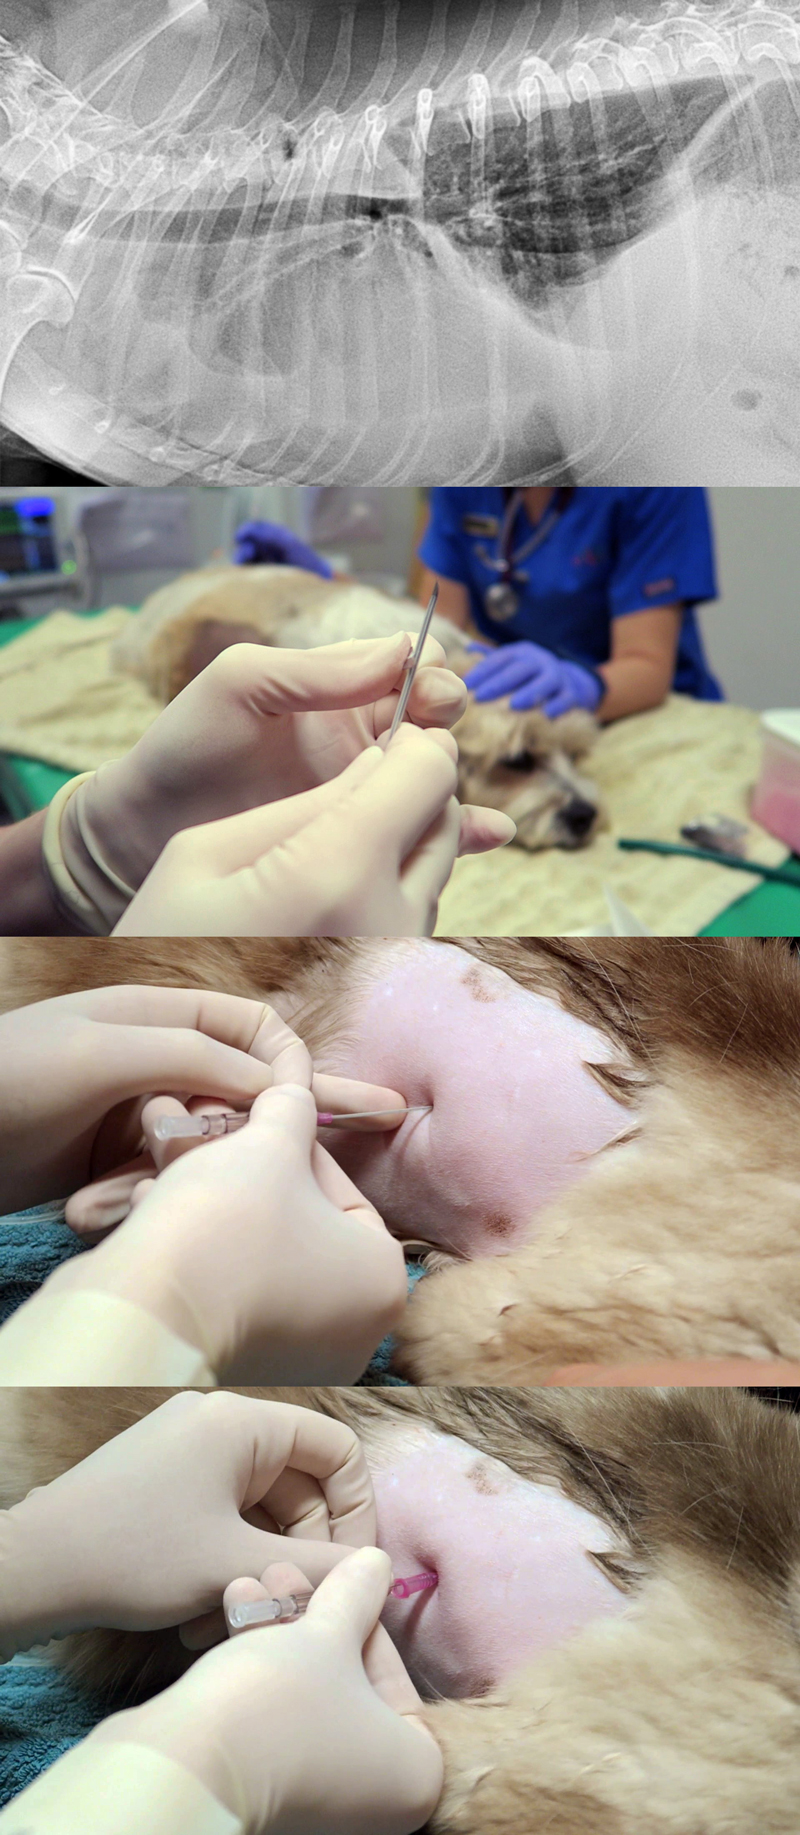
    1. Patient comfort

    Thoracocentesiscombined
    An approach to performing a thoracentesis.

    a. Options include local anaesthetic infiltration of the intended centesis site, and/or IM or IV opioid pain relief at standard doses.

    b. Opioid pain relief, such as butorphanol, is great for sedation that facilitates the process.

    c. Depending on the case, I often use opioid pain relief without local. This is sufficient in the vast majority of cases.

    d. If severely dyspnoeic, anaesthesia and intubation can help facilitate the process. It will reduce patient stress, enable manual ventilation and administration of 100% oxygen, and allow for larger volumes of air/fluid to be removed.

    2. Patient positioning

    Generally, sternal is easiest – otherwise, lateral recumbency or standing (if the animal will tolerate it).

    3. Site

    a. Locate the seventh to ninth intercostal spaces.

    b. To remove air, clip the dorsal two-thirds of the chest.

    c. To remove fluid, clip the ventral two-thirds of the chest.

    d. Clip a larger area than you expect.

    e. Prepare the area for an aseptic procedure.

    4. Connect everything

    a. The syringe to the three-tap and extension set should be ready prior to connecting the butterfly catheter.

    b. Often, a rush occurs to connect everything after the catheter is in place.

    5. Needle insertion

    a. Insert the needle on the cranial edge of the rib to avoid the nerves and blood vessels that run along the back of the rib.

    b. Ultrasound guided is best for fluid; you can lube the inside of a sterile glove and put the probe inside the glove to keep the area sterile.

    c. An IV catheter can also be used. I partially fenestrate a 20g IV catheter with two extra holes – once the catheter is advanced into the chest minimal risk exists of trauma to the lungs, and larger volumes of fluid and air can be removed.

    6. After insertion

    a. Once through the skin, connect to the extension set and apply gentle negative pressure. This can help determine how far you need to advance the needle into the chest.

    b. Sometimes a small syringe, such as 10ml, is better for smaller volumes as it creates less negative pressure. Pulse the negative pressure.

    7. Collect samples

    Make sure you collect the required samples from the first collection, as this is often the best sample and means you don’t forget.

    Overall, if you feel it is necessary to perform an emergency thoracentesis then do not delay. Most animals will tolerate the procedure well and have immediate dramatic improvements in respiratory rate, effort and oxygen saturations – all great outcomes for any dyspnoeic patient.

    Next week, we will look at what to do with the collected sample.

  • Cutting edge (Goad in Goa, pt 2)

    Cutting edge (Goad in Goa, pt 2)

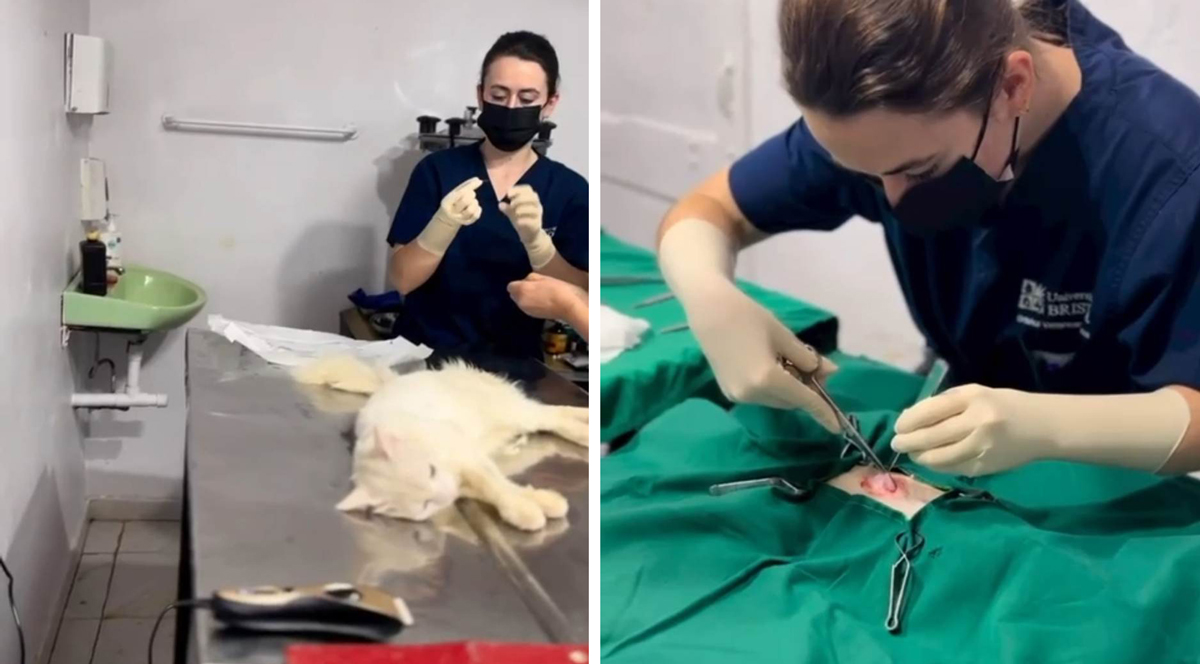
    My recent trip to India comprised two weeks of intense sun, gorgeous beaches and delicious food that truly tested the constitution of my stomach. The majority of my time, however, was spent doing what I had gone all the way out there to do: surgery – lots and lots of surgery!

    After 10 weeks of my clinical EMS was shut down by the pandemic, I had felt the desire to both travel and gain extra experience wherever possible, and so a surgical course based in Goa sounded like the perfect solution.

    Spays for days

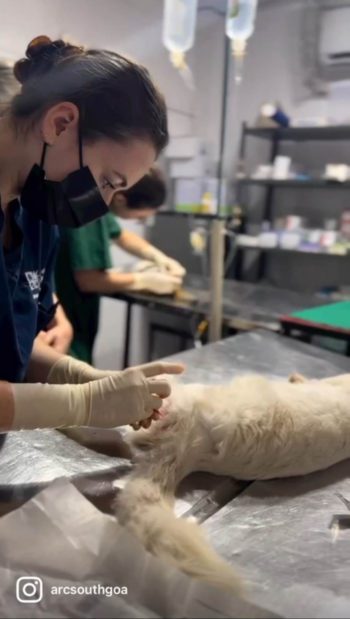
    Image courtesy Animal Rescue Centre, South Goa.

    For my friend and I, the holy grail of all surgeries was the dreaded bitch spay. At the end of our placement – after what we presumed would initially be just watching, then maybe some helping, probably followed by a whole lot of cat castrating (the gateway surgery for newbies) – it was our hope that we would maybe (maayyybe) even be allowed to attempt a bitch spay for ourselves.

    It didn’t ever occur to me that I would be executing my first bitch spay, from start to finish, by day three. Nor did I ever imagine that I would leave having done a total of 10… essentially one per day (although on some days we did two each).

    Ironically, cat castrates were few and far between – even dog castrates for that matter – and of the 25 total surgeries I performed in those weeks, 16 were spays.

    Left in the dark

    The main thing I took away from the trip (aside from sore fingers) was a newfound appreciation for the fundamentals of surgery.

    As was initially advertised to us, the clinic we found ourselves working in was charity based, and so lacked many of the facilities I think I’d learned (without even realising) to take for granted back home. Instruments were sterilised in an autoclave, there was no inhalant anaesthesia available, and no patient monitoring beyond CRT, pulse and breathing rate.

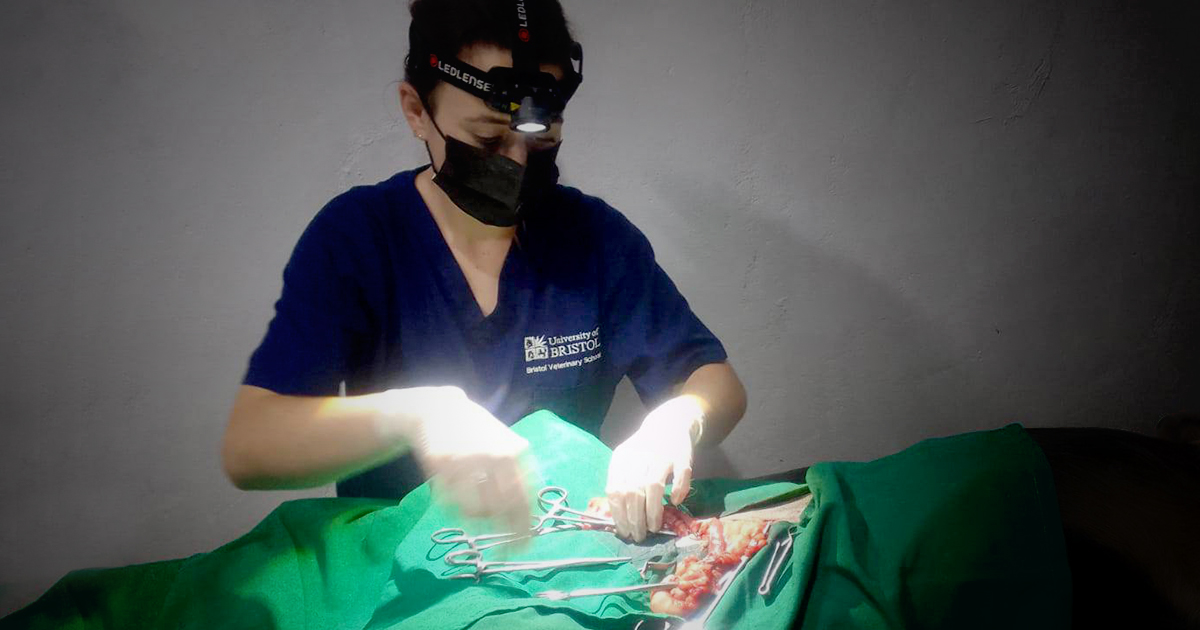
    Plus, since there was no surgical lighting, and only one table was directly beneath the light, it meant a really deep-chested bitch spay on the other end of the room felt like operating in the dark.

    How does it feel?

    With no surgical lighting and only one head-torch to share between the two of us, the vet monitoring us joked towards the end of the placement that I could perform surgery by braille.

    Although I wouldn’t recommend this approach to anyone, it gave me an incredible appreciation for the feel of normal versus abnormal anatomy – and that’s something no amount of revision or surgical observance could ever have given me.

    Anaesthesia was purely parenteral, with top-ups being given as needed. We were all quite surprised by how well this worked for the majority of surgeries, with only a few hiccups along the way (and by hiccups I mean that, on one occasion, my patient turned around to look at me while I still had my fingers inside its abdomen).

    The EMS placement’s main advertising pull had been as an opportunity to gain “incredible surgical experience”, says Eleanor.

    Expect the unexpected

    No matter how much they teach you, or how well you learn the steps, there will always be a surgery – usually a bitch spay – that throws you a curveball (unfortunately, our patients haven’t read the textbook and are under no obligation to behave).

    Whether it’s a ginormous blood vessel masquerading in a portion of facia, or a large glob of fat obscuring your view, every spay (even every castrate) has the potential to be entirely different to the previous one; surgery is not an endeavour for people who can’t roll with the punches or adapt their plan to a new situation.

    I’ve heard the phrase, “no plan ever survives first contact with the enemy”, but I think my own proverb would read: “No surgical plan ever survives first contact with the patient.”

    Well taught

    One of the best instruments a vet can have at their disposal is support. My friend and I could not have asked for a better teacher, and the skills taught to us will undoubtedly be invaluable to us during the next stage of our careers.

    I wouldn’t say that surgical programmes like this are for the faint hearted, but it provided me with experience that I simply would not have been able to gain had I not stepped out of my comfort zone.

  • Nutritional healing power

    Nutritional healing power

    Nutrition is a key factor in a patients recovery; in fact, numerous studies show getting patients to eat as soon as possible or providing nutritional support early has several benefits:

    • Patients start to eat on their own earlier.
    • They are less nauseous once they start.
    • Reduced mortality.
    • Improved wound healing.

    All of these contribute to overall improved outcomes for the patient.

    Encouraging patients

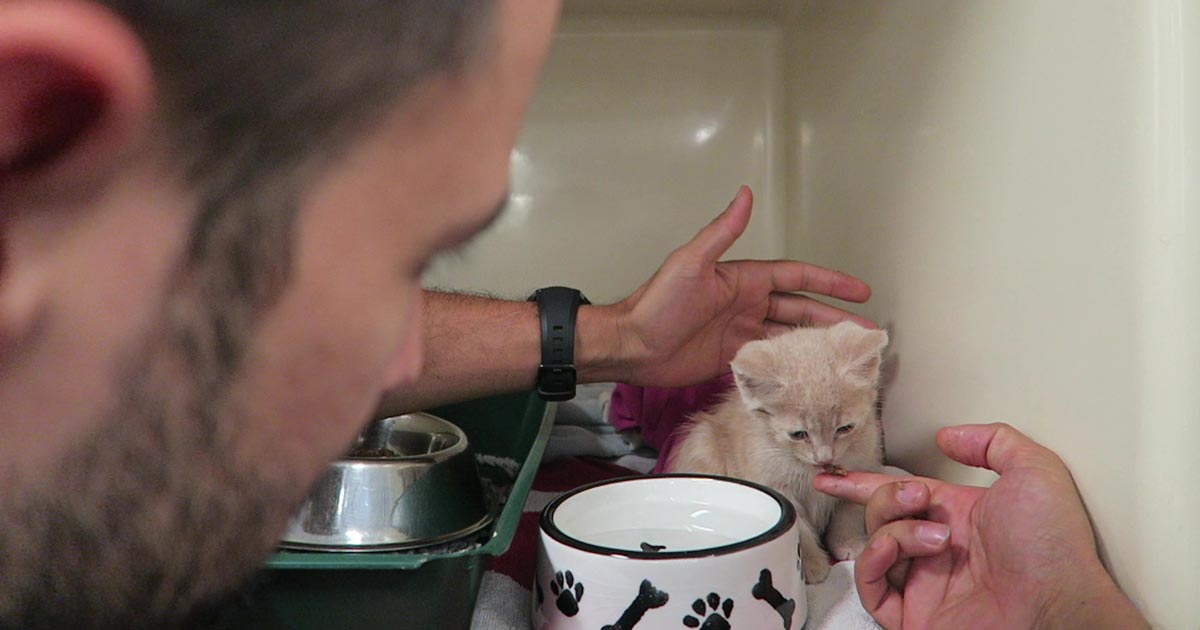
    At Animal Emergency Service we treat the sickest of the sick so we work hard towards encouraging patients – just like the kitten pictured above – to eat as soon as possible. So, after they have recovered from their anaesthesia we make sure there are no contraindications, we address their nausea and pain, then offer food.

    It is best for the patient and feeding to use as much of the gastrointestinal tract as possible, meaning it’s better if they eat on their own, otherwise the next best thing is an oesophageal tube, followed by a tube into the stomach, such as a nasogastric tube.

    Focused approach

    So, in combination with the management of pain, nausea and the underlying illness, we first encourage them to eat on their own. We begin with offering an assortment of different foods, warmed up to increase aromas, or ask owners to try to feed their pet.

    If they are critically ill we will take a more focused approach with feeding tubes, as they are unlikely to eat on their own by themselves for several days.

    We feel a proactive approach to early nutrition helps get our patients home to their families earlier.

  • Laryngeal paralysis

    Laryngeal paralysis

    This patient was brought to us for exercise intolerance, breathing difficulty and loud airway sounds.

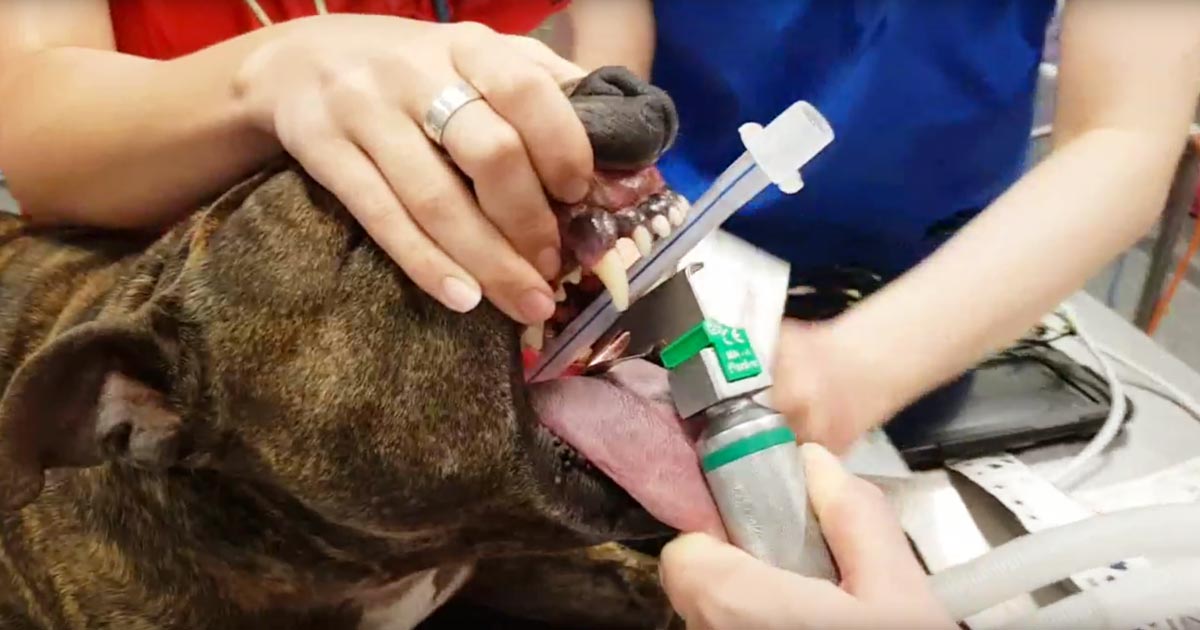
    The patient has laryngeal paralysis. This is where the muscles controlling the arytenoids cartilages do not work and leads to failure of opening of the arytenoids during inspiration.

    Most commonly seen in middle-aged large breed dogs, it can occur acutely, but more often it is a chronic problem exacerbated by heat or stress. The cause is often unknown, but it can be caused by trauma or lesion to the cervical region or some kind of neuropathy, such as myasthenia gravis or tick paralysis. Diagnosis is based on visualisation of the arytenoid cartilages failing to abduct during inspiration under light anaesthesia.

    Treatment

    The management of the acute presentations include oxygen and sedation (butorphanol) to improve airway dynamics – with or without active cooling triggered by heat and with or without anti-inflammatories (dexamethasone) to reduce swelling secondary to airway turbulence.

    Patients in severe respiratory distress, anaesthesia and intubation may be required for a short period. Long-term management involves either surgery, such as laryngeal tieback, or conservative management strategies that involve weight loss, avoiding exercise and being kept in a cool environment.

  • Focus on GDV, part 2: releasing the pressure

    Focus on GDV, part 2: releasing the pressure

    Last week we covered IV fluid resuscitation and pain relief. This week we will go into more detail about gastric decompression.

    stomach tube
    Passing the stomach tube inside the roll down into the oesophagus (click to zoom).

    Gastric decompression can be achieved in two ways:

    1. trocarisation
    2. stomach tube (orogastric tube) placement

    The decision on which method to use depends on many factors – personal preferences, past experiences and clinical protocols, to name a few.

    So, which one is best? A retrospective analysis of 116 gastric dilatation-volvulus (GDV) patients (Goodrich et al, 2013) found both methods of gastric decompression had low complication and high success rates, and either technique is acceptable.

    If one method fails to achieve gastric decompression, the other can be tried.

    How to decide

    Personally, I use either or sometimes both. Which one I choose first depends on the situation. My decision-making process goes something like this:

    Not clinically obvious or mild GDV

    These are often diagnosed based on supportive radiographic findings as history and presenting clinical signs making me suspicious of a GDV.

    I would always try to pass a stomach tube in these patients first, as the tube is passes easier when the gastric distention is milder. Although this procedure generally requires prior opioid analgesia administration to help reduce the stress, it can achieve rapid and lasting decompression of the stomach.

    I often leave the tube in throughout stabilisation, just prior to induction of anaesthesia for surgical correction of the torsion. The tube allows continual release of gastric gases that can accumulate again rapidly if the tube is removed prior to surgery.

    Obvious or severe GDV

    The abdomen in these animals is often distended and tympanic. I will perform trocarisation in these cases first, as passing a stomach tube in these patients is often unsuccessful. It allows rapid gastric decompression, which is particularly important in cases with evidence of respiratory compromise.

    After the trocar is no longer releasing gas, I will then pass a stomach tube. At this stage, it is often easier to pass the stomach tube once the gastric pressure has been reduced. Once again, I often leave the tube in during stabilisation.

    How to perform

    Stomach tube

    • The main risk is rupture of the oesophagus or gastric wall.
    • Pre-measure and mark the tube from the mouth to the level of the last rib.
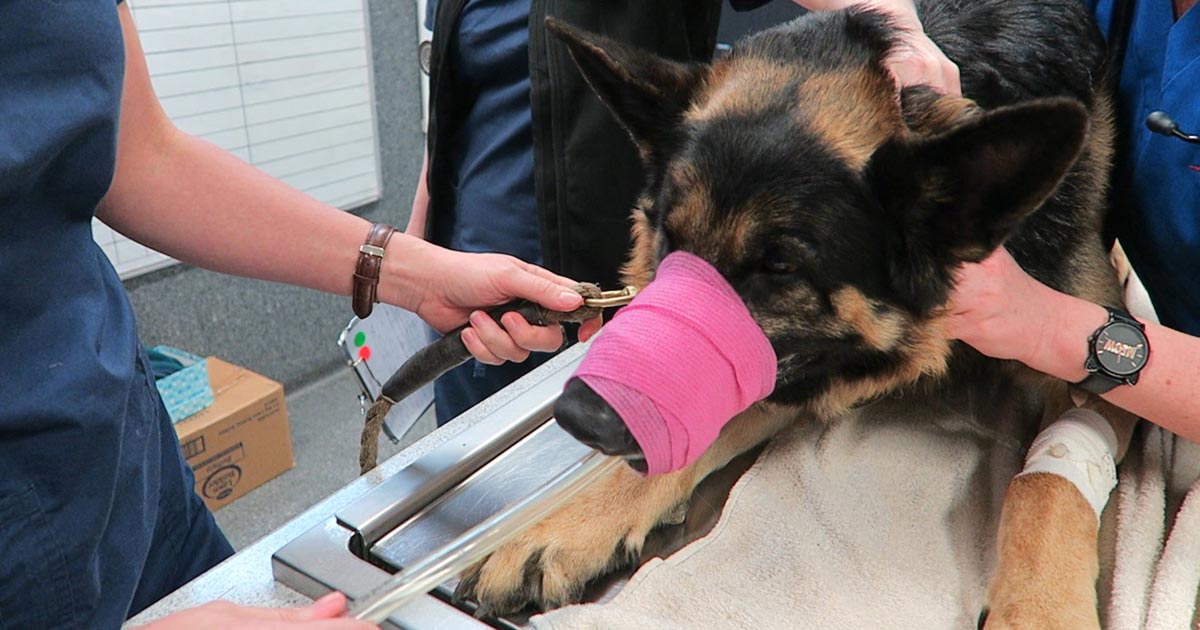
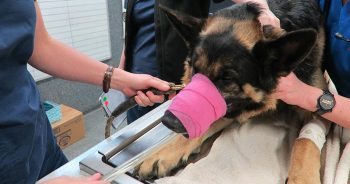
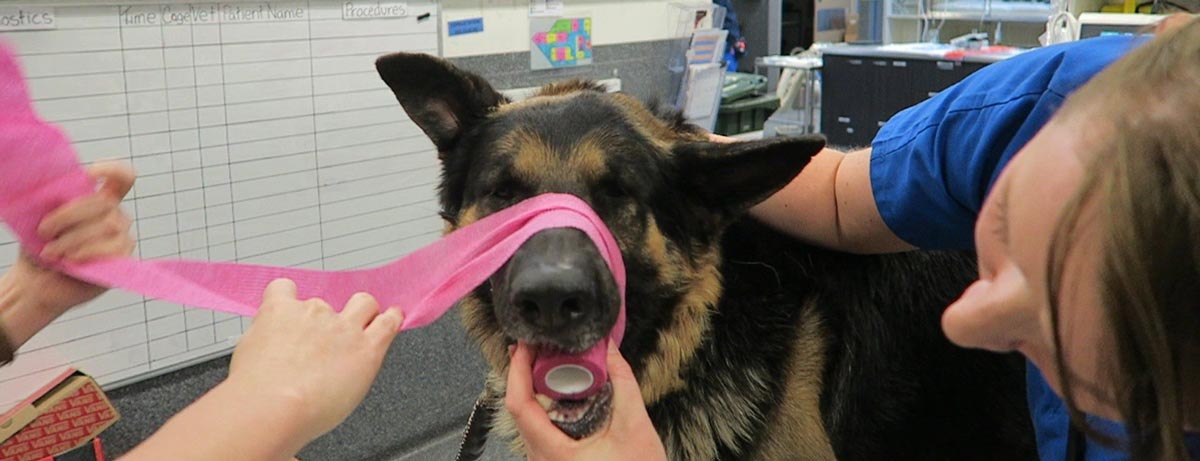
    • Use a roll of adhesive bandaging material as the mouth gag. I prefer to use Elastoplast as it has an incompressible plastic core and the diameter is just large enough to fit our largest diameter stomach tube.
    • Unwrap approximately 30cm of Elastoplast before placing the roll of tape inside the mouth.
    • Wrap the tape snugly around the muzzle to prevent the dog from opening its mouth and dislodging the roll.
    • Lubricate the tube to reduce frictional trauma to the oesophagus.
    • Pass the stomach tube through the core of roll and into the mouth. You will feel a dead end at the level of the lower oesophageal sphincter, where the volvulus has torsed the oesophagus.
    • Apply gentle constant pressure and, most times, the tube will pass through into the stomach. Sometimes a puff of gas can be heard and felt from the aboral end of the tube when it enters the stomach. The tube can also be palpated when the stomach is decompressed.
    • The tube is taped to the muzzle to prevent dislodgement and the aboral end placed in a bucket to allow fluid to exit via gravity and siphon.
    • If it does not pass, reassess to see if trocarisation is required to relieve some pressure in the stomach

    As mentioned above, I generally leave the stomach tube in while continuing to stabilise the patient and prepare for surgery. Gas can rapidly accumulate in the stomach and cause rapid deterioration if the tube is not left in. The tube is removed just prior to induction of anaesthesia.

    tape
    Placing a roll in the mouth to prevent biting down on the stomach tube.

    Trocarisation

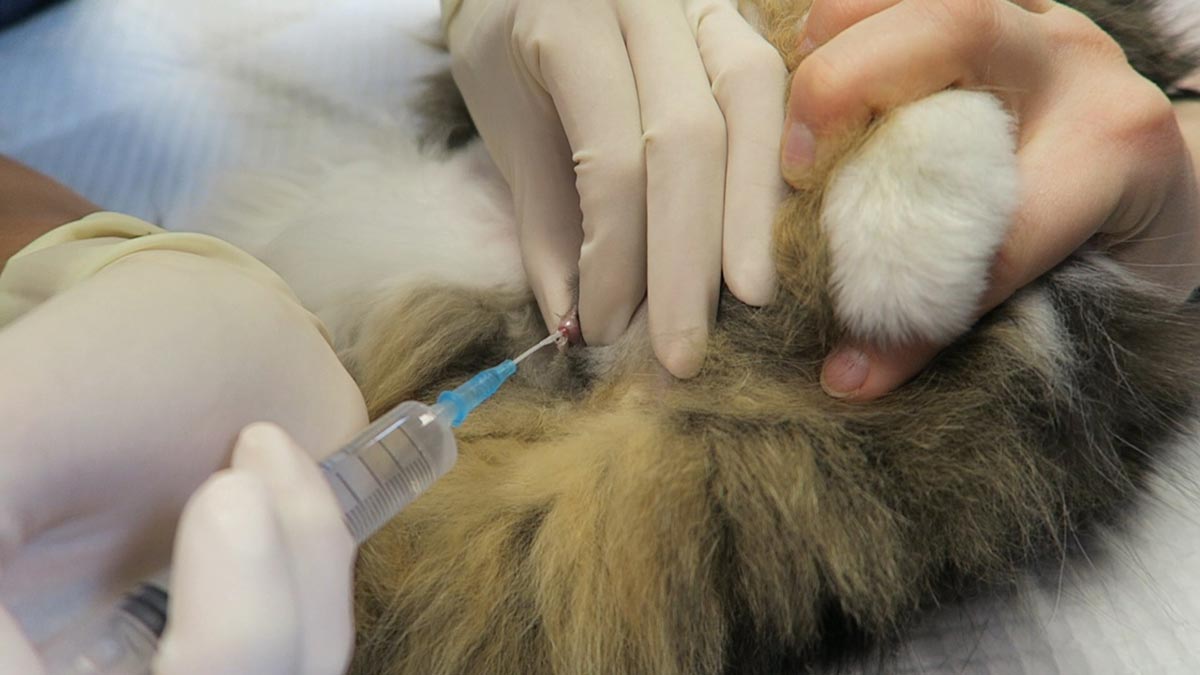
    • The main risk is hitting the spleen while trying trocarisation. To avoid this, identify the most tympanic site by palpation, or use the ultrasound to confirm the absence of the spleen.
    • A 3in, 14g catheter is usually sufficient.
    • Clip and surgically prep a 10cm by 10cm area where you intend to place the catheter.
    • Insert the catheter to the hub and remove the stylet.
    • Although local anaesthetic in the area is ideal, you will not have time to do this in most cases – especially the very unstable ones. Also, since I administer pure opioid agonist intravenously to most confirmed GDV cases on presentation, local anaesthetic is not required.
    • Remove the stylet and gas should come blowing out under pressure.
    • Once the gas flow starts to slow down, gently apply inward pressure or pressure on the dilated stomach, which helps ensure the stylet does not fall out of the stomach and as much of the gas is removed as possible.

    >>> Read Focus on GDV, part 3: surgery tips

  • Temporary catheters in obstructed FLUTDs: buying time with a blocked cat

    Temporary catheters in obstructed FLUTDs: buying time with a blocked cat

    Obstructive feline lower urinary tract disease (FLUTD) is a common presentation in both general practice and emergency settings.

    Every clinician has his or her own approach to treating and managing a cat with obstructive FLUTD signs. Working in an emergency setting, once I have confirmed an obstructed bladder via palpation, I focus on trying to relieve the obstruction as quickly as possible.

    The first step is obtaining consent from the client to administer pain relief (an opioid IV or IM), place an IV catheter, collect blood for biochemistry, electrolyte and blood gas analysis, and temporarily relieve the obstruction.

    At our hospital, we achieve temporary relief of the obstruction generally within 15 minutes of patient arrival.

    Process

    blocked cat
    Obstructive feline lower urinary tract disease is a common presentation in general practice.

    We do this in three steps:

    1. Assess the tip of the penis, occasionally a crystal/mucus plug is all that is blocking the penis.
    2. If this is not the case, I pass a pre-lubricated 22g IV catheter tip (without the stylet) into the penis with a 10ml syringe, containing 0.9% NaCl, connected for hydropropulsion. In the vast majority of cases, this helps to dislodge the urethral blockage enough to enable some urine to pass (urination suggests active urination by the cat).
    3. Once urine is flowing, I pass a 12cm or 14cm rigid catheter, tape it to the tail and leave it in place to allow constant drainage.

    If the 22g IV catheter does not relieve the obstruction, I would use a rigid catheter and progressively advance it up the urethra while hydropropulsing with the saline the entire time. Once unblocked, then I will tape it to the tail as aforementioned.

    Quick Tip: Once you have the catheter in the tip of the penis, pull the prepuce straight out to straighten the penis and thus the penile urethra. Otherwise, the bend in the penile urethra may hinder the passage of the catheter.

    Benefits

    The benefits I see of placing a temporary urinary catheter include:

    • immediate relief to the patient and reduces their stress levels
    • provides a sample for urinalysis
    • allows you time to run through the diagnostic and treatment plan in more detail with clients
    • buys you time to stabilise the patient for their anaesthetic later to place a closed system indwelling urinary catheter and then bladder lavage

    Quite often, your patient would present unwell enough that you should have no issues (resistance to) passing this temporary urinary catheter, provided you have given pain relief on presentation.

    In fractious patients, I usually forgo the temporary catheter and focus on stabilising the patient. The aim is to have them stable as soon as possible for sedation or a general anaesthesia to place a longer indwelling urinary catheter.

  • Isoflurane and oxygen: the dangers of 2 and 2

    Isoflurane and oxygen: the dangers of 2 and 2

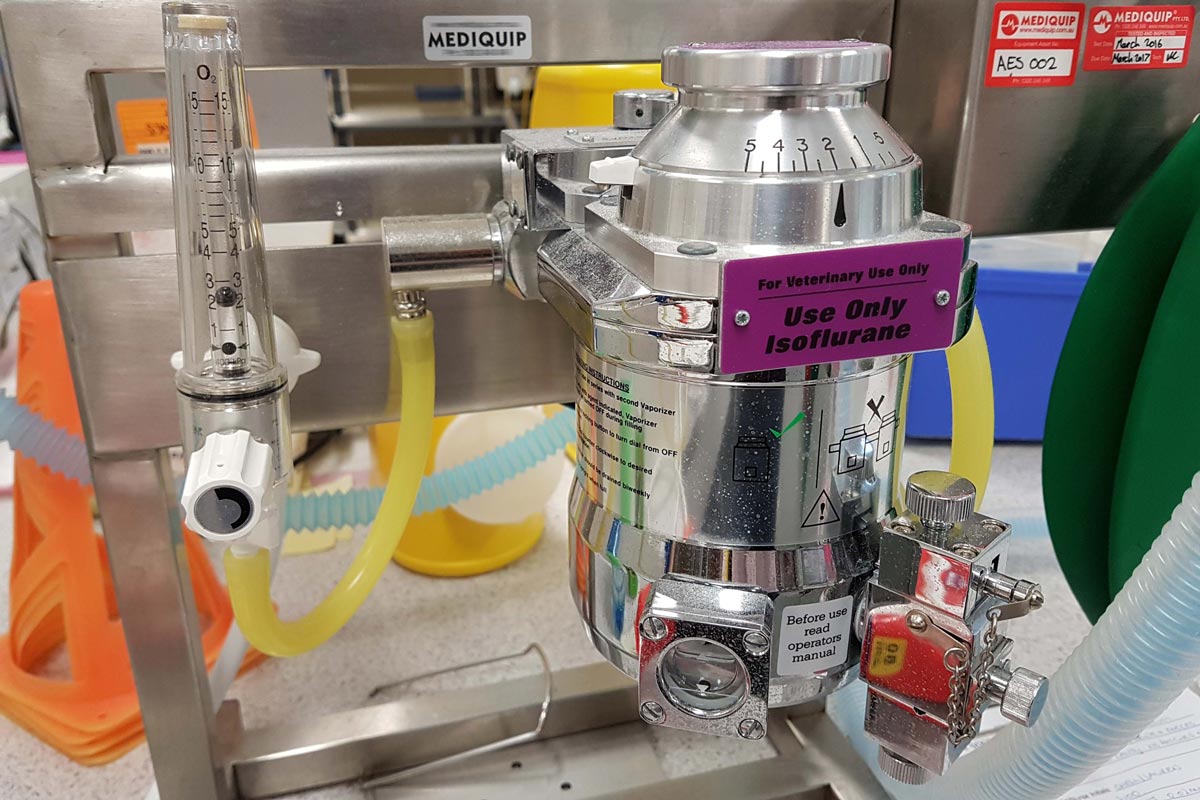
    It is a common practice to place all patients on 2% isoflurane and 2l/min oxygen flow rate, but blanket isoflurane saturations and oxygen flow rates can be dangerous.

    2 and 2
    Take time to consider your anaesthetic approach.

    Without a doubt, the majority of patients seem to do just fine at these levels; but every patient is different, and simply placing all patients on 2% isoflurane and 2l/min oxygen may be introducing an easily avoidable risk into anaesthesias.

    Isoflurane

    Isoflurane can cause severe effects such as hypotension and respiratory depression, so 2% isoflurane may be too high – especially for patients that are critically ill or have been premedicated with sedatives/anxiolytics.

    In these patients, the isoflurane can be safely titrated down while monitoring the patient’s reflexes and vitals. Consider administering IV pain relief instead of turning up the isoflurane levels if the patients are too “light” and responding to pain. Examples include a low dose pure-opioid.

    It is important to titrate its use like any other anaesthetic agent, maintaining an appropriate level of anaesthesia while minimising potential side effects.

    Oxygen

    It is common to use a standard 2l/min oxygen flow for all anaesthetics regardless of the type circuit, but this will not meet the oxygen requirements for larger patients. It is best practice to work out the appropriate flow rate amount using an oxygen consumption chart.

    I cannot stress enough the importance of taking the time to consider your anaesthetic approach in patients, especially compromised ones such as those with renal/hepatic disease or circulatory deficits.

    Titrating anaesthetic agent levels can increase the stability of your patient under anaesthesia and significantly reduce the life-threatening complications.

  • Anaesthetic risks: when complacency sets in

    Anaesthetic risks: when complacency sets in

    Adverse events during anaesthesia in otherwise young and healthy patients is a rare occurrence. However, with low incidence of adverse events could come an increased risk of complacency on the part of the veterinary team.

    Take the following case as an example:

    Clicky
    Clicky the cat with Gerardo and his team.

    “Clicky” is a young and healthy cat that underwent a routine dental prophylaxis procedure. A few days after the procedure, she developed respiratory difficulties and presented to our emergency clinic.

    Possible problems

    She was diagnosed as having severe subcutaneous emphysema, most likely from a tracheal wall compromise that would have occurred as an adverse event from tracheal intubation.

    We need to handle cats very gently while they are intubated as their tracheas are nowhere near as robust as their canine counterparts.

    Overinflating the cuff is another cause of tracheal necrosis.

    Never be complacent

    What we think happened was the patient was repositioned during the dental procedure and the endotracheal tube was twisted in the process, causing either ischaemic compromise to a portion of the trachea or direct damage to the trachea.

    Thankfully, “Clicky” made a full recovery, but this case certainly highlights that we must never be complacent when it comes to handling our anesthesia cases.

    Low incidence does not mean no incidence, and individualised anaesthetic plans – along with in-depth training for the anaesthetist (who most often are veterinary technicians and nurses) – will help reduce the chances of adverse events occurring.

    Clicky's x-ray
    Clicky’s x-ray

  • Linear foreign bodies, part 3: should YOU take it to surgery?

    Linear foreign bodies, part 3: should YOU take it to surgery?

    In the previous post we covered what to look out for on ultrasound when assessing for a linear foreign body. Now we discuss the things you should consider before deciding to take the patient to surgery.

    Read the following statements and answer the questions – either yes or no…

    • Linear foreign body surgeries can be technically difficult and can take a prolonged period of time to perform. The longer the surgery, the higher the rate of complications. Are you (or do you have access to) an experienced surgeon who has performed a linear foreign body surgery before, and do you have an additional pair of hands for surgery to help reduce surgery time?
    • Were bacteria visualised or is their presence likely based on the comparison of the abdominal fluid glucose and lactate to peripheral blood (see previous post)? If yes, then septic peritonitis is present. Approximately 40% of dogs with linear foreign bodies will have septic peritonitis. This means you need to be prepared to perform a resection and anastomosis; sometimes two. Have you performed a resection and anastomosis before?
    • Often a combination of gastrotomy, enterotomy, and resection and anastomosis are required. Are you prepared to perform a combination of these surgeries?
    • Linear foreign body surgeries can often require a significant number of surgical instruments and consumables. Do you have Balfour retractors, forceps, clamps, additional kit for closure, supply of lap sponges, as well as substantial amounts of lavage and access to suction?
    • Linear foreign body patients are often critically ill due to septic peritonitis. They can present in shock and have biochemical derangements such as hypoalbuminaemia, which indicates the need for perioperative critical care. Do you have experience stabilising, performing anaesthesia and postoperatively managing a critically ill patient?
    • Hypotension can be caused by hypovolaemia; however, if the hypotension has not responded to reasonable volumes of a balanced isotonic crystalloid fluid – for example, 30ml/kg to 40ml/kg – then the hypotension could be caused by vasodilation from septic shock. This means vasopressor agents will be required in addition to crystalloids. Do you have access and experience with vasopressor therapy?

    Image: Gerardo Poli.

    Conclusion

    This list of questions is not meant to be conclusive or definitive, but merely a list of considerations before taking a linear foreign body patient to surgery.

    If you answered no to many of these questions, then consider referral to a facility that is prepared and equipped for the challenges that often accompany linear foreign body patients. However, if referral is not an option, consider the list above as a way to be as prepared as possible for tackling those situations.