Blog

  • When emotions run high

    When emotions run high

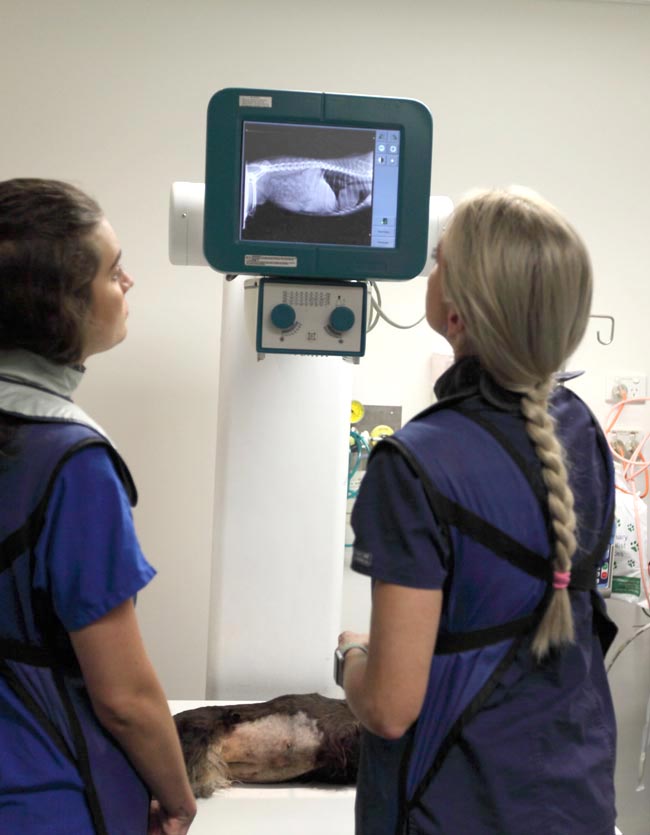
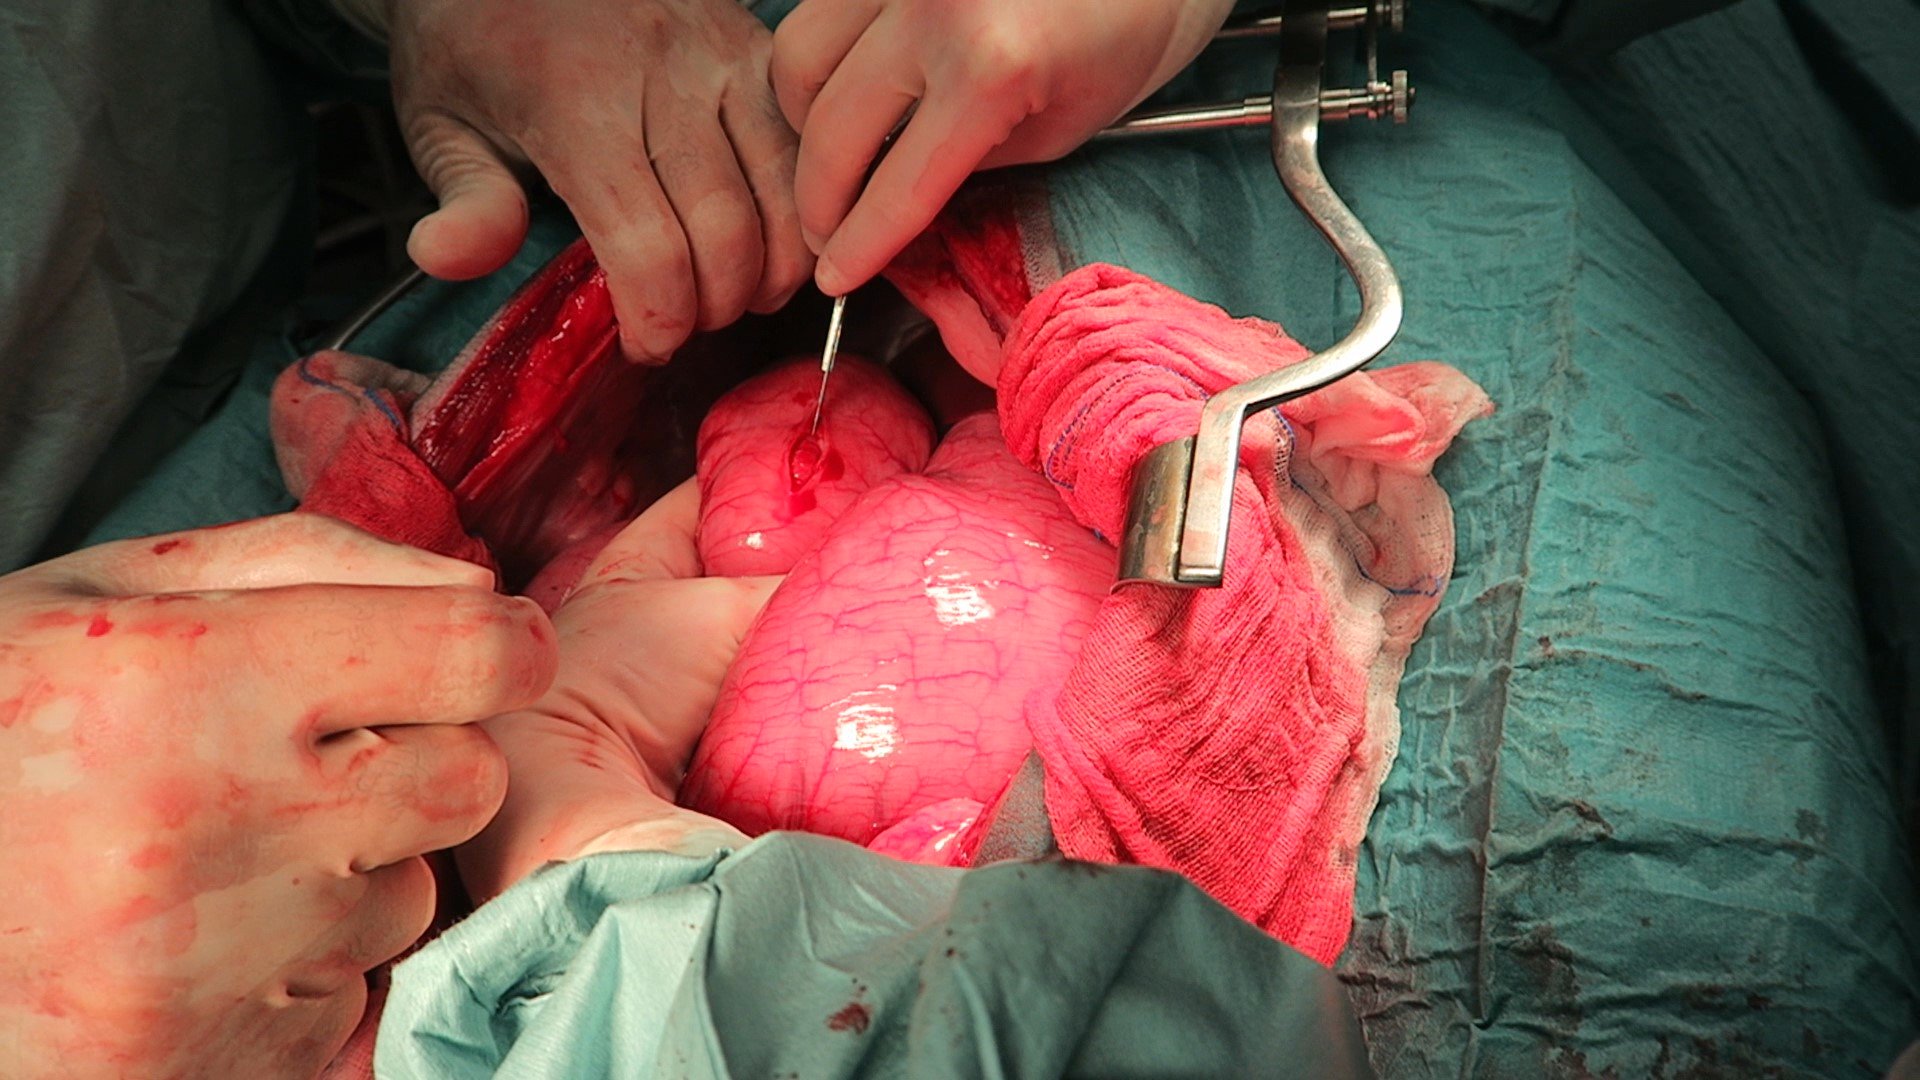
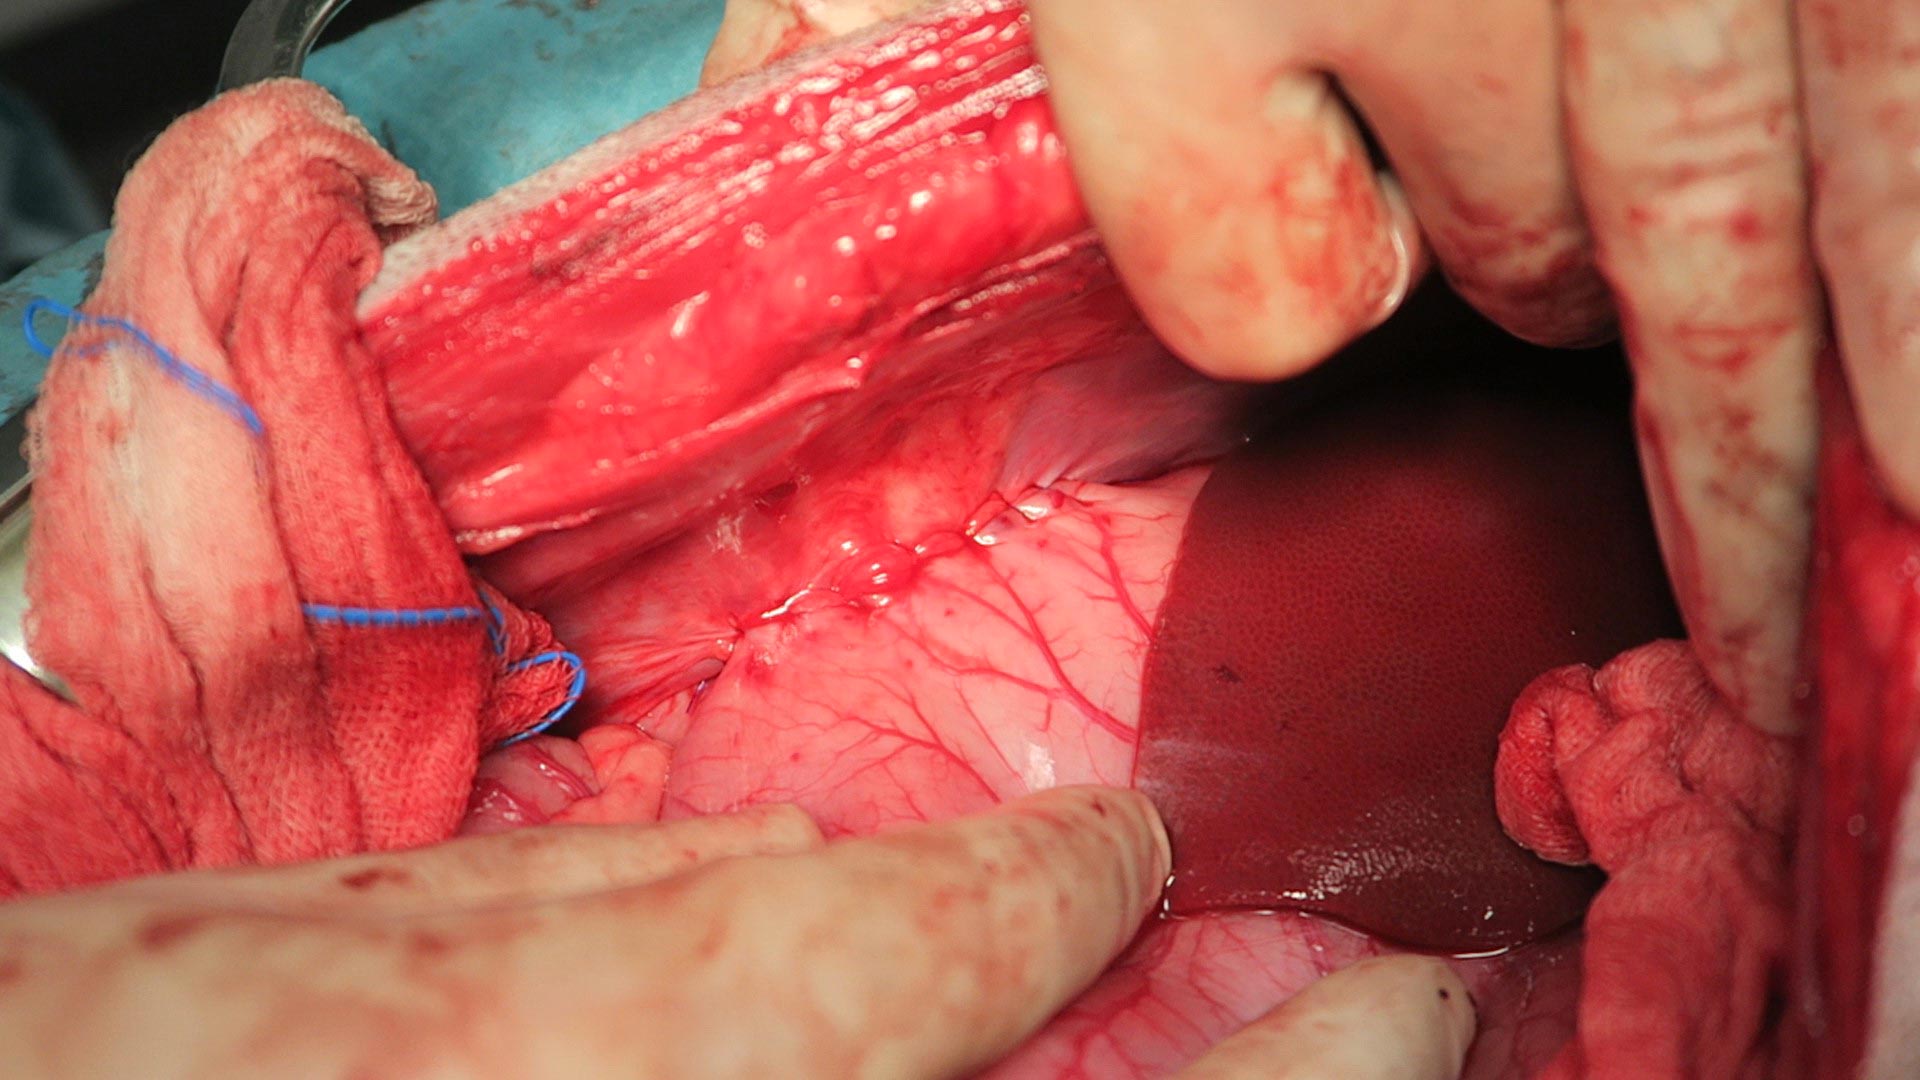
    Vets have to handle a variety of difficult situations, from delivering bad news to addressing financial difficulties. But when it comes to tackling client grief, awkwardness or anger, it’s a bit like that old children’s book, We’re Going on a Bear Hunt – we can’t go over, under or around it – we’ve got to go through it!

    I recently had a three-hour communications practical, during which my fellow students and I were tossed into a randomly selected clinical scenario designed to help us deal with uncomfortable areas of future practice. These included such topics as:

    • discussing the needs for euthanasia
    • apologising for clinical mistakes
    • reasoning with angry farmers when their herds came back TB-positive

    Role play

    We’re Going on a Bear Hunt, written by Michael Rosen and illustrated by Helen Oxenbury, is available from Amazon.co.uk and other booksellers.

    All scenarios were conducted with real actors portraying the clients – and although we’d been given a list of topics to revise if we wanted – any revision turned out to be next to useless as the exercise was less about what you knew, and more about how you dealt with people.

    Personally, I find this type of practical as rewarding – if not more so – than our clinical skills work. We have countless opportunities to practise suturing, spaying and catheterising in the labs at school, and in final-year rotations, but dealing with the raw side of client communications is the one thing we never actually get to experience until we’re suddenly in the driver’s seat.

    It’s completely understandable – nobody wants a student present at their most vulnerable moments. If my own pet was being put down, I’d want the comfort of an experienced vet doing the job and walking me through it from start to finish.

    Learning experiences

    That’s why I think communication practicals are so incredibly useful, and it’s a real shame that I’ve only had three in my course so far. It can be difficult to learn from and build upon experiences spaced years apart from one another, and I feel incredibly sorry for the year before me (while I was intercalating) who had to do their scenarios over Zoom.

    One of the most valuable lessons that these practicals have taught me, is not to be afraid of emotion.

    It can be difficult – especially when a very valid defence mechanism for many medical professionals is to distance yourself from it at all costs – but there are moments when all is required of you is simply to be there, to listen and understand.

    Just be there

    There’s no textbook in the world that can teach you that. When a client (or an actor pretending to be a client) is crying in front of you, you want to fix their grief because fixing things is, quite literally, your profession.

    Your instinct is to talk and fill the silence, but instead, you need to wait for them to process the moment and then be there to answer their questions.

    Some things you can’t fix and you can’t work around – you just have to go through them.

  • Focus on GDV, part 4: the recovery

    Focus on GDV, part 4: the recovery

    Postoperatively, gastric dilatation-volvulus (GDV) patients remain in our intensive care unit for at least two to three days.

    Monitoring includes standard general physical examination parameters, invasive arterial blood pressures, ECG, urine output via urinary catheter and pain scoring.

    I repeat PCV/total protein, lactate, blood gas and activated clotting times (ACT) immediately postoperatively and then every 8-12 hours, depending on abnormalities and patient progress.

    GDV recovery
    Patient recovering in the pet intensive care unit. As well as standard monitoring parameters, GDV patients have constant ECG, arterial blood pressure and urine output monitoring to enable the early detection and correction of abnormalities.

    I always repeat these blood tests postoperatively, as IV fluids given during the resuscitation and intraoperative period often cause derangements. I use the results to guide my fluid therapy, but also take it with a grain of salt.

    IV fluids

    I generally continue a balanced and buffered crystalloid. The rate depends on blood pressures, urine output and assessment of general physical examination parameters for perfusion and hydration, but I try to avoid fluid overload and reduce the IV fluids postoperatively as soon as possible.

    Coagulopathy

    Prolonged clotting times are frequently seen as a result of consumption in a dog with GDV. However, one should note it can also occur as the result of haemodilution.

    As the underlying disease process has been corrected, and haemostasis achieved during surgery, I usually monitor ACTs, but may not necessarily treat with blood products as prolonged ACTs do not always translate to clinical bleeding. Unless clinical evidence of bleeding exists, I generally hold off treatment and monitor.

    Hypoproteinaemia

    Low total protein is also common. This is generally due to haemodilution from fluid resuscitation. However, a low total protein does not mean oedema will develop, or that it requires management. I generally track the protein levels, use conservative fluid therapy and try to correct it by instituting enteral nutrition as soon as possible.

    Electrolyte imbalances

    Hypokalaemia is a common complication of fluid therapy. This can be rectified with potassium supplementation in the IV fluids.

    Hyperlactataemia

    If present post-surgery, this is usually corrected with a fluid bolus. However, I always assess for other things that may affect oxygen delivery to the tissues, such as poor cardiac output (arrthymias), hypoxaemia (respiratory disease) and anaemia (from surgical blood loss).

    Arrhythmias

    Ventricular arrhythmias are common post-surgery. Accelerated idioventricular rhythms are the most common cause, especially if a splenectomy was performed.

    arrhythmia
    Ventricular premature contractions are common postoperative arrhythmia.

    Before reaching for anti-arrythmia medications, first check and correct:

    • electrolyte abnormalities
    • hypoxaemia
    • pain control
    • hypovolaemia or hypotension

    If they are still present, despite correction of the above, consider treating the rhythm if:

    • multifocal beats (ventricular premature contractions of various sizes)
    • overall rate greater than 190 beats per minute
    • R-on-T phenomenon
    • low blood pressure during a run of ventricular premature contractions

    I start with a bolus 2mg/kg lidocaine IV and start a constant-rate infusion of 50ug/kg/min to 75ug/kg/min.

    Anaemia

    It is common to have a mild anaemia post-surgery, due to a combination of blood loss and haemodilution. In the absence of transfusion triggers – such as increased heart rate, increased respiratory rate or hyperlactataemia – it does not require treatment.

    Vomiting

    Anti-emetics are the first line of medication. Non-prokinetic anti-emetics, such as maropitant and ondansetron, can be used immediately; otherwise, after 12 hours, metoclopramide can also be used postoperatively. If the patient remains nauseous despite these medications, the placement of a nasogastric tube can ease nausea by removing static gastric fluid.

    Excessive pain relief may also contribute to the nauseous state.

    Pain relief

    I mostly rely on potent-pure opioid agonists, such as fentanyl constant-rate infusions and patches. This is generally sufficient for most patients. Ketamine is occasionally used.

    • Some drugs listed in this article are used under the cascade.
  • Focus on GDV, part 3: surgery tips

    Focus on GDV, part 3: surgery tips

    Following on closely from the first two parts of our February focus on gastric dilatation-volvulus (GDV) – which covered IV fluid resuscitation, pain relief and gastric decompression – we turn to surgery.

    Here, I offer a few tips to help ensure the procedure runs as smoothly as possible.

    Abdominal incision

    Make the abdominal incision large – from the xipoid to the pubis. You cannot perform a proper exploratory laparotomy without proper visualisation. Additionally, when it comes time to re-rotate the spleen, you will need all the space you can get. Removal the falciform fat to help improve exposure.

    Derotation

    derotation
    Figure 1. Derotation of the stomach. Standing on the right side of the patient, one hand pulls as the other pushes.

    The degree of rotation is variable from 90° to 360°, so not all GDV surgeries will be the same. If the omentum is draped over the stomach, this is pathognomonic for GDV.

    When derotating, stand on the right side of the patient as all descriptions are based with the surgeon on that side.

    During volvulus, the pylorus rotates ventrally then to across to the left side of the body.

    Method

    With one hand (usually your right) reach down the left abdominal wall and firmly grab the stomach down where the spleen normally resides, then pull towards you (Figure 1). At the same time, use your other hand to apply downward pressure (or pressure in the dorsal direction) on the right side of the stomach. This simultaneous pulling on the left side of the stomach and push on the right side of the stomach is generally successful.

    At this stage, it is important to check things have gone back to their normal places. Ensure the:

    • pylorus is to the right and you are able to track it through to the duodenum and pancreas
    • fundus is to the left
    • omentum is hanging off the caudal aspect of the stomach
    • spleen is also derotated

    Passing a stomach tube can sometimes help you identify the oesophagus – you can feel it running along the inside of the gastric cardia and fundus.

    Further decompression

    If the stomach is still distended and hard to manipulate, reducing the size of the stomach can make derotation significantly easier. Pass the stomach tube again or aspirate more gas from the stomach using a 18G needle, extension set, 50ml syringe and three-way tap.

    Assessment of the stomach

    incision
    Figure 2. Incision into the pyloric region of the stomach.
    Figure 3. Completed incision gastropexy.
    Figure 3. Completed incisional gastropexy.

    Gastric necrosis is most likely to occur along the greater curvature of the body and fundus. Lifting up the stomach and looking at the dorsal aspect of these areas is important. Allow 5 to 10 minutes after derotation before resecting the affected areas to see if it regains colour and pulsations.

    Pexy

    I personally perform incisional gastropexy – I find them easier and very effective. I find an area on the pyloric region of the stomach where minimal tension exists, when brought to the lateral body wall (Figures 2 and 3).

    Ensure you do not accidentally incise into the diaphragm; the muscle fibres of the diaphragm radiate out and insert at the costal arch. Identify the transverse abdominal muscles and pexy the stomach to here.

    I also ensure muscularis to abdominal muscle contact to increase the strength of the pexy once it is healed.

    Spleen

    The spleen is almost always engorged in GDV cases, but this does not necessarily mean it needs to be removed.

    Always assess the splenic blood supply as it is not uncommon for splenic vessels to tear or thrombose during the volvulus.

    If there is any concern that the splenic arterial flow is compromised, I would perform a splenectomy.

    Stomach still dilated after pexy?

    What if the stomach appears to be still dilated? Generally, once the stomach is derotated, normal anatomy has been achieved and the pexy is performed, the remaining food and gas will pass with time. You can try to empty more via a stomach tube or aspiration with a large needle, but this is not generally required. I would not perform a gastrotomy to remove contents.

    Next week, we will cover common postoperative complications.

    >>> Read Focus on GDV, part 4: the recovery

  • Focus on GDV, part 2: releasing the pressure

    Focus on GDV, part 2: releasing the pressure

    Last week we covered IV fluid resuscitation and pain relief. This week we will go into more detail about gastric decompression.

    stomach tube
    Passing the stomach tube inside the roll down into the oesophagus (click to zoom).

    Gastric decompression can be achieved in two ways:

    1. trocarisation
    2. stomach tube (orogastric tube) placement

    The decision on which method to use depends on many factors – personal preferences, past experiences and clinical protocols, to name a few.

    So, which one is best? A retrospective analysis of 116 gastric dilatation-volvulus (GDV) patients (Goodrich et al, 2013) found both methods of gastric decompression had low complication and high success rates, and either technique is acceptable.

    If one method fails to achieve gastric decompression, the other can be tried.

    How to decide

    Personally, I use either or sometimes both. Which one I choose first depends on the situation. My decision-making process goes something like this:

    Not clinically obvious or mild GDV

    These are often diagnosed based on supportive radiographic findings as history and presenting clinical signs making me suspicious of a GDV.

    I would always try to pass a stomach tube in these patients first, as the tube is passes easier when the gastric distention is milder. Although this procedure generally requires prior opioid analgesia administration to help reduce the stress, it can achieve rapid and lasting decompression of the stomach.

    I often leave the tube in throughout stabilisation, just prior to induction of anaesthesia for surgical correction of the torsion. The tube allows continual release of gastric gases that can accumulate again rapidly if the tube is removed prior to surgery.

    Obvious or severe GDV

    The abdomen in these animals is often distended and tympanic. I will perform trocarisation in these cases first, as passing a stomach tube in these patients is often unsuccessful. It allows rapid gastric decompression, which is particularly important in cases with evidence of respiratory compromise.

    After the trocar is no longer releasing gas, I will then pass a stomach tube. At this stage, it is often easier to pass the stomach tube once the gastric pressure has been reduced. Once again, I often leave the tube in during stabilisation.

    How to perform

    Stomach tube

    • The main risk is rupture of the oesophagus or gastric wall.
    • Pre-measure and mark the tube from the mouth to the level of the last rib.
    • Use a roll of adhesive bandaging material as the mouth gag. I prefer to use Elastoplast as it has an incompressible plastic core and the diameter is just large enough to fit our largest diameter stomach tube.
    • Unwrap approximately 30cm of Elastoplast before placing the roll of tape inside the mouth.
    • Wrap the tape snugly around the muzzle to prevent the dog from opening its mouth and dislodging the roll.
    • Lubricate the tube to reduce frictional trauma to the oesophagus.
    • Pass the stomach tube through the core of roll and into the mouth. You will feel a dead end at the level of the lower oesophageal sphincter, where the volvulus has torsed the oesophagus.
    • Apply gentle constant pressure and, most times, the tube will pass through into the stomach. Sometimes a puff of gas can be heard and felt from the aboral end of the tube when it enters the stomach. The tube can also be palpated when the stomach is decompressed.
    • The tube is taped to the muzzle to prevent dislodgement and the aboral end placed in a bucket to allow fluid to exit via gravity and siphon.
    • If it does not pass, reassess to see if trocarisation is required to relieve some pressure in the stomach

    As mentioned above, I generally leave the stomach tube in while continuing to stabilise the patient and prepare for surgery. Gas can rapidly accumulate in the stomach and cause rapid deterioration if the tube is not left in. The tube is removed just prior to induction of anaesthesia.

    tape
    Placing a roll in the mouth to prevent biting down on the stomach tube.

    Trocarisation

    • The main risk is hitting the spleen while trying trocarisation. To avoid this, identify the most tympanic site by palpation, or use the ultrasound to confirm the absence of the spleen.
    • A 3in, 14g catheter is usually sufficient.
    • Clip and surgically prep a 10cm by 10cm area where you intend to place the catheter.
    • Insert the catheter to the hub and remove the stylet.
    • Although local anaesthetic in the area is ideal, you will not have time to do this in most cases – especially the very unstable ones. Also, since I administer pure opioid agonist intravenously to most confirmed GDV cases on presentation, local anaesthetic is not required.
    • Remove the stylet and gas should come blowing out under pressure.
    • Once the gas flow starts to slow down, gently apply inward pressure or pressure on the dilated stomach, which helps ensure the stylet does not fall out of the stomach and as much of the gas is removed as possible.

    >>> Read Focus on GDV, part 3: surgery tips

  • Focus on GDV, part 1: resuscitation

    Focus on GDV, part 1: resuscitation

    Last month we covered a bit of pathophysiology, presenting pathophysiology, presenting clinical signs and the radiographic diagnosis of gastric dilatation-volvulus (GDV).

    Now we cover the three things you need to do as soon as a suspected case is presented:

    1. IV fluid resuscitation
    2. decompression of the stomach
    3. pain relief

    Depending on the number of staff you have, all of these can be performed simultaneously. If not, follow the above order as shock is the most imminent problem.

    Catheter placement

    Fluid resuscitation is relatively straightforward. Most GDV patients will be in some degree of shock, varying from mild to severe. Regardless of the actual degree, all patients will require IV fluids.

    The placement of IV catheters is particularly important; their numbers and diameter will influence the rate of response to treatment. Large-bore catheters allow faster flow of fluids compared to smaller ones, while multiple catheters allow concurrent delivery of two bags of fluids as opposed to one – particularly important in large dogs. Therefore, always try to place the largest catheter possible (for example, 18G or larger for large-breed dogs) into the cephalic veins.

    Once the catheters have been placed, collect 2ml to 3ml of blood for baseline measurements. These can be collected directly from the catheters and should include:

    • PCV/total protein
    • blood gas analysis
    • lactate
    • activated clotting time
    • electrolytes
    • later, full haematological and biochemical analysis

    Once the baseline bloods have been collected, fluid resuscitation should start immediately.

    How much, how fast?

    fluid
    Fluid resuscitation is relatively straightforward, says vet Gerardo Poli.

    How much fluid should you deliver, and how fast? My “go to” fluid is crystalloids and I generally start with a 20ml/kg bolus of an alkalinising crystalloid.

    I perform bolus therapy, so 10ml/kg to 20ml/kg fluid doses rather than shock rates 90ml/kg/hr, as I feel it allows me to better titrate my fluid therapy to effect. It also helps minimise excessive fluid administration and the problems with haemodilution – such as anaemia, hypoproteinaemia and prolonged coagulation times.

    As fluids are being delivered, I administer pain relief and start gastric decompression (covered next week).

    The decision to administer more fluids depends on whether I have achieved some end point resuscitation variables, such as:

    • a reduction in heart rate
    • a reduction in capillary refill time
    • an improvement of mucus membrane colour
    • improvement in pulse pressures

    Improvement in mentation is not often reliable as the sedative effect of analgesia, which I generally give during fluid resuscitation, often confounds this effect.

    Shock therapy

    If evidence of shock still exists, despite the initial fluid boluses and gastric decompression, I will consider more fluids. This can include hypertonic saline or colloids.

    In my experience, a repeat of a smaller dose of crystalloid fluid bolus is often adequate (10ml/kg). The transition on to hypertonic saline (7% solution) or colloids is influenced by the results of the aforementioned baseline diagnostics.

    A reduction in PCV/total protein suggests blood loss. In this case, I will consider either hypertonic saline (3ml/kg to 5ml/kg of 7% solution), a dose of colloids or even blood products, such as whole blood or packed red blood cells.

    If significant prolongation in activated clotting time occurs, likely from consumption, then I may incorporate fresh frozen plasma into my fluid therapy. This is in anticipation of possible surgery, where prolonged coagulation times can not only be troublesome, but life-threatening.

    Lactate

    A quick note on lactate – I don’t use the baseline reading as a prognostic indicator or an indicator of gastric necrosis. This is supported by recent findings claiming it is not the level of lactate that is predictive, but the degree of improvement in response to fluid resuscitation and gastric decompression.

    I have seen unreadable lactate levels – greater than 15mmol/L – in patients who returned to reasonably normal levels within an hour of stabilising. These patients also went on to survive surgery.

    Pain relief

    After starting IV fluid resuscitation, I generally administer pain relief while the team is preparing for gastric decompression. To keep things simple, I stick to an easily accessible pure opioid agonist at 0.2mg/kg IV. I avoid subcutaneous or even intramuscular administration as the patient is often in shock; the peripheral blood is shunted centrally to the heart and the brain and absorption can be variable.

    I find this offers a reliable and great degree of pain relief that helps reduce anxiety levels and, consequently, reduces oxygen demand. It has minimal cardiovascular effects and the mild sedative effect also helps with the process of decompression.

    >>> Read Focus on GDV, part 2: Releasing the pressure (gastric decompression)

  • Christmas dangers

    Christmas dangers

    Christmas can be a busy time for vet clinics, so here is a list of common intoxications and conditions to keep an eye out on during the festive period.

    Chocolate

    • Michael Pettigrew / fotolia
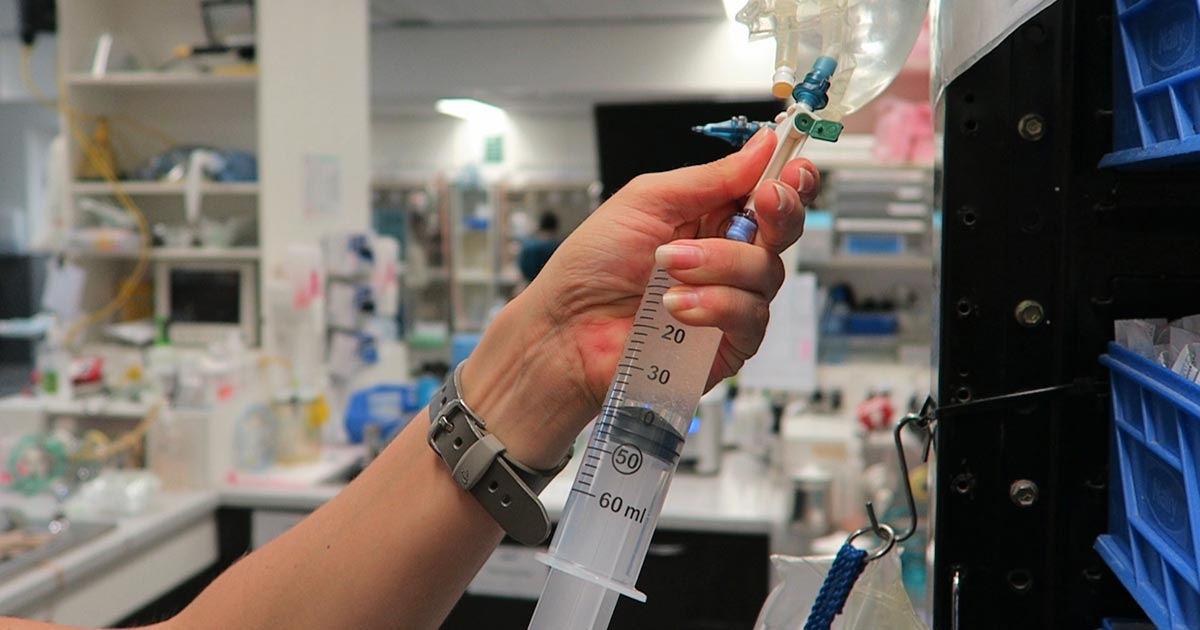
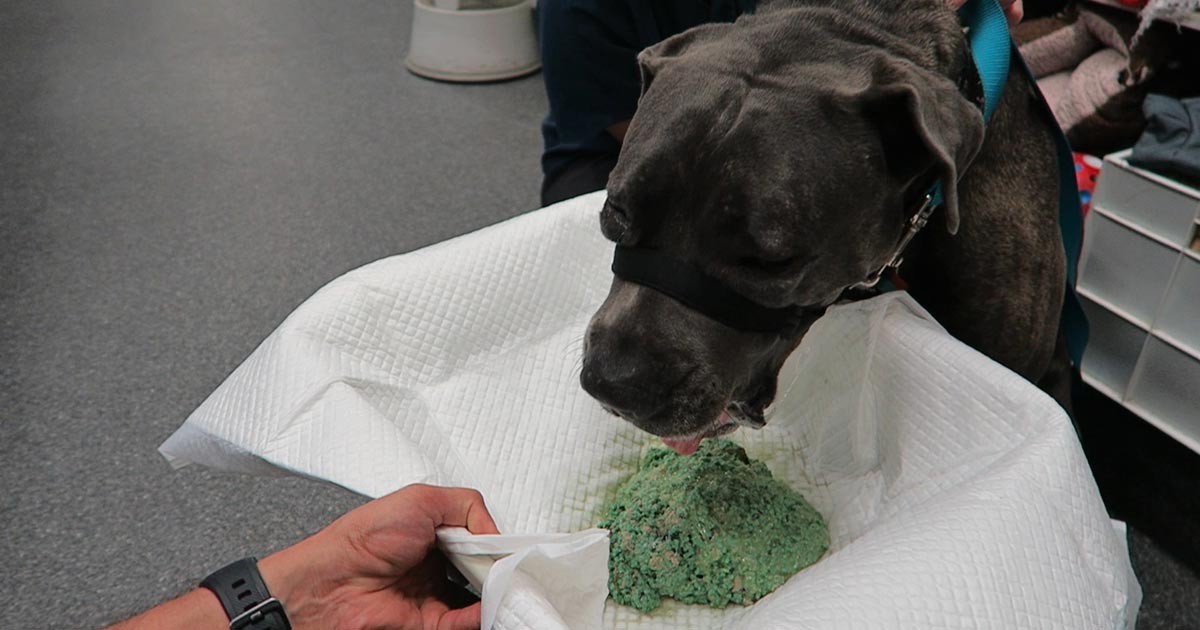
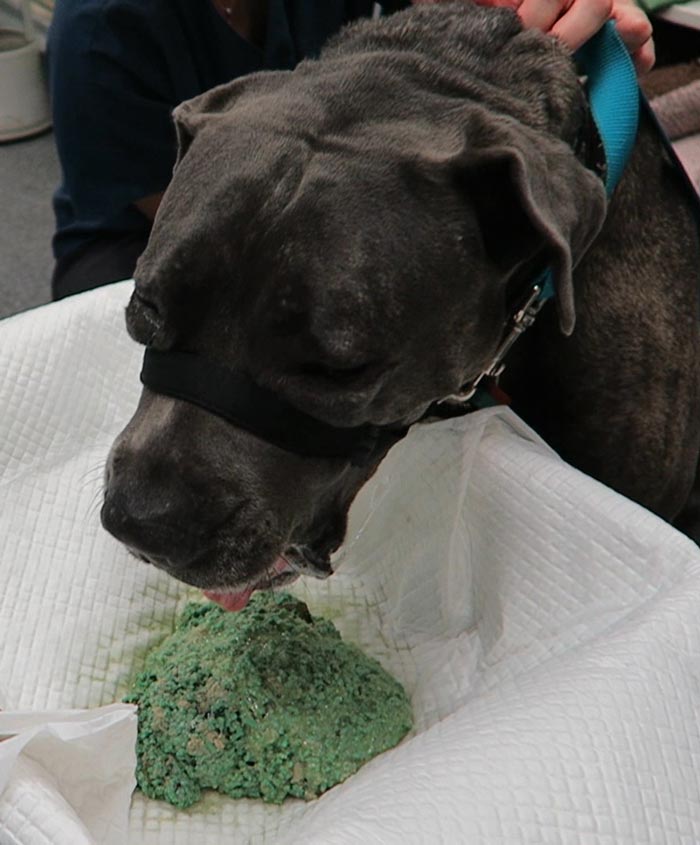
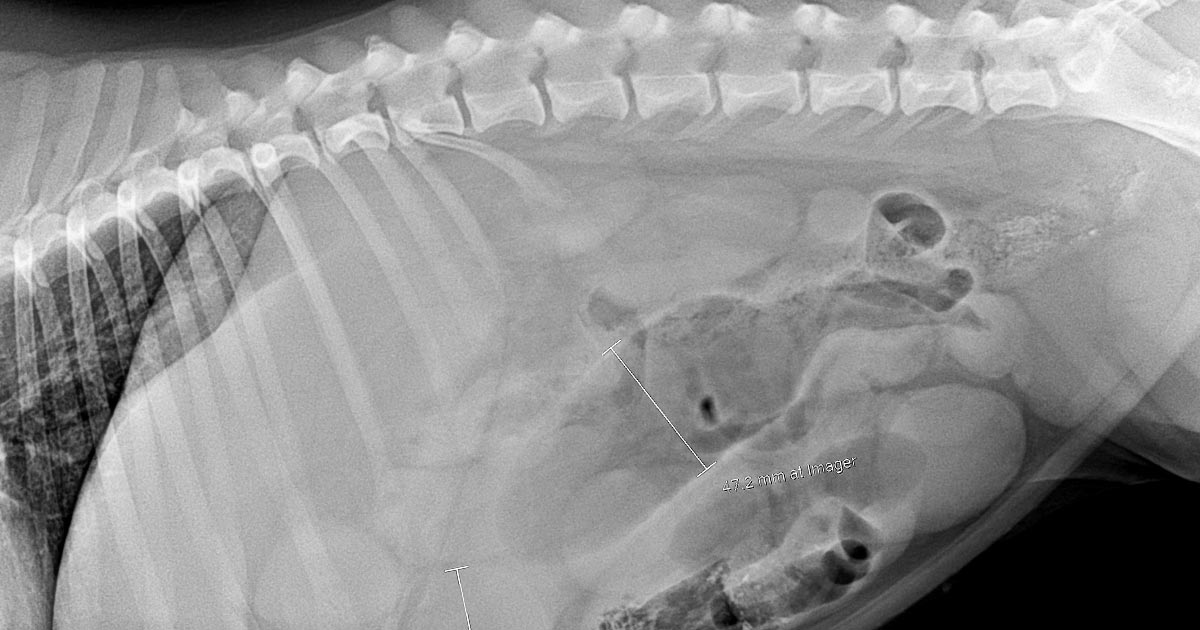
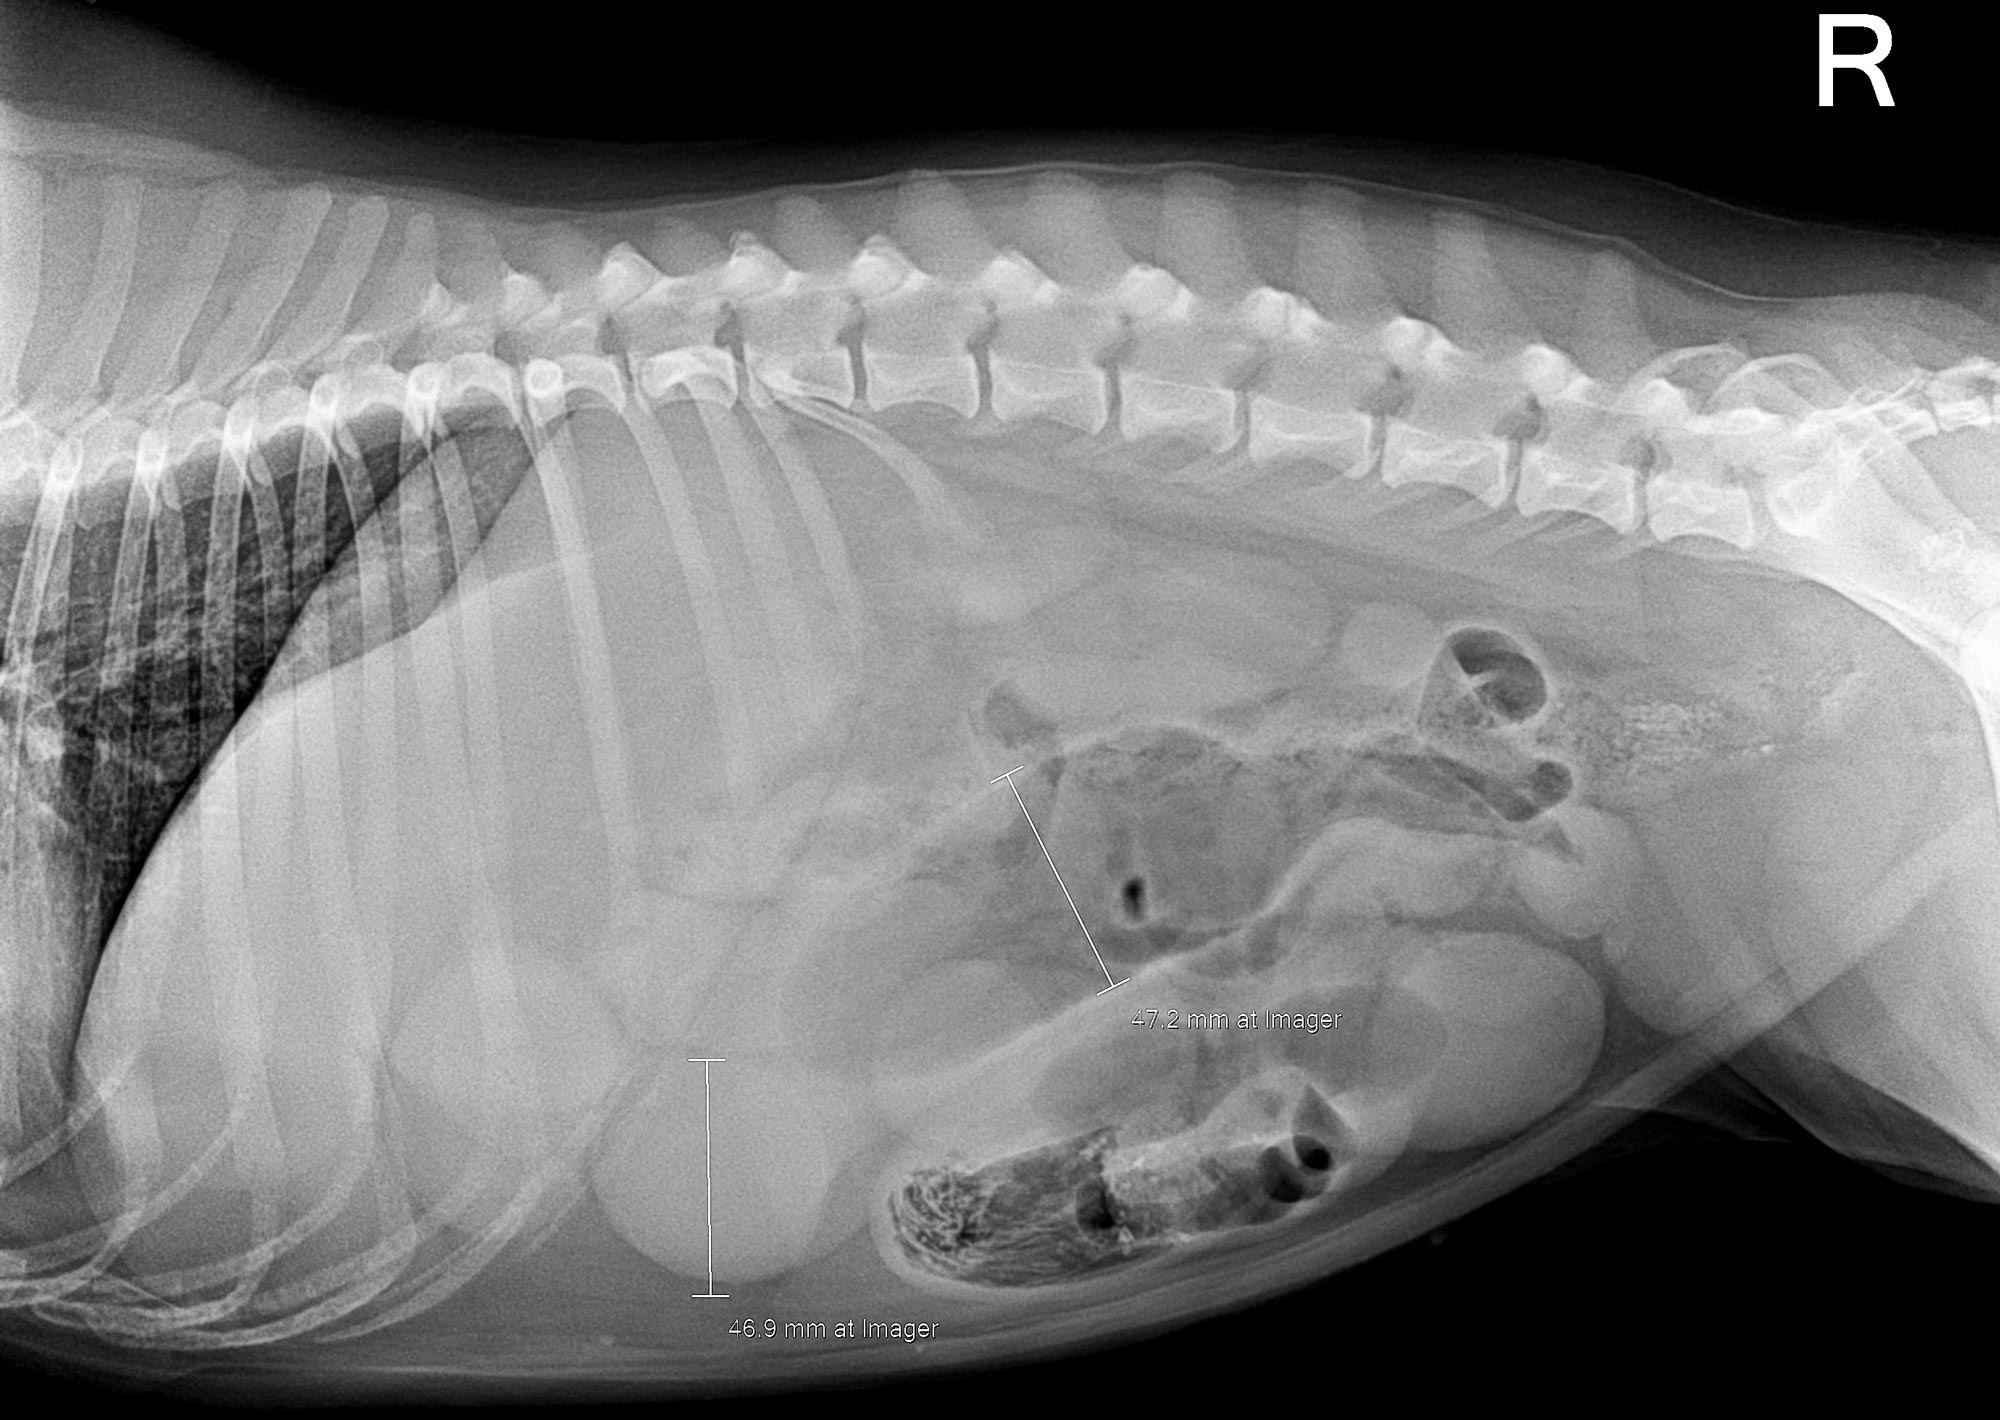
Numerous online calculators can determine whether a toxic dose has been consumed and they are a great place to start.
    • I always perform emesis in patients that have ingested chocolate, even hours after ingestion as often large amounts can reside in the stomach.
    • Remember that cardiac arrhythmias can also occur in clinically normal looking patients, so perform an ECG.
    • The toxic components can be reabsorbed through the bladder wall; therefore, urinary catheterisation is a part of management of this intoxication.

    Onions

    • Onions used in roasts and on BBQ’s can cause Heinz body formation, haemolytic anaemias and pigmenturia.
    • This is not a common intoxication, but should be considered in anaemia patients and those with discoloured urine.

    Raisins

    • Commonly used in Christmas cakes and puddings. They can cause acute kidney failure, the exact mechanism of action is unknown, and there does not appear to be a dose-dependent relationship.
    • It should always be a differential for azotemic patients this time of year.
    • IV fluid induced diuresis for 48 hours is the safest way to manage raisin exposure.

    Mistletoe

    • The berries can be fatal, even if only a couple are ingested.

    Ethylene glycol

    • In colder climates, ethylene glycol can be a very common toxicity.
    • This sweet liquid is very attractive to pets and can cause acute renal failure, with the first signs being acute onset ataxia.

    Macadamia nuts

    • Macadamia nuts are common in some parts of the world. They result in joint pain in the hocks and carpus leading to weakness and ataxia.
    • Often confused with trauma and soft tissue injuries. Hyperextension of the hocks and sometimes flexion of the carpus are the clinical features.

    Xylitol

    • Xylitol is a sugar-free product used in lollies and baking.
    • In dogs, it triggers endogenous insulin to be released and a subsequent hypoglycemia develops. It can also cause hepatic failure.
    • As a general rule, I approach all intoxications as if they could be fatal as it is rare to know exactly how much of the toxic agent they have been exposed to. I consider if a patient I am treating for intoxication never develops clinical signs and wonder whether it was going to or not is the best outcome.

    Strings

    • Look under the tongue.
    • Linear foreign bodies can be difficult to diagnose. Some features on abdominal radiographs to look out for include abnormal bunching of the small intestines, and “c” and “comma” shaped gas patterns.

    Christmas meals

    • Gastroenteritis is the most common presenting condition over the Christmas period, with dietary change and indiscretion often being the culprit.
    • Bones can lead to obstructions from oral cavity to the intestines and can also cause constipation.
    • Leftover meat trimmings, often fat laden, are a common cause of pancreatitis.

    BBQ skewers

    • In some parts of the world (Australia especially) BBQs are common around Christmas time.
    • BBQ skewers can cause gastrointestinal tract perforation and septic peritonitis.
    • Because they are not radiopaque they are often difficult to diagnose.
  • Emesis: a thing of the past?

    Emesis: a thing of the past?

    Until I started researching this Tip of The Week, I did not know the medical profession has abandoned the routine use of emesis in oral poisoning.

    This is based on multiple medical literatures that have proven emesis induction does not influence the clinical severity of poisoning, the length of hospitalisation and the clinical outcome or mortality.

    Although the rationale for inducing emesis is obvious, it is not necessarily evidence based. It is also dependent on satisfying a few large assumptions, all of which are untrue:

    • Emesis is a very effective way of removing gastric contents.
    • No separation exists of poison from its vehicle while inside the acidic environment of the stomach.
    • Poison is not absorbed through the stomach wall.

    Ineffective method

    snail bait
    Snail bait ingestions: this patient ate 500g of snail bait containing metaldehyde.

    Emesis induction is an ineffective way of clearing stomach contents. A review of the effectiveness of induced emesis, with both human and canine participants, showed at 30 minutes post-ingestion of non-absorbable markers, the recovery rate averaged between 17.5% and 52.1%, but never exceeded 62%.

    In fasted puppies, this was even lower at 2% to 31%, despite inducing emesis immediately after marker administration. These have been confirmed by the presence of poisonous materials in the stomach of dead patients, despite effective emesis induction until clear fluid was brought up.

    The clinical outcome only improves if the systemic exposure of a toxicant is reduced by more than half. However, considering animals rarely practice restraint, the ingested amount is unlikely to be exactly the lethal dose and no more. Therefore, even reducing the ingested toxic dose by 62% is unlikely to make a clinical difference.

    Furthermore, most patients rarely present within 30 minutes of ingesting a toxicant, thus further reducing its efficiency.

    The absorption conundrum

    Some may argue the retrieval of metaldehyde or anticoagulant rodenticide granules from vomitus is indicative of reducing the toxicant dose. This could be true, but only if emesis was induced immediately after ingesting the poison.

    The poison itself is colourless and has a different absorption characteristic to the coloured vehicle (granule); therefore, the presence of granule only serves to confirm ingestion, but is of no indication whether the poison has already been absorbed.

    Contraindications

    Many well-recognised absolute contraindications also exist to inducing vomiting:

    • Ingestion of oils, which includes waxes that melt to oil in the internal body environment, as this poses a high risk of lipoid and bacterial pneumonia. This is of significant veterinary significance, as wax is routinely used in rodenticide baits.
    • Ingestion of hydrocarbons and other volatile substances, or caustic or corrosive substances.
    • When the mental status is altered – for example, hyperexcitable or depressed mental state.
    • Where the patient is at risk of seizures (seizures can be induced by emesis).
    • Increased intracranial pressure.
    • Risk of intracranial or cerebral haemorrhage – for example, thrombocytopenia or abnormal clotting parameters.

    Other less severe, yet important, reasons include:

    • delays administration of more effective treatment, such as activated charcoal, antidote or other treatments
    • risk of aspiration pneumonia
    • hypochloraemia in recurrent emetic patients
    • significant CNS and respiratory depression from apomorphine
    • rare, but reported, complications such as cerebral haemorrhage, oesophageal tear/ rupture, hiatal hernia, gastric rupture, pneumothorax and pneumomediastinum
    • legal implications – for example, if the product information clearly states emesis should not be induced

    A place for everything

    Emesis induction is not a benign procedure. It still has its place in certain circumstances, but its use in the routine management of oral poisonings may need to be reconsidered – especially if it means delaying administration of a more effective treatment, such as activated charcoal.

    So, after all this, how do I tackle this information? It is a bit hard to swallow. My clinical experience is emesis is generally safe, especially in canine patients using apomorphine. So, I still feel some merit exists in reducing the amount of toxicant in the stomach if you have a chance – and in some situations, you don’t know until you try.

    Emesis after ingestion of a toxic dose of chocolate can be incredibly rewarding, even six hours after ingestion, leading to patients not developing clinical signs at all.

    Overall, I am biased by my personal successes with emesis, so still feel a time and place exist for emesis induction. But I now stop and question my decision to induce emesis, whereas I did not hesitate before.

    • Some drugs listed are used under the cascade.
  • Lessons learned from intercalating

    Lessons learned from intercalating

    Although it may technically have finished in September with my final deadline, it didn’t feel complete or right to celebrate the end of my MSc intercalation until the final grades were released this month.

    With my shoulders a little lighter, I can now look back on the experience with a fondness similar to that which I felt after completing my silver Duke of Edinburgh’s Award (a similarly exhausting experience) – and although it was definitely a steep learning curve, I’ve come away incredibly grateful for the experience and having learned the value of intercalating.

    Lesson #1: you don’t have to be a one trick pony

    Now, I’ve spoken before about the plethora of jobs a veterinary graduate can apply themselves to beyond clinical practice. Not only has intercalating made this all the more apparent to me, but it has also expanded my academic experience.

    The vet course is very exam-centric (with the occasional directed self-education), and for those like me coming straight from GCSEs and A-levels with no prior undergrad degree, exams are all we’ve ever known. Course work and deadlines are an entirely new kind of process.

    To put it in athletic terms, I feel it’s a little like a long-distance runner retraining for sprinting events. I’m used to planning six months ahead and slow-burning my revision in preparation for one big exam, so changing my mindset towards two to three coursework deadlines a month did not come naturally. Despite this, I appreciate the challenge, and it felt good to apply my mind in a different way – like stretching a new muscle.

    Lesson #2: comfort zones are there to be defied

    Everything I’ve learned and applied myself to over the past few years has been entirely vet related, so, for a while, I felt a bit like a fish out of water. Saying that, why does anybody intercalate, if not for a fresh perspective? I now know more about conservation efforts than I knew there was to know about, including several career routes I never would have even considered beforehand.

    Image © WindyNight / Adobe Stock

    Pushing yourself and not getting set in your ways are valuable traits to have as a clinician. You need to be versatile, adaptable and open to new ideas, as well as constantly trying to work on yourself both personally and professionally (no sleeping on the job either, literally or figuratively).

    At the start of this course, I’d never written a literature review, a grant proposal or a research paper – to tell you the truth, I’d have had no clue where to even start. The closer I get to graduation the more I worry about all the new challenges that lie ahead, but the past year has really helped my confidence and made those challenges seem less intimidating.

    Lesson #3: absence makes the heart grow fonder

    If it hadn’t been obvious to me from the beginning, it certainly is now. I really, really, really (am I overdoing it?) cannot wait to be a practising vet.

    A short break from the course made me miss everything about it, which affirms that I am:

    1. a total nerd, and
    2. have likely been on the right course all along

    Intercalating doesn’t have to imply disinterest in whatever medical degree you’re studying – quite the opposite. So, if you’re reading this article trying to decide on whether to intercalate yourself, my advice would be to go for it. Expanding your interests or abilities is never a bad thing.

    Many vets return to education several years post-graduation anyway, and intercalating is a really useful way to explore a whole new world of academia in a relatively short space of time.

  • Abdominal radiography, part 2

    Abdominal radiography, part 2

    Last week’s tips (Abdominal radiography, part 1) were about taking appropriate images.

    Now, here are some tips on interpreting those images.

    Interpretation

    abdominal x-ray
    Abdominal x-ray (click to zoom).

    I often find there is too much to look at and it gets confusing with overlapping organs. I like to step back and look from a distance; sometimes, this gives me an overview of the image first.

    Next, I use a systematic approach, starting with extra-abdominal structures and working inwards.

    Then I assess the main organs – liver, spleen, kidneys, bladder and prostatic region – and assess for a uterus. Once I have identified and assessed those, I look at the gastrointestinal tract (GIT).

    What part of the GIT is it?

    This can be the most confusing part. I start with the stomach, assess size and position, then identify and track the colon from caecum to rectum. Once I’m happy I have identified the stomach and colon then everything else with gas in it is likely to be small intestinal.

    Enema and a walk

    If there is too much faeces, or if the gas is colonic, I administer a suppository enema to facilitate defecation. This can dramatically clear up a confusing x-ray and move gas.

    Repeat the study

    If I am still concerned about an obstruction, but it is not obvious, I either transition to an ultrasound or repeat the abdominal study after a couple of hours of IV fluids and pain relief.

    I find, once a patient is rehydrated, the GIT starts to move; gas and faeces shift and things can look surprisingly different in a couple of hours. If it remains the same, or worsens, that also provides valuable information.

    Consider high GIT and partial obstructions

    Don’t forget pyloric, high duodenal and partial obstructions that don’t give you the classic small intestinal dilation. The absence of a radiopaque foreign body or gas dilated small intestines do not rule out an obstruction.

  • Abdominal radiography, part 1

    Abdominal radiography, part 1

    Abdominal radiographs can be daunting, but here are six tips to help you get the most information from your studies.

    1. Patient preparation

    Have the patient prepared as best as possible, have them dry – as wet hair shows up on x-rays – and appropriately sedated, or anaesthetised if needed, to minimise the amount of radiation exposure to you and your staff.

    abdominal radiology
    Image the abdomen from diaphragm to pelvis.

    2. Adjust according to depth

    Adjust the settings based on the depth. The cranial abdomen is often wider and deeper than the caudal abdomen, so adjust the settings as appropriate. This will help make sure the areas of interest are appropriately exposed. Otherwise, the cranial abdomen is often underexposed and the mid-abdominal region overexposed.

    3. Expiration

    Take radiographs on expiration. This is the longest pause and will reduce motion artefact.

    4. Minimum two views

    Routine abdominal studies vary, but at a minimum I perform two views – lateral and ventrodorsal (VD).

    5. Three views for gastrointestinal tract

    If I am assessing the gastrointestinal tract then I take three views: left and right lateral, and a VD view.

    Why three views? Gas floats and fluid sinks, so the gas patterns change and provide valuable information. For example – on the right lateral view, gas moves into the fundus and fluid moves into the pylorus, so it looks like a soft tissue mass or foreign body.

    6. Image the entire abdomen

    If the patient is larger, I may take two or three images per view to make sure I image the entire abdomen. I make sure I image the entire abdomen from diaphragm to pelvis if the patient is large by dividing it into segments – cranial abdomen and caudal abdomen; sometimes cranial, mid-abdominal and caudal. This may mean standard two views turns into cranial and caudal VD and lateral views.