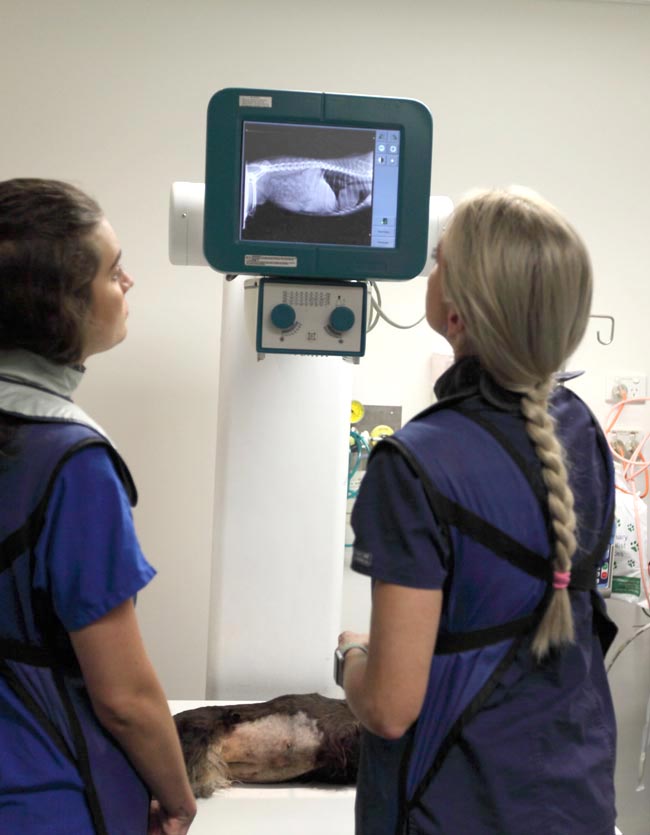
Last week we covered IV fluid resuscitation and pain relief. This week we will go into more detail about gastric decompression.

Gastric decompression can be achieved in two ways:
- trocarisation
- stomach tube (orogastric tube) placement
The decision on which method to use depends on many factors – personal preferences, past experiences and clinical protocols, to name a few.
So, which one is best? A retrospective analysis of 116 gastric dilatation-volvulus (GDV) patients (Goodrich et al, 2013) found both methods of gastric decompression had low complication and high success rates, and either technique is acceptable.
If one method fails to achieve gastric decompression, the other can be tried.
How to decide
Personally, I use either or sometimes both. Which one I choose first depends on the situation. My decision-making process goes something like this:
Not clinically obvious or mild GDV
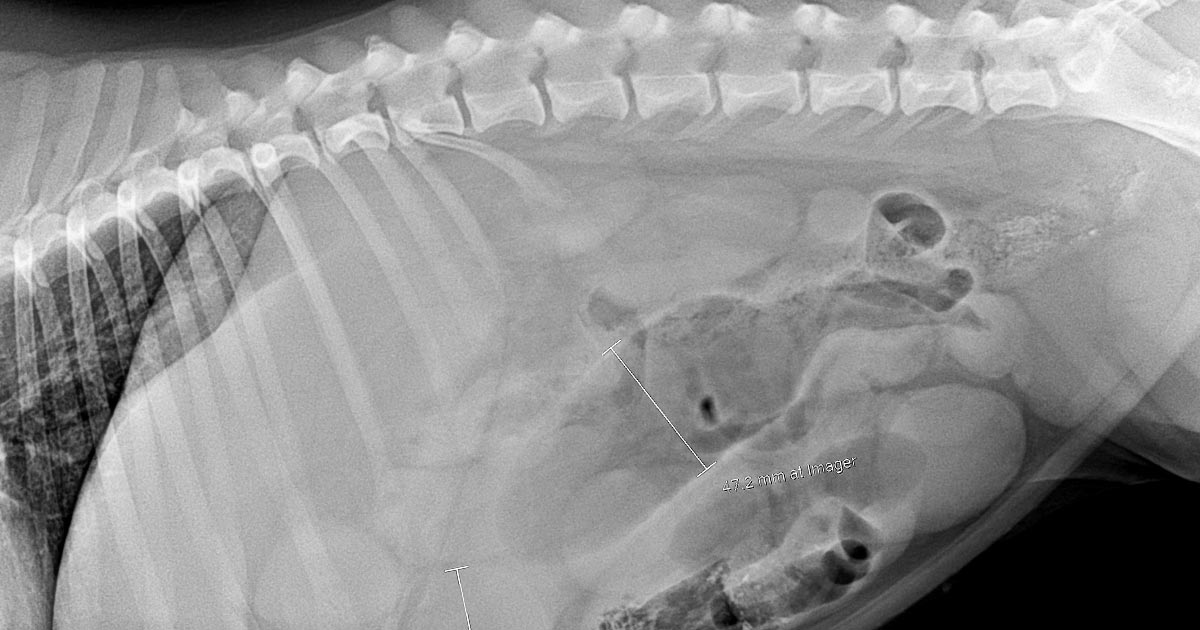
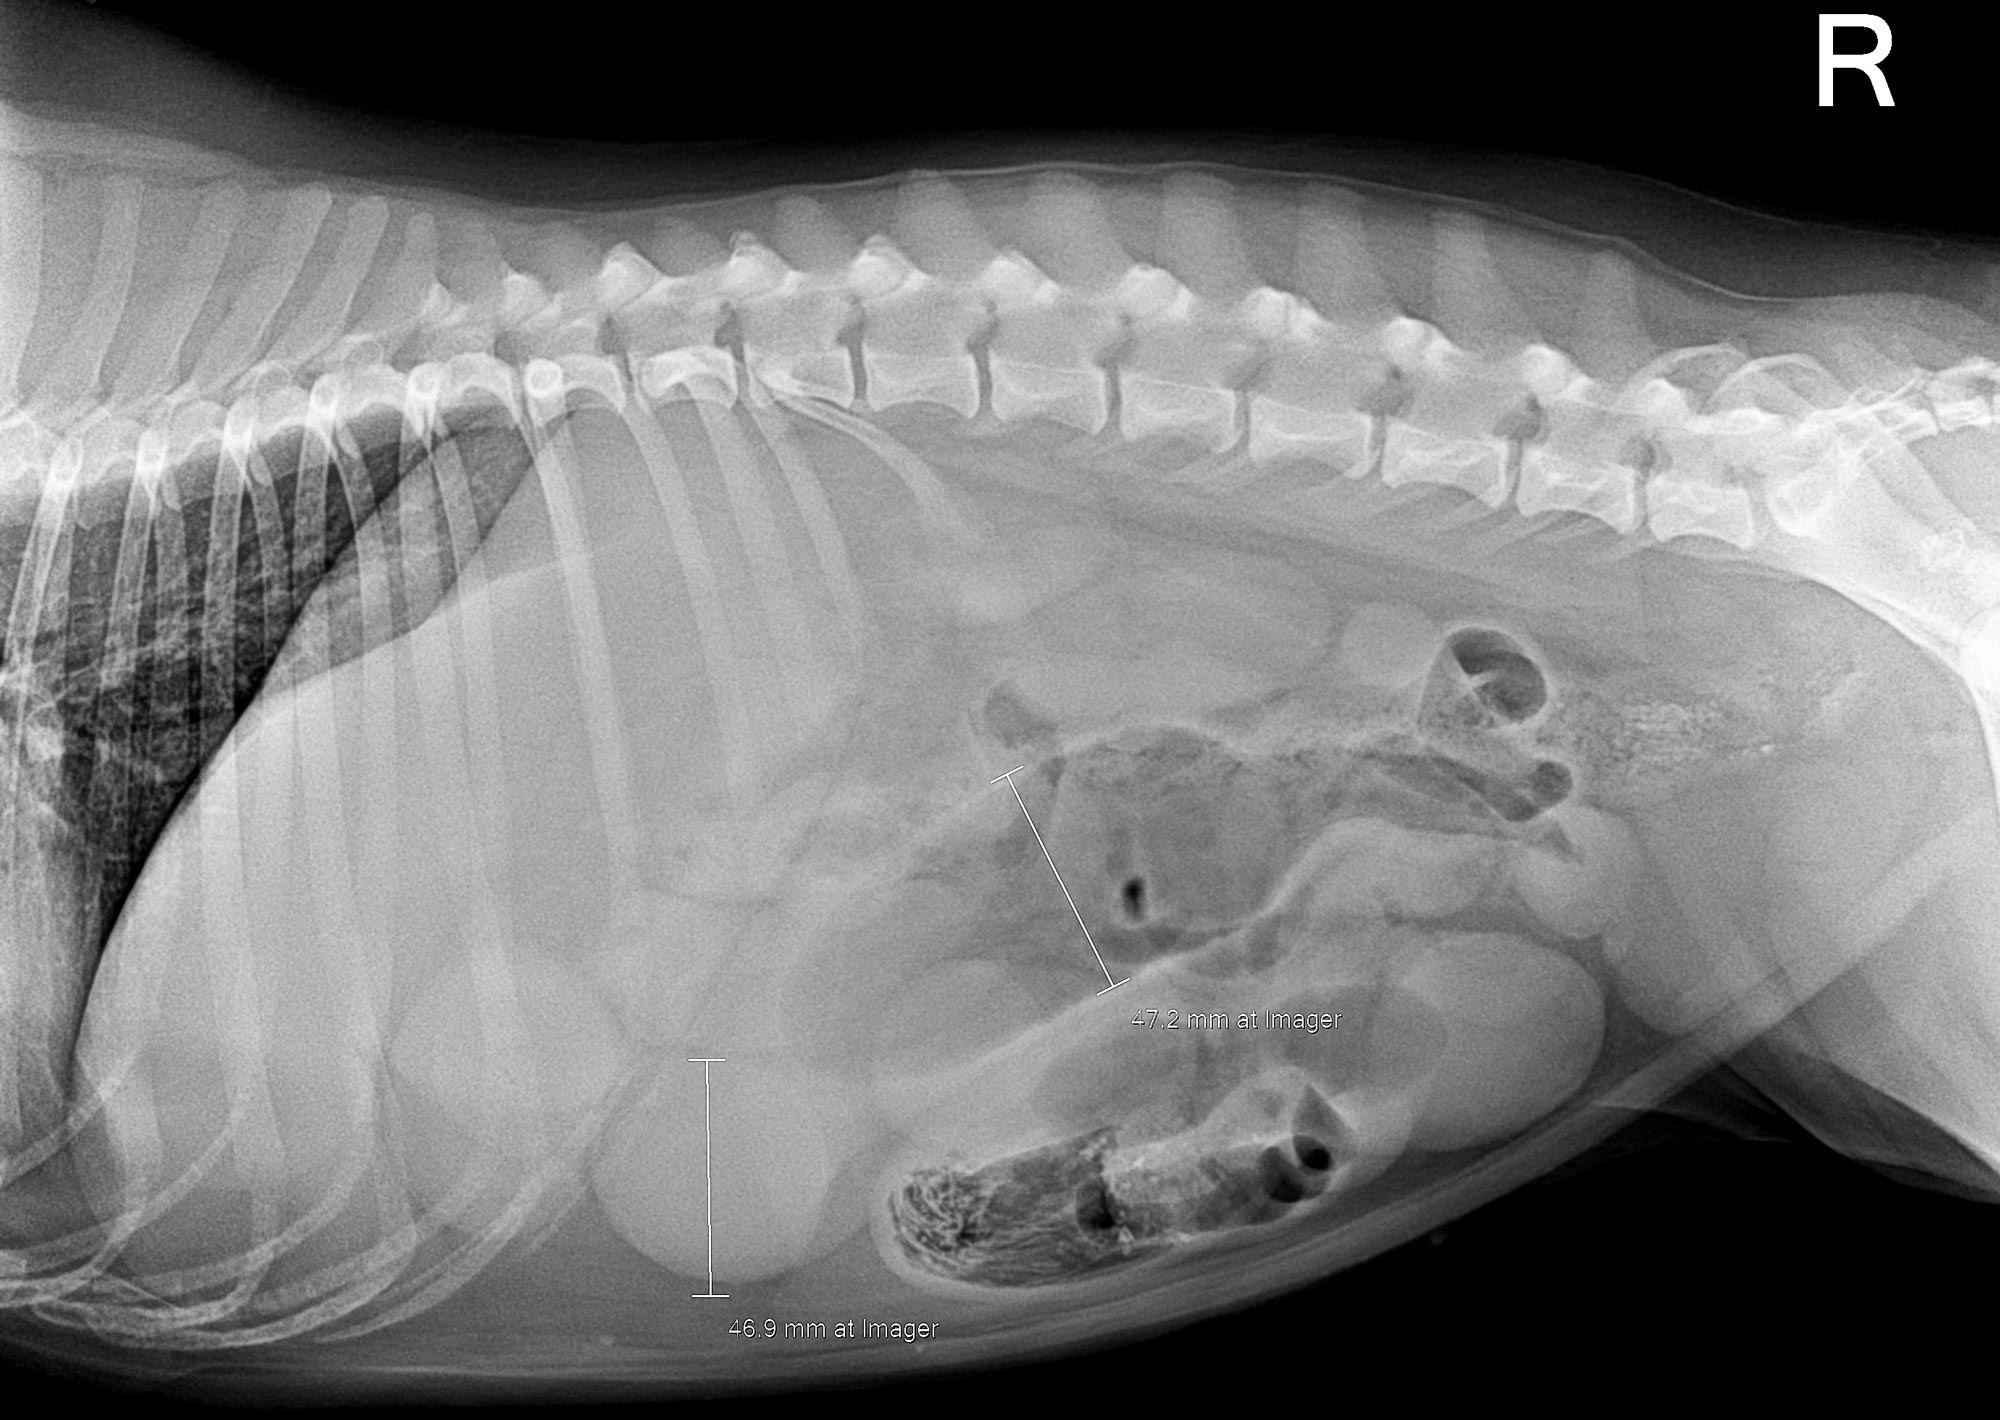
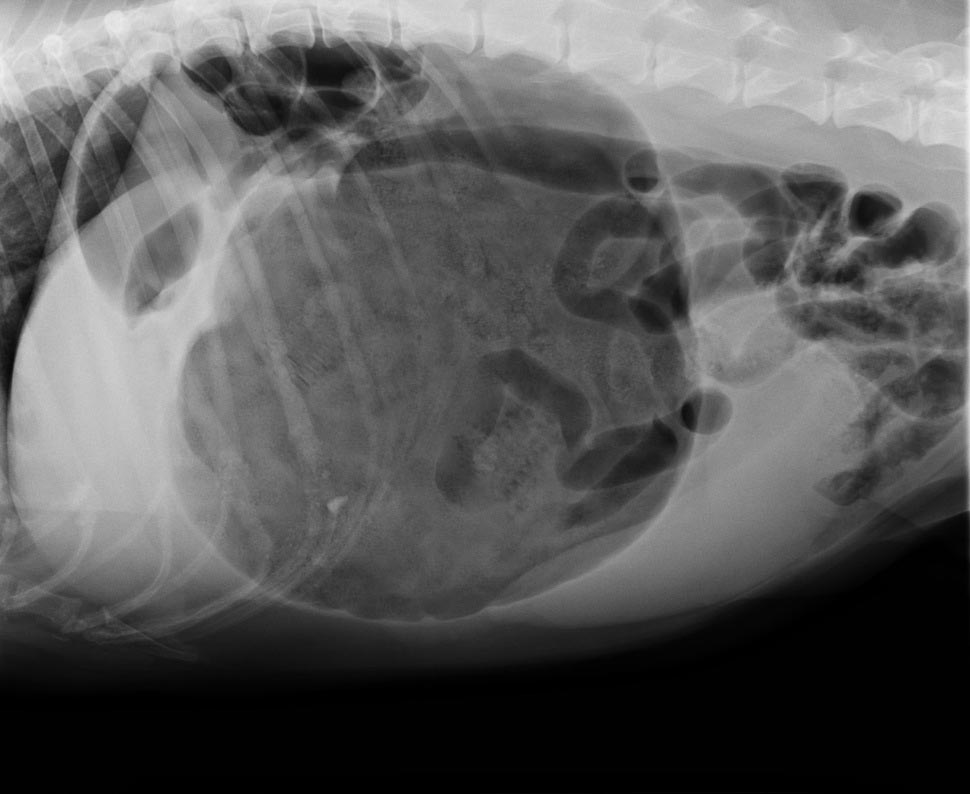
These are often diagnosed based on supportive radiographic findings as history and presenting clinical signs making me suspicious of a GDV.
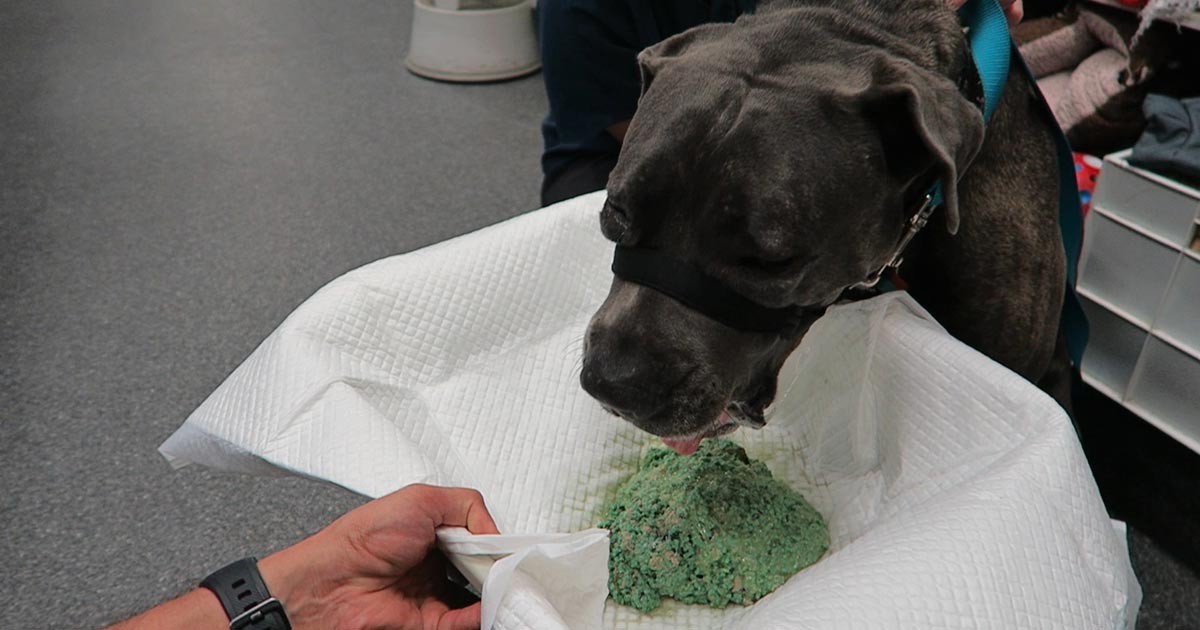
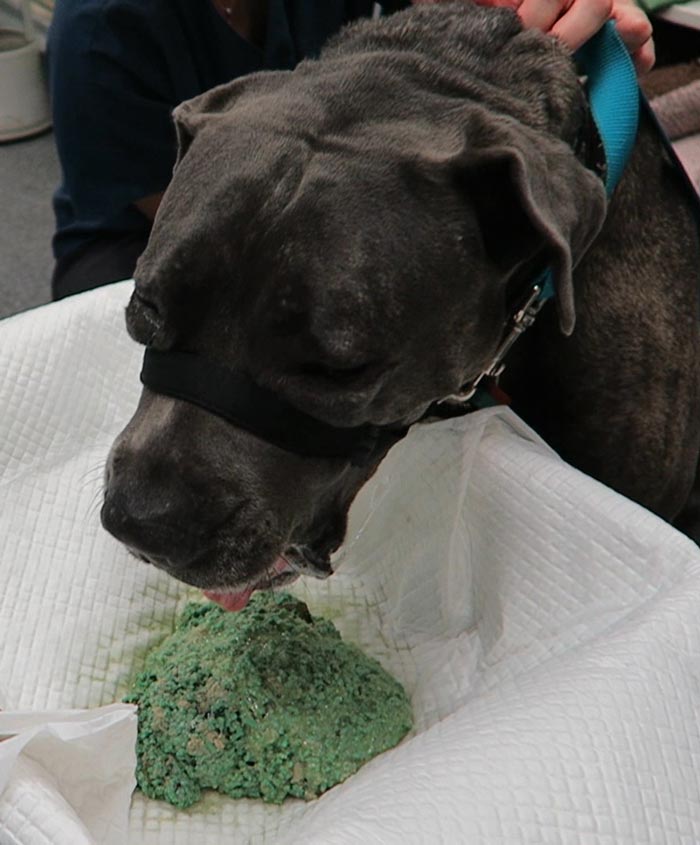
I would always try to pass a stomach tube in these patients first, as the tube is passes easier when the gastric distention is milder. Although this procedure generally requires prior opioid analgesia administration to help reduce the stress, it can achieve rapid and lasting decompression of the stomach.
I often leave the tube in throughout stabilisation, just prior to induction of anaesthesia for surgical correction of the torsion. The tube allows continual release of gastric gases that can accumulate again rapidly if the tube is removed prior to surgery.
Obvious or severe GDV
The abdomen in these animals is often distended and tympanic. I will perform trocarisation in these cases first, as passing a stomach tube in these patients is often unsuccessful. It allows rapid gastric decompression, which is particularly important in cases with evidence of respiratory compromise.
After the trocar is no longer releasing gas, I will then pass a stomach tube. At this stage, it is often easier to pass the stomach tube once the gastric pressure has been reduced. Once again, I often leave the tube in during stabilisation.
How to perform
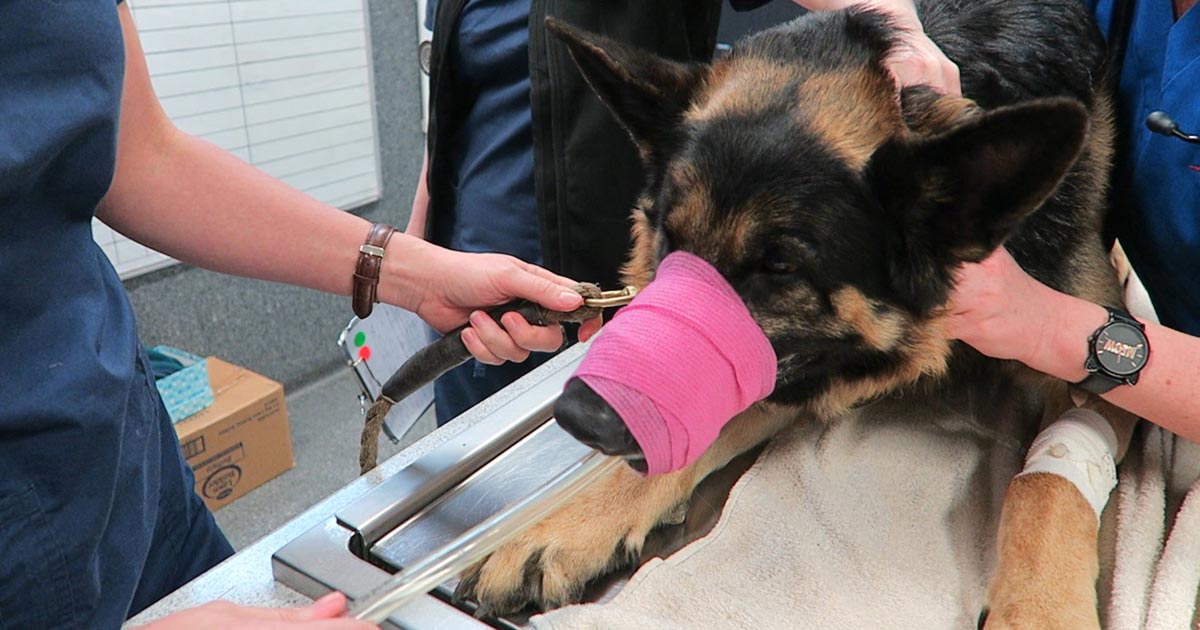
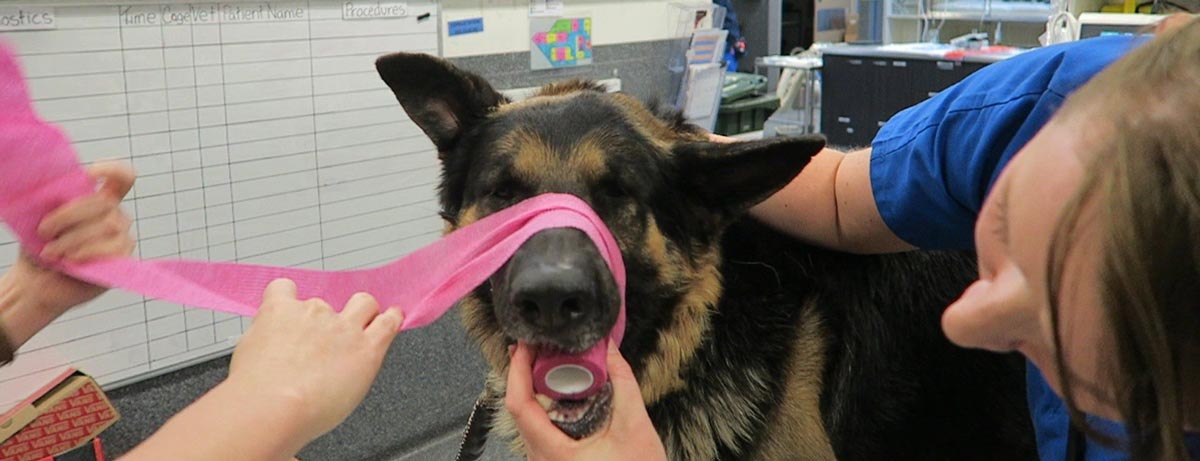
Stomach tube
- The main risk is rupture of the oesophagus or gastric wall.
- Pre-measure and mark the tube from the mouth to the level of the last rib.
- Use a roll of adhesive bandaging material as the mouth gag. I prefer to use Elastoplast as it has an incompressible plastic core and the diameter is just large enough to fit our largest diameter stomach tube.
- Unwrap approximately 30cm of Elastoplast before placing the roll of tape inside the mouth.
- Wrap the tape snugly around the muzzle to prevent the dog from opening its mouth and dislodging the roll.
- Lubricate the tube to reduce frictional trauma to the oesophagus.
- Pass the stomach tube through the core of roll and into the mouth. You will feel a dead end at the level of the lower oesophageal sphincter, where the volvulus has torsed the oesophagus.
- Apply gentle constant pressure and, most times, the tube will pass through into the stomach. Sometimes a puff of gas can be heard and felt from the aboral end of the tube when it enters the stomach. The tube can also be palpated when the stomach is decompressed.
- The tube is taped to the muzzle to prevent dislodgement and the aboral end placed in a bucket to allow fluid to exit via gravity and siphon.
- If it does not pass, reassess to see if trocarisation is required to relieve some pressure in the stomach
As mentioned above, I generally leave the stomach tube in while continuing to stabilise the patient and prepare for surgery. Gas can rapidly accumulate in the stomach and cause rapid deterioration if the tube is not left in. The tube is removed just prior to induction of anaesthesia.
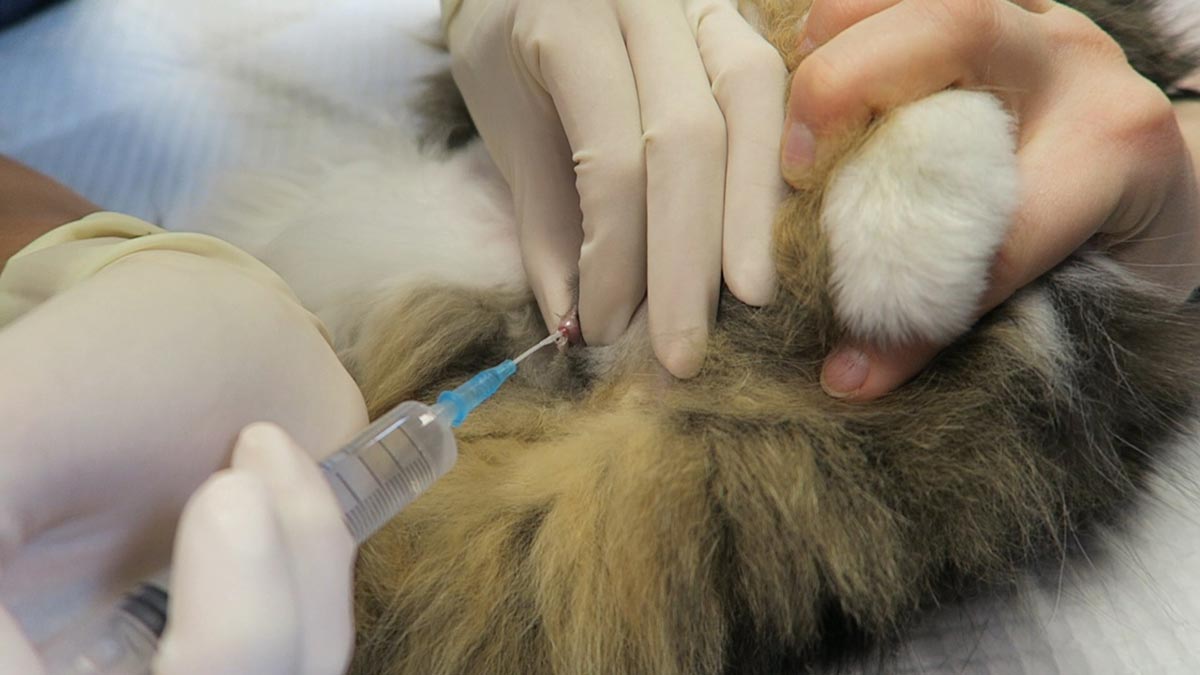
Trocarisation
- The main risk is hitting the spleen while trying trocarisation. To avoid this, identify the most tympanic site by palpation, or use the ultrasound to confirm the absence of the spleen.
- A 3in, 14g catheter is usually sufficient.
- Clip and surgically prep a 10cm by 10cm area where you intend to place the catheter.
- Insert the catheter to the hub and remove the stylet.
- Although local anaesthetic in the area is ideal, you will not have time to do this in most cases – especially the very unstable ones. Also, since I administer pure opioid agonist intravenously to most confirmed GDV cases on presentation, local anaesthetic is not required.
- Remove the stylet and gas should come blowing out under pressure.
- Once the gas flow starts to slow down, gently apply inward pressure or pressure on the dilated stomach, which helps ensure the stylet does not fall out of the stomach and as much of the gas is removed as possible.
>>> Read Focus on GDV, part 3: surgery tips

 Numerous online calculators can determine whether a toxic dose has been consumed and they are a great place to start.